The visual content has multiple times impact on your audience than a textual article. That’s why most of the bloggers keep on making infographics and videos.
And, the best thing about a video site is its chance of going viral is high. So you may ask; ‘how can I create videos without even having a good camera’?
It is possible. You can embed the videos from popular sharing sites like YouTube, Vimeo, Daily Motion, etc. The only thing you need is the proper tool to aid you with.
Introducing WP Video Robot For WordPress Websites
 If you look forward to creating a video republishing website, you can’t afford to ignore this WordPress plugin.
Once you finish setting up the plugin, it will keep on finding a relevant video for you automatically. In case you are a busy man with a lot of stuff to do, you can automate the publishing as well.
For all these, you need a single plugin; that’s WP Video Robot.
Installation and Activation
You will get a zipped plugin file as soon as you finish the payment. Then, follow the steps given below to install it.
Step 1: Login to your WP dashboard and go to Plugins>> Add New from the left sidebar.
Step 2: You should click on Upload Plugin and then on Choose File. You will get a browse dialogue box. Don’t forget to press Install Now button after the file selection.
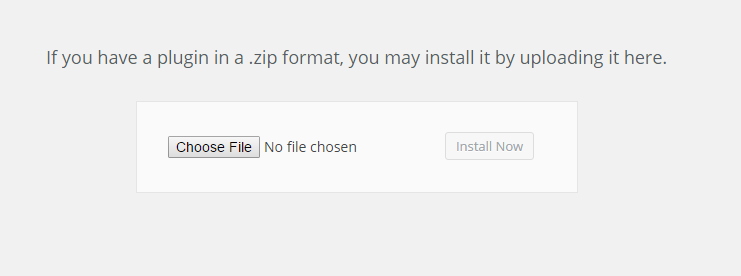 Step 3: Once the installation is finished, you will get an activation link.
Step 4: Now that we have installed the plugin successfully, you need to activate it to automate video posting.
You will see a new menu on the sidebar called WP Video Robot. Just hover your mouse pointer and go to dashboard.
You will be asked to enter the email ID and activation code of the plugin. If you try to close the license entry field, you will end up being broke. 🙂
So enter the email and purchase code there. That’s all.
Posting the Videos
Here, you are going to know how to post videos using this Plugin.
Step 1: First, you have to add video sources to fetch the content. Go to WP Video Robot>> Plugin Dashboard. (The very first step is getting API access. Read about it in the next section.)
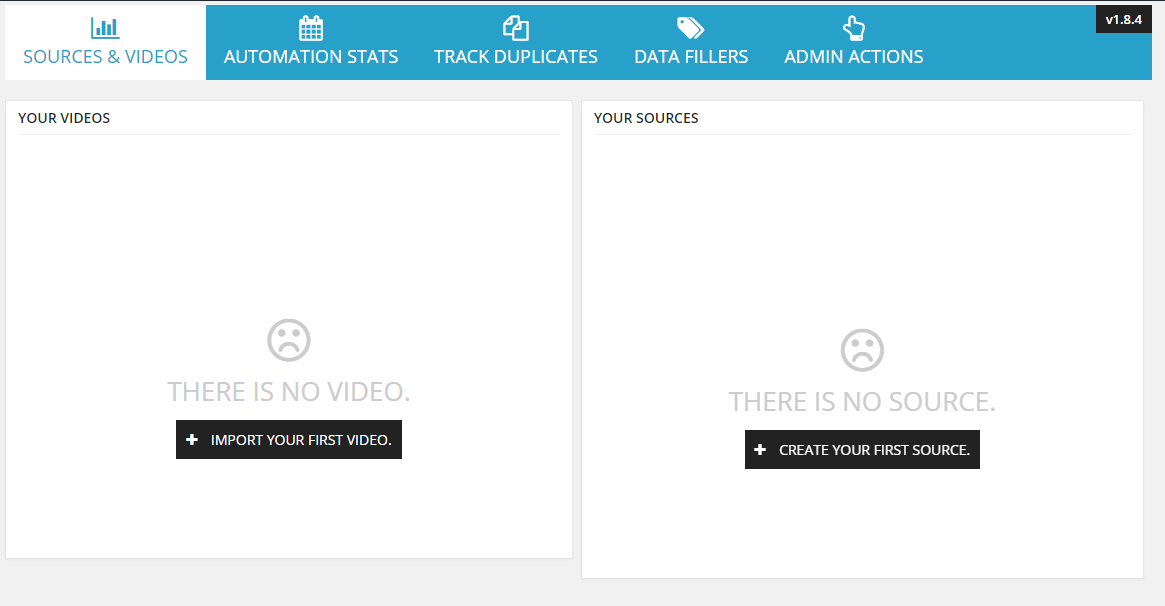 Step 2: You will see a black Create Your First Source button (Sources>> New Source also gives the same ). Clicking on it will get you a screen similar to the image provided below.
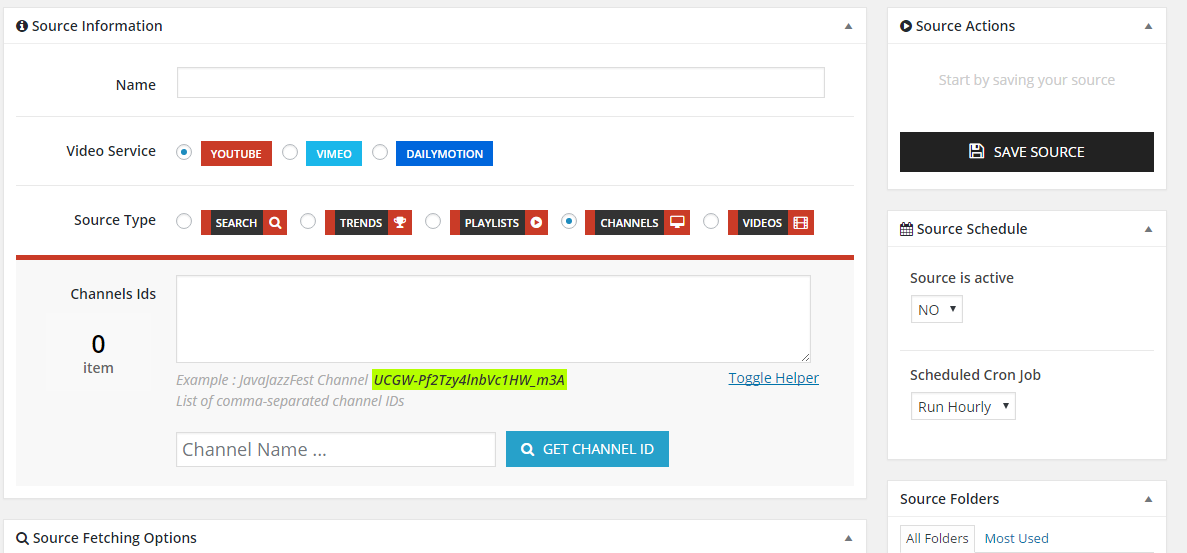
You have to paste the video, channel or playlist ID into the field given there.
Step 3: Scrolling down to the bottom will reveal you a lot of other options.
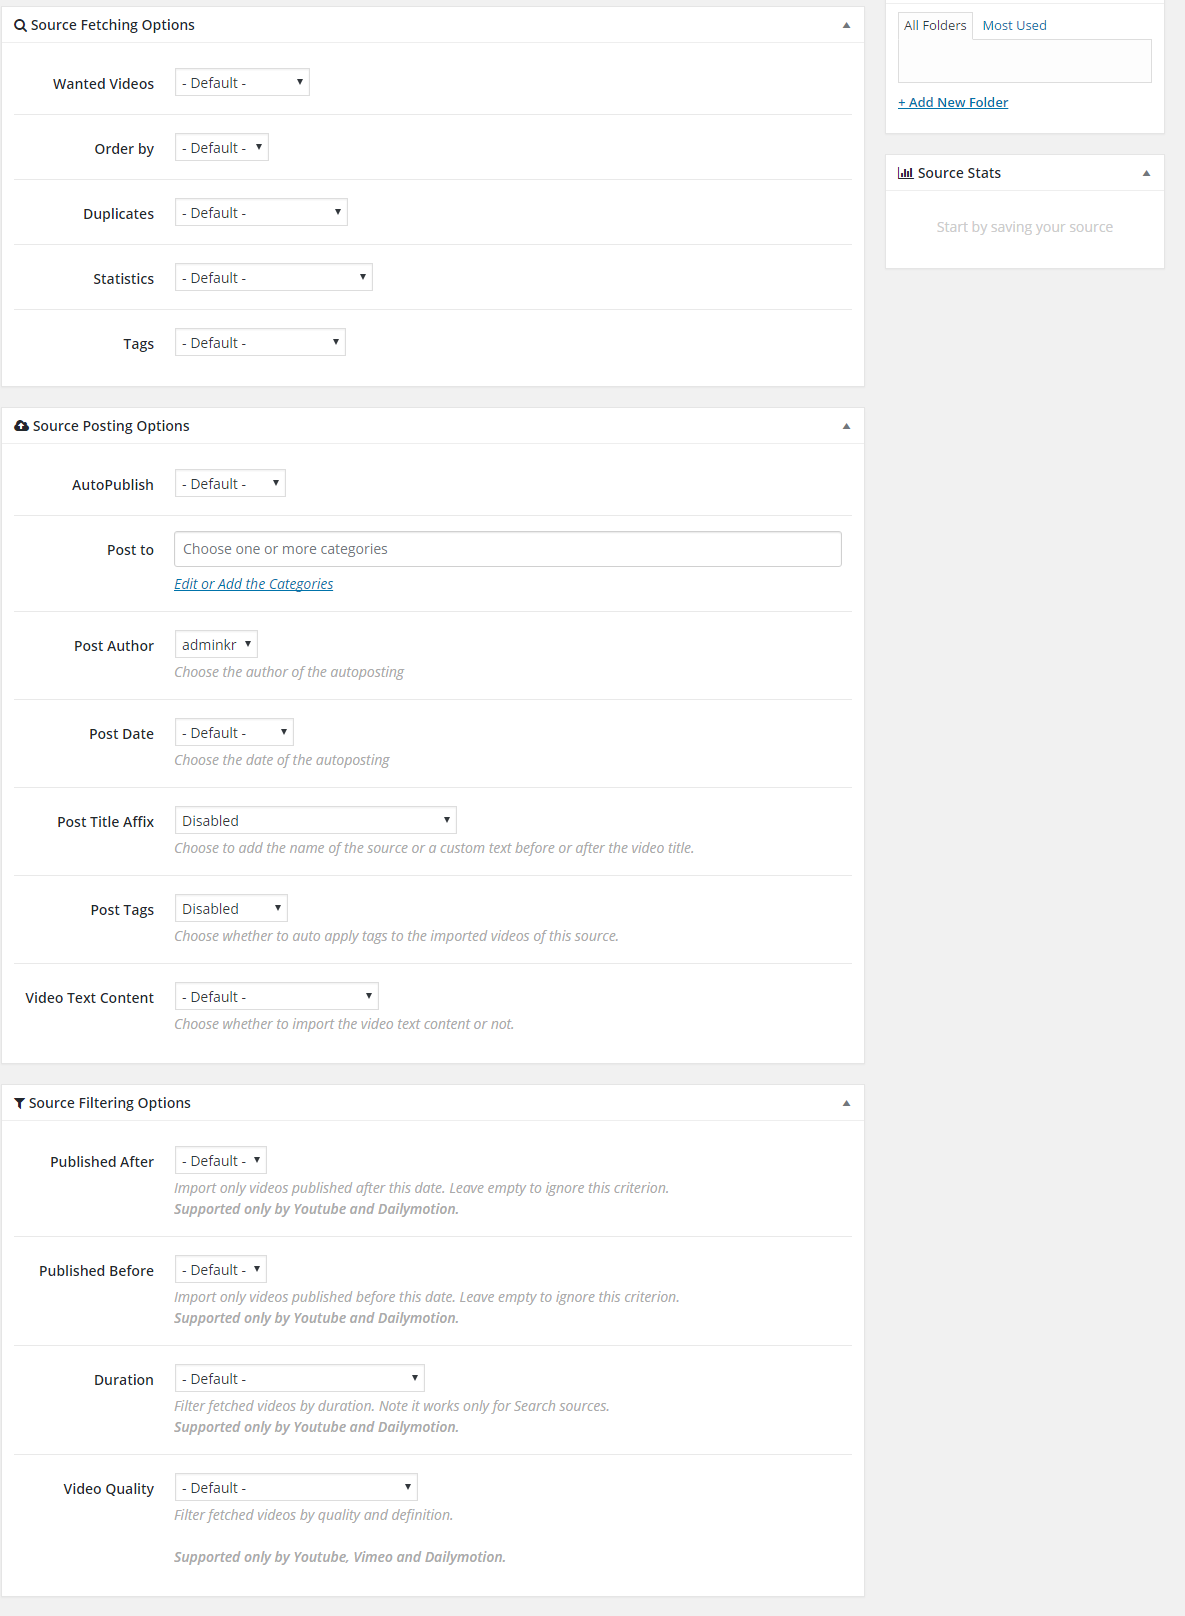 You can filter the videos, adjust the automation, change authors, categories, and tags, set dates, choose the duration and a lot more. Finally, click on Save Video Source.
Step 4: You can also post individual videos. Access Videos>> Add New to get the WordPress post editor to add your first video.
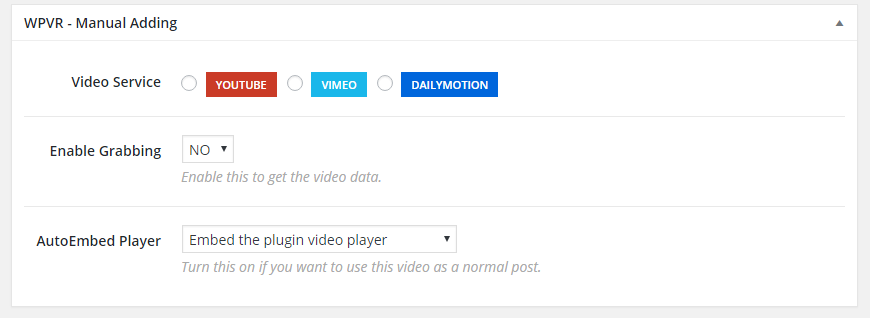
Look at the end of the post editor field. You will see the options for manual addition. At last, hit the publish button.
That’s all.
Here is how it looks when you try to add or retrieve clips from various websites
Options Panel
Accessing WP Video Robot>> Manage options will lead you to the Options Panel in the dashboard.
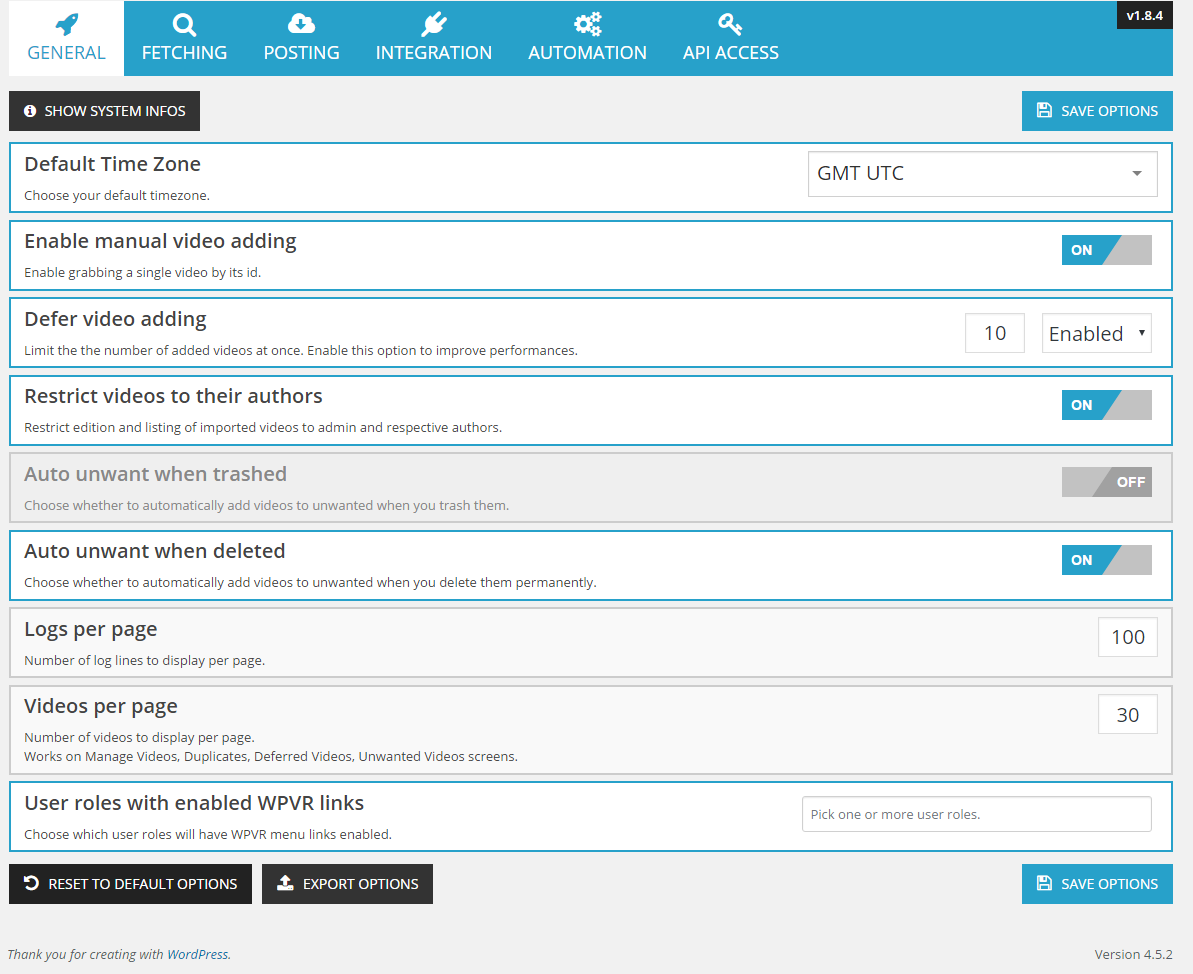
The options are divided into six sections there. You can customize a lot of things here. I can’t explain each and every feature here because it is impractical.
But I want to tell how to grant API access.
Click on the API Access at the end of the Options Panel menu bar.
 You will get three boxes for YouTube, Vimeo and Daily Motion. Use them accordingly.
So here are the pros and cons in short
Pros
- WordPress Themes compatibility : WP Video Robot works with all free (default ones like Twenty 12,13, 14, 15, 16 and paid themes (like Truemag, SlimVideo, Sahifa, TopNews, Valenti, Video Theme, VideoTube, NewsPaper, NewsTube, DeTube, BeeTube + many other ones available in the market).
- Addons ecosystem (33 addons) to extend the plugin functionalities like you can allow the user to download the clips or only sound (MP3 format) by using an addon called Download Videos. Auto Pilot with corn to automate the process. The other popular addons include Autorun Reports, Facebook Video Service, Scheduler, Canal+ Video Service, Monetizer (To show Google Adsense ads before clip is being played by a visitor), Ravnur Video Service,TED and many more.
- Automation is the most liked property of the plugin by us. Once configured, the plugin works by itself.
- Also supports WordPress website having SSL certificates installed on them.
- Free lifetime updates
- SEO friendly
Cons
 I got a warning that my PHP version is not completely compatible with this plugin. There’s nothing much we can do about it. If you get any error due to old PHP version, you must contact your host for the update or login to your cPanel and navigate to PHP Options as shown in the pic and set a higher version, save it and you are done.
Set a higher version as your current version, done the error will go.
Other info
This is a paid plugin. So, you have to take your card to get access to the same. You can purchase it just for $36 from CodeCanyon with six months support. The support period can be increased up to a year by paying an additional ten bucks.
Wrapping Up
I really think WP Video Robot is going to help you out even when you are sitting idle doing nothing. It can fill your WordPress blog with content that your ranking will never fade away.
Don’t forget to hit one of the share buttons here and purchase the plugin.


