Microsoft is one of the excellent featured product us Windows. Some people like to prefer other OS other than the Windows, but the majority of the users are on Windows because of the freedom, feature and affordable prices, which lets the users use the Windows latest release.
The current version is Windows 10, which is the best OS by Microsoft so far. If you look at the track record of the operating system then you can see that there are several bugs, issues and complications have come to the users during or after the installation of the Drivers, OS, Softwares and more.
There are options available and bundled with the Windows 10, which happens to protect your PC or Laptop from unknown installations and harmful facilities. Such programs are blocked by the OS unless you are willing to give it the access to your PC or Laptop.
Disable Driver Signature Enforcement on Windows 10 Quickly
Microsoft has added a feature where the firewall blocks software that tries to add Drivers to the version. The explanation for it is that the drivers without a certificate don’t have the right to install drivers on it. This is one of the fantastic options because 80% of the Windows users in the world accidentally install unknown drivers to their, which turn out to be a Malware or a slowing down your PC or Laptop performance.
However, there are drivers, which we want to install despite the serious stuff that comes out of it. If you trust the source, then there is nothing to worry about, and you can turn off the option, which is called ” Driver Signature Enforcement.”
There are two methods present for you to put out the D.S.E and I’ll start things off with the easiest one.
Method One: Using CMD Prompt
There is no secret or complex about this because it takes only mere one minute to finish it, even if you don’t have any technical knowledge.
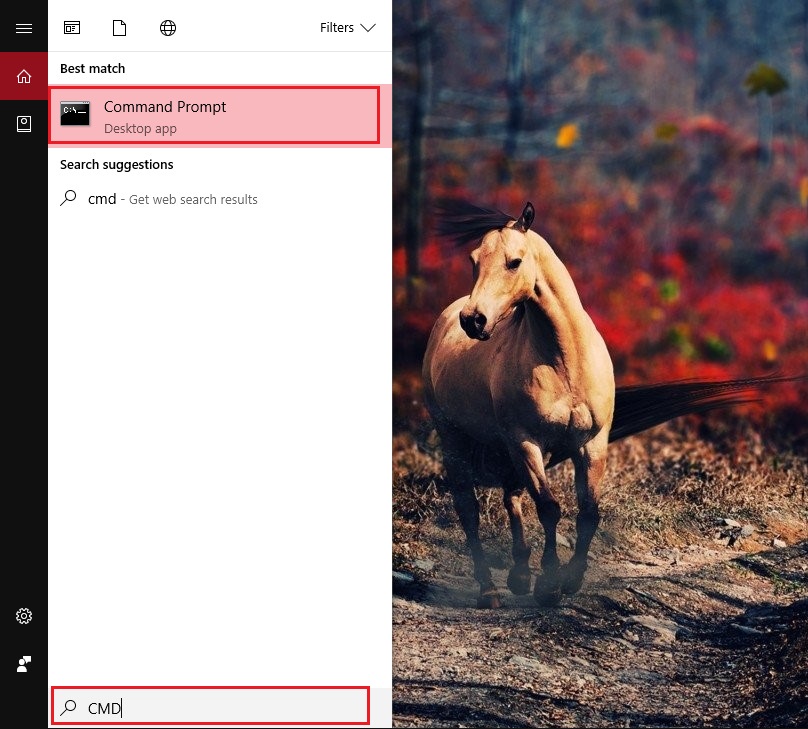
Step 1: Open the search bar in the Windows 10 (You can use the “RUN” option for another version of Windows.).
Step 2: Type in “CMD.”
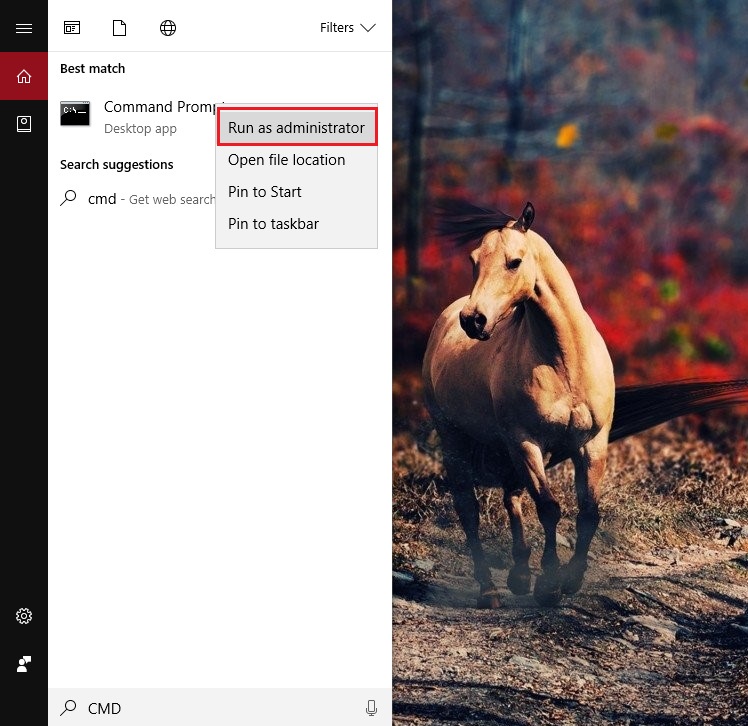
Step 3: Use the mouse and Right Click > Run as administrator.
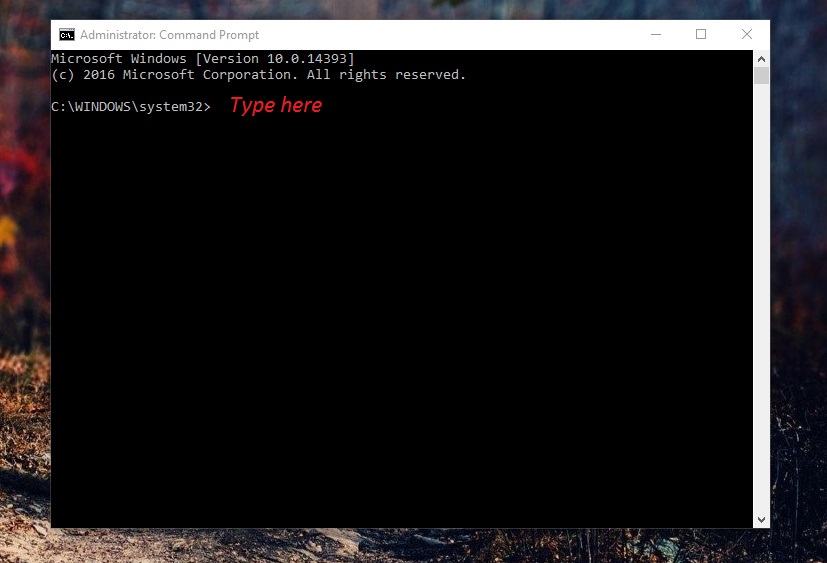
This is how it looks, when the CMD Prompt pop-up,
Step 4: Type in the exact commands, which we have provided here “bcdredit /set test signing on“
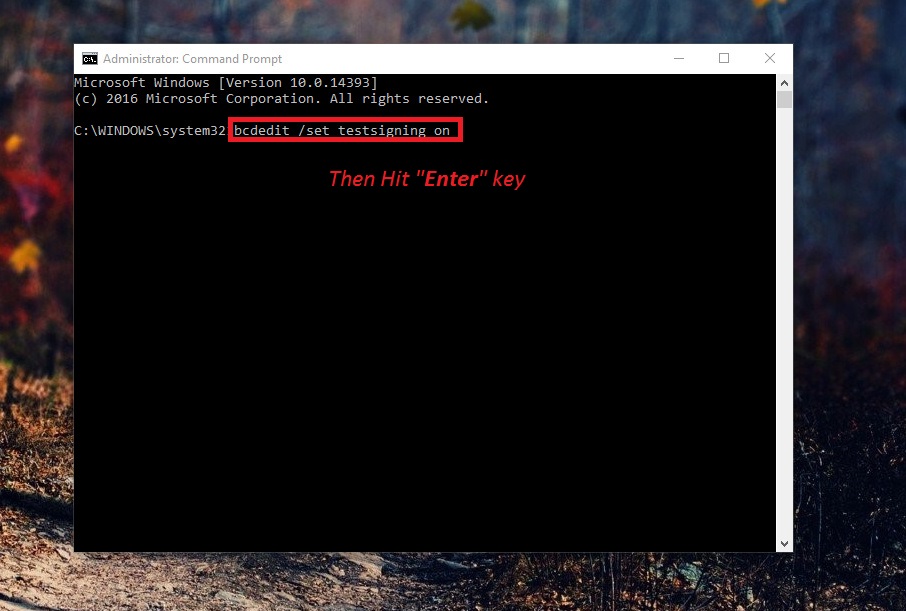
Step 5: Hit Enter and you should be seeing a message saying “The Operation Completed Successfully” (I have not hit ENTER because it would disable the option on my version of Windows 10.).
You can use the CMD Prompt method to get the work done, and I would recommend you to go for method one, rather than the second one because sometimes it becomes difficult for you to follow the compact version, if you don’t have any technical knowledge. In the worst case scenario, if you are unable to get the job done then method two will work out.
Method Two:
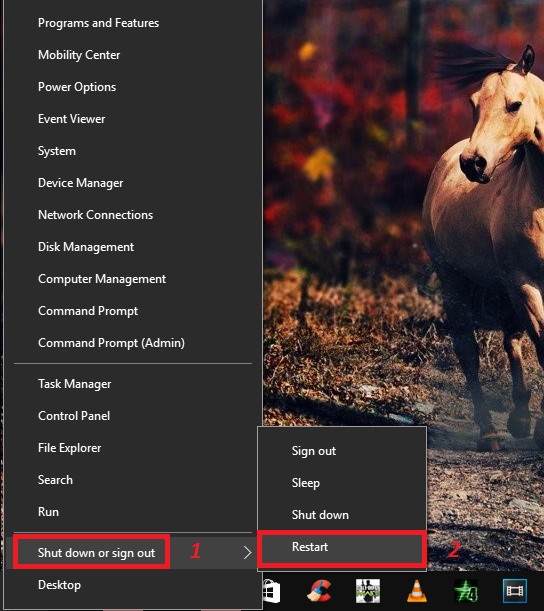
Step 1: Go to Windows Icon in the bottom right and Restart the PC while holding the shift key. (Incase, if you are not able to see the what we have shown in the image below then you can Google to find out how to open it based on your Laptop or PC model number.)
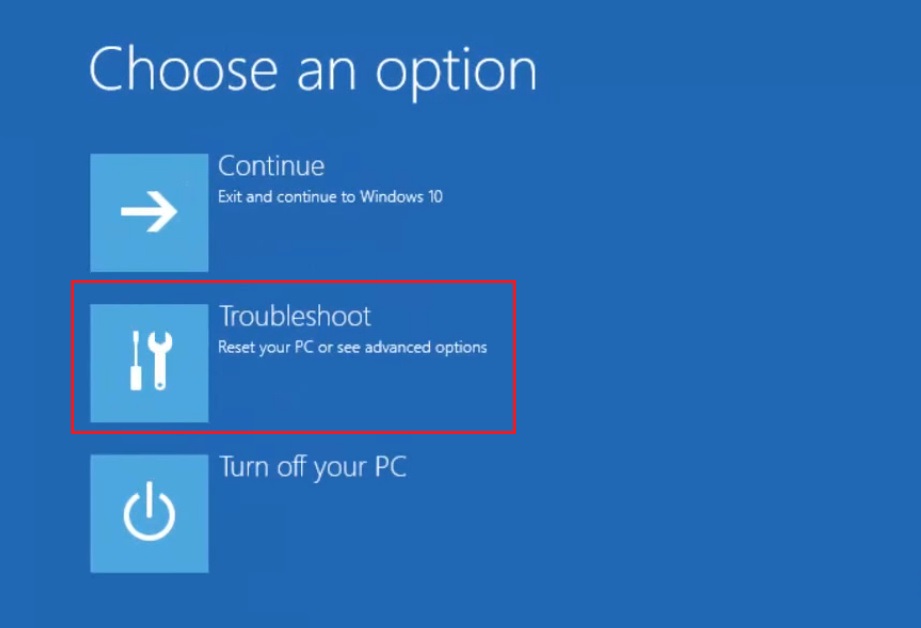
Step 2: You can see three options, and you have to select “Troubleshoot.”
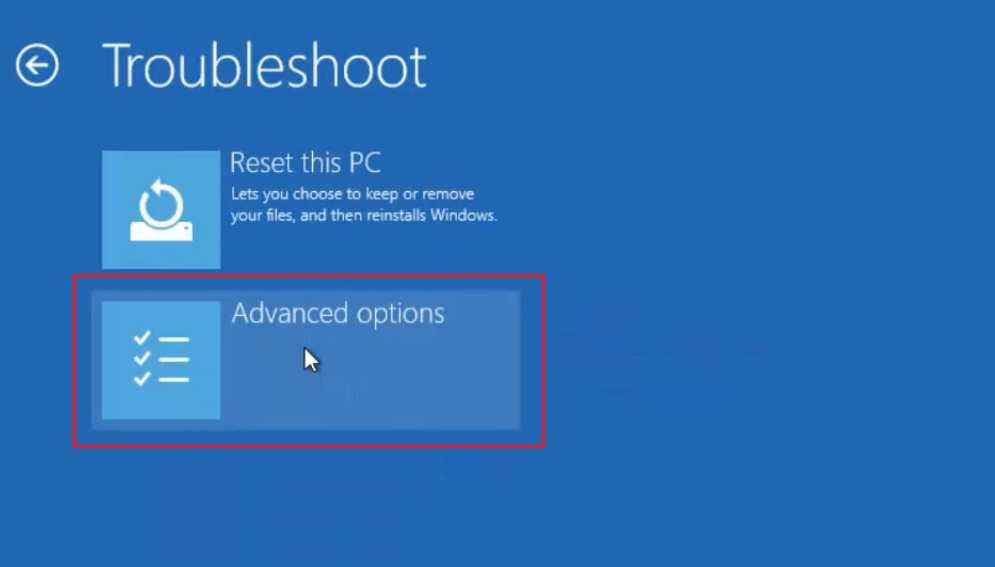
Step 3: As you can see in the image below that, there are two options and you have to select “Advance Options.”
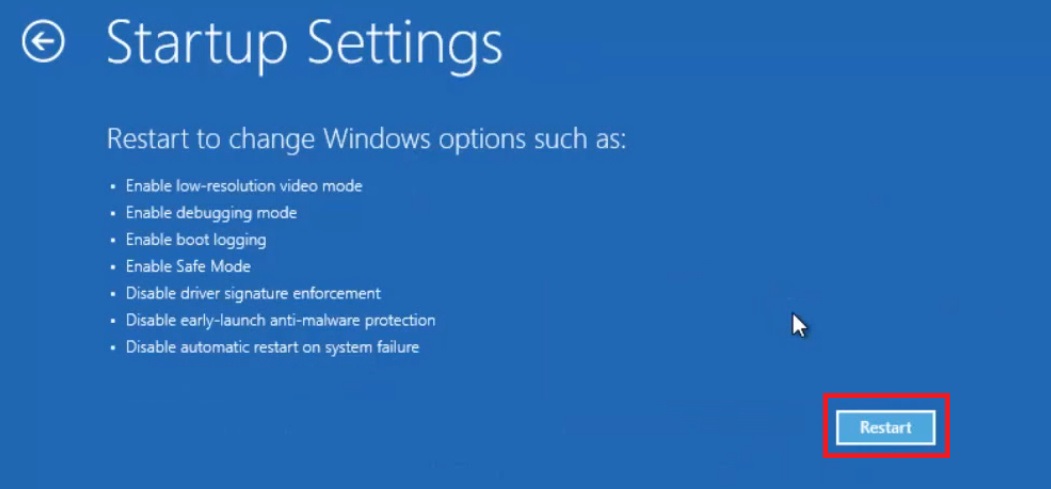
Step 4: This is where most of the people get confused, but the option, which we are looking for is in “Startup Settings.”
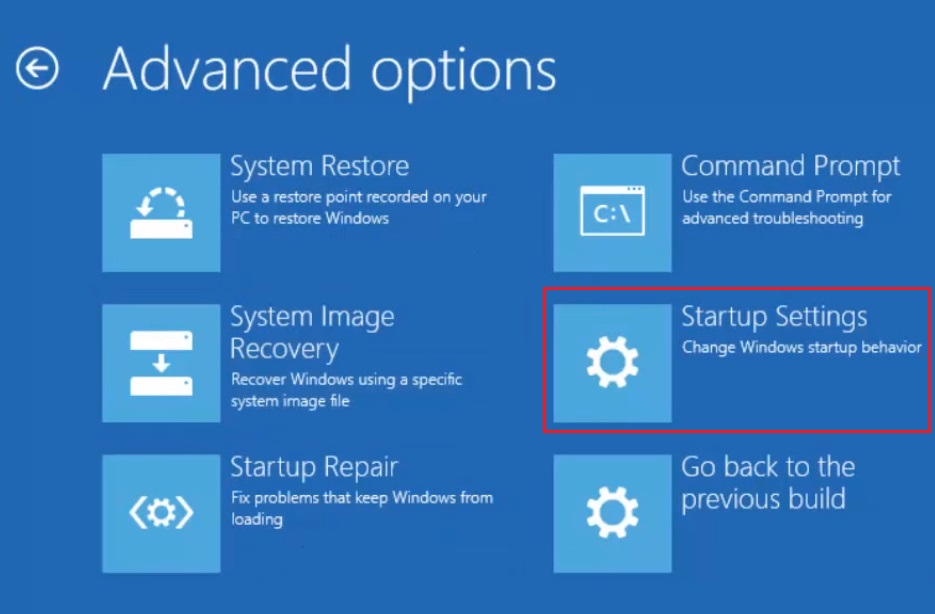
Step 5: You have to click “Restart.”(Your Windows-based PC will reboot and continue with the options, so be patient and do not turn off the power.)
Step 6: The options work based on keys “F1 to F9, ” and you have to select the one which we have highlighted in the image. You can disable the “Driver Signature Enforcement” by clicking F9 on your keyboard.

Conclusion
These two work smoothly and you don’t have to look for an alternative because these are the official Windows options. In case, if the problem is with your version of Windows then you can Reset the PC or Re-install the current version again. We would like to know your ideas and solutions which have worked out for you in the comments section below.


