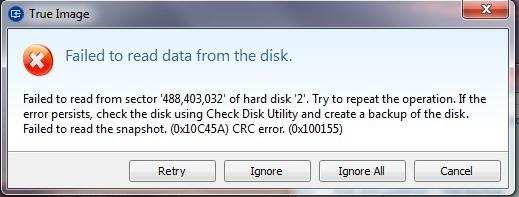
Many users now consider data cloning to be a necessary procedure, especially those who are updating their hardware, backing up systems, or making exact duplicates of their drives. One of the most often used programs for this purpose is Acronis True Image, which has strong disk cloning and backup capabilities. On occasion, though, users could run into the following issue when cloning: “Failed to Read Data from the Disk.” You might not be able to finish an important task because of this annoying mistake.
The reason behind the Acronis “Clone Failed to Read Data from the Disk” error will be examined in this post, along with a number of potential fixes. We will also suggest other trustworthy disk cloning programs that can be great substitutes if Acronis doesn’t live up to your expectations.
Contents
- Possible Reasons For Getting Clone Failed To Read Data
- Disk Errors
- File systems that are incompatible
- Problems with Hardware Connectivity
- Conflicts in Software
- Alternative Solutions To Fix Acronis Clone Failed To Read Data
- Method 1: Apply CHKDSK check
- Method 2: Use Third Party Providers
- Method 3: Clone Your Hard Drive with Acronis Bootable Media
Possible Reasons For Getting Clone Failed To Read Data
Knowing the causes of facing this unwanted problem is just as important is finding the solution. By learning the possible reasons, you may be aware of your steps next time you face the same issue.
Disk Errors
This is one of the biggest reasons for clones failing as disks are a complicated network of structures requiring every bit of it to perform optimally. Any bad sectors, damages or file corruption in the disk can cause the clone to fail.
File systems that are incompatible
Numerous file systems are supported by Acronis True Image; nevertheless, some setups may cause incompatibilities. The cloning operation might not succeed if the disk’s file system is unsupported or incorrectly formatted.
Problems with Hardware Connectivity
The “Failed to Read Data” problem may arise from a copying process interruption caused by loose cables, damaged USB ports, or defective adapters.
Conflicts in Software
Acronis’ functionality may be hampered by other background-running software, such as disk utilities or antivirus software.
Alternative Solutions To Fix Acronis Clone Failed To Read Data
Use these methods as a suitable solutions.
Method 1: Apply CHKDSK check
The failed-to-read data error from the disk could indicate damaged hard drive sectors. By scanning and fixing drive faults, the CHKDSK command can help you fix this problem. Here’s how:
- Enter cmd in the Windows search bar to get started. Select Run as administrator by doing a right-click on the Command Prompt. Click Yes to continue if UAC asks you to.
- Type this “chkdsk g: /f /r” command in the following Prompt. The drive letter of the target disk where the cloning error occurred should be substituted for g.
- To execute, press Enter. Errors are fixed by the /f parameter, while legible data is recovered by the /r parameter, which finds faulty sectors.
- Depending on certain circumstances, CHKDSK may need some time to scan and fix it.
After it’s finished, try using Acronis to clone your hard disk again. This procedure ought to fix the clone disk error brought on by corrupted files or faulty sectors, enabling a successful operation.
Method 2: Use Third Party Providers
You may easily move your data to a new disk with EaseUS Disk Copy, an easy-to-use program for hard drive cloning. This utility guarantees a smooth cloning process whether you’re replacing an outdated disk or upgrading to a larger one. This is a detailed tutorial on using EaseUS Disk Copy to clone a disk:
Step 1: Install EaseUS Disk Copy first.
On your computer, download, install, and launch EaseUS Disk Copy. To begin using the software, click on Disk Mode after it has opened. Click Next to continue after selecting the drive you want to duplicate.
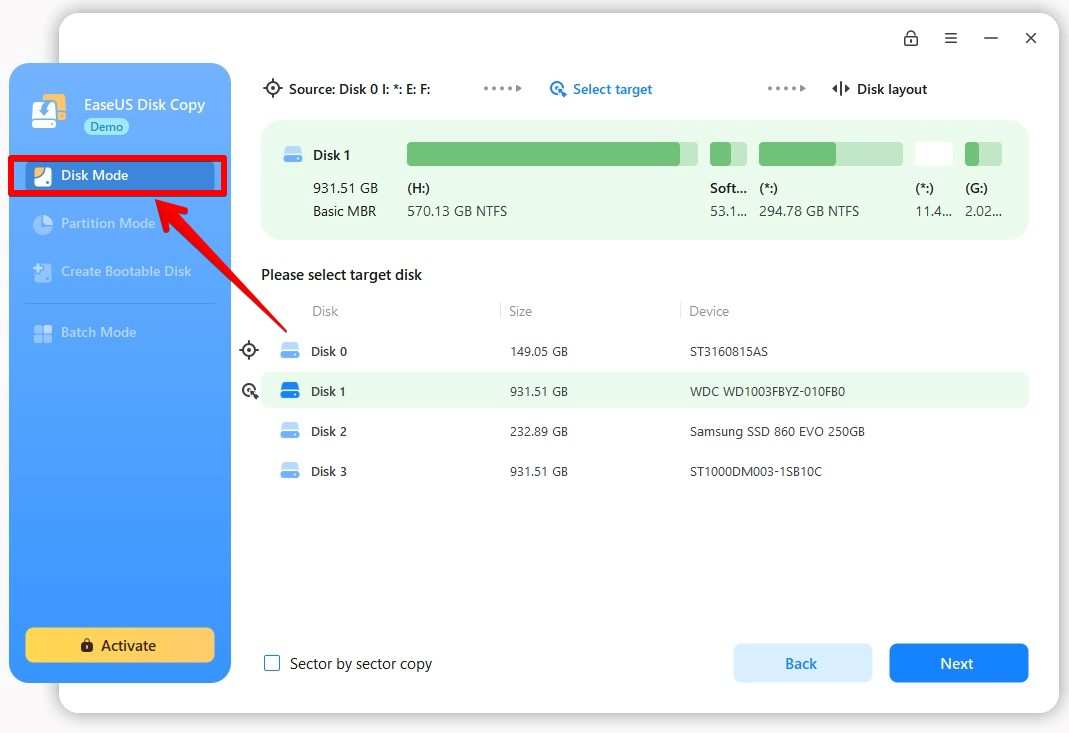
Step 2 Examine and Modify the Disk Layout
Verify that the disk layout satisfies your needs. To improve performance and guarantee effective data transfer, choose the Optimize for SSD option if the destination disk is an SSD.
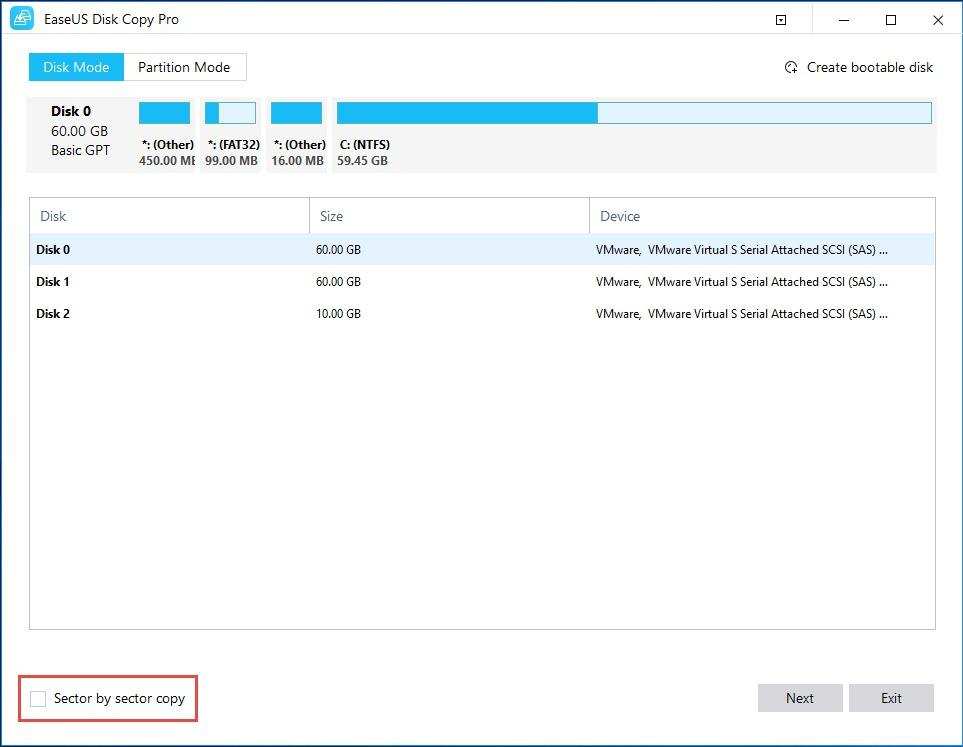
Step 3: Verify data erasure in step four.
You will be prompted by EaseUS to confirm that the data on the destination disk is being erased. Remember that all current data on the destination disk will be overwritten when you click OK to continue.
Step 4: Start cloning at step five.
To begin the cloning process, click Proceed. Await the completion of the procedure.
When you are at the end of the cloning process, swap out the old disk with your new one. Change the boot order to boot from the new drive in your BIOS settings if the cloned disk is a system drive. This guarantees that the freshly cloned disk will function properly on your system.
Method 3: Clone Your Hard Drive with Acronis Bootable Media
Using Acronis Bootable Media to clone a hard drive is a simple procedure that is especially helpful when dealing with simple MBR drives. Acronis Cyber Protect and Acronis Cyber Backup 12.5 support this technique, although it is only available on Linux-based bootable media. Here’s how to successfully complete the cloning process:
Step 1: Make Bootable Media for Acronis
First, follow Acronis’s media creation instructions to make bootable media. In order to use disk management features, make sure you enter a valid serial number during the process. Keep in mind that disk management is not supported by bootable media that you downloaded as an ISO file from your Acronis account. If you are not sure how to create a bootable media then follow along as you read further.
- Start the Acronis program on your PC.
- Open the main interface and navigate to the Tools section.
- To launch the bootable media creation tool, click Rescue Media Builder.
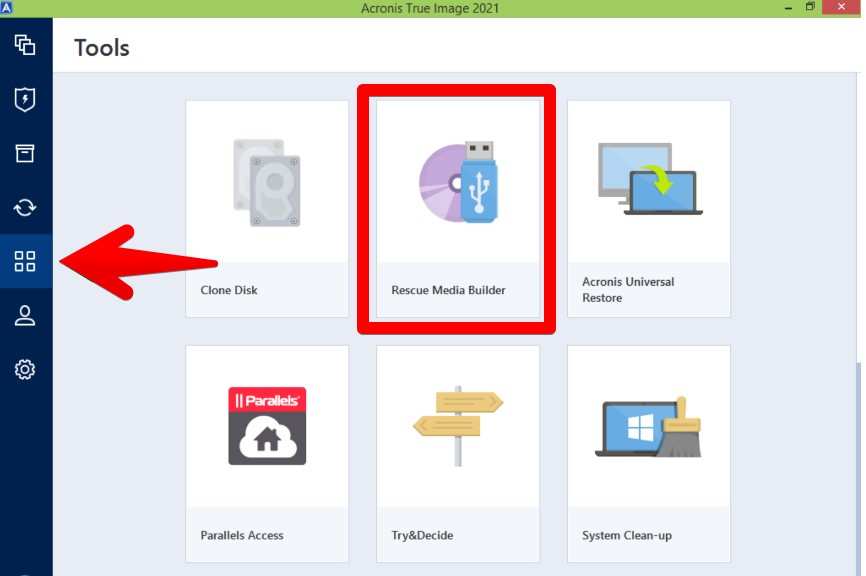
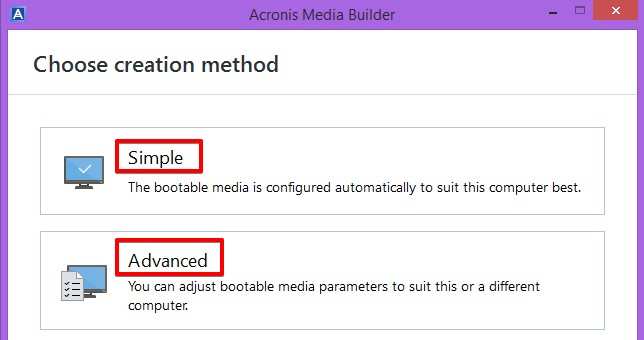
- A choice of media creation method will be presented to you. Select one of the choices listed below:
Simple: Simple is what most should be happy with by choosing it. Acronis will automatically select the best kind of media for your system. A WinRE-based media will be produced if you are using Windows 7 or later. A Linux-based media will be made for earlier Windows versions.
Advanced: You can choose the type of media and have more flexibility with this option. If you need further customisation or need to make rescue media for a different version of Windows, use this option.
- This step is optional. Add the Universal Restore in the bootable DVD as you may want to restore the system to another system.
- Compatibility with systems that use various hardware combinations is thus guaranteed. For comprehensive details, consult Acronis’s Universal Restore guide.
- Put in the USB drive, CD, or DVD that you are using as bootable media. In the Rescue Media Builder interface, choose the one that particular USB bootable device.
- To begin producing the bootable media, click Proceed. Depending on your device’s speed and the options you choose, the procedure could take several minutes.
- Make sure the bootable media functions properly by testing it after it has been generated. Restart your computer after inserting the media, then set up your BIOS or boot menu to boot from the media. Check to see whether Acronis loads properly.
Step 2: Use the Acronis Bootable Media to boot up
Boot from the bootable media after inserting it into your PC. After the media has loaded, select Manage this computer locally or connect remotely.
Step 3: Access Disk Management in Step Three
To see every drive attached to the computer, click on drive Management. Choose Clone basic disk from the menu after right-clicking on the source disk you wish to clone. Keep in mind that partition-level cloning is not supported; only full drives can be copied.
Step 4: Choose a Target Disk in Step Four
A list of disks that are available for cloning will be shown by the software. Choose a target disk with sufficient capacity to hold all of the source disk’s data. You can either clone the disk exactly as it is or resize the source volumes proportionately if the destination disk is larger than the source disk. Proportional resizing is required if the destination disk is smaller.
A warning stating that all data will be overwritten will show up if the target disk has any data on it. Before continuing, ensure that your disk is empty or has nothing important.
Step 5: Complete the Clone and Implement It
Click Finish to add the cloning operation to the list of outstanding operations after the target disk has been chosen and the settings have been set up. Proceed to the Pending Operations box after selecting Commit from the toolbar.
To prevent problems brought on by duplicate NT signatures, unplug the source or target disk after cloning a system disk. This guarantees that the operating system on the cloned drive will boot up properly.
Final Words
The cloning process with the alternative solutions can be grueling as the standard clone part is a big task in itself. However, with proper guidance like this, you can surely get peace of mind when trying to copy your disk and everything in it.


