The Recycle Bin for USB devices can be enabled as one of the many new features and enhancements that come with Windows 11. This function makes sure that erased files on your USB sticks/Pendrive can be readily recovered if necessary and are not gone forever. This post will provide a step-by-step tutorial on making Windows 11‘s Recycle Bin accessible via USB drives so you can better manage your data and protect your files.
Contents
An explanation of Windows 11 Recycle Bin functionality
A built-in function in Windows operating systems called the Recycle Bin serves as a backup for deleted files. Whenever a deleted file is transferred to the Recycle Bin it can be recovered, rather than being immediately deleted from your machine. The Recycle Bin offers both protection from unwanted file deletions and a way to retrieve accidentally or incorrectly deleted items.
Reasons why USB drives should have the Recycle Bin enabled
Data storage and transfer now need the use of USB drives, commonly referred to as flash drives or external storage devices. However, they are vulnerable to data loss owing to a number of reasons, including hardware malfunction, unintentional deletion, and formatting.
Enabling the Recycle Bin for USB drives gives your sensitive data an additional layer of security by allowing deleted files to be temporarily saved there rather than being permanently wiped.
- By turning on the Recycle Bin for external hard drive you can:
- Preventing unintentional data loss Instead of being permanently lost if you unintentionally delete a file from your USB device, it can be restored from the Recycle Bin.
- Recovery of deleted files: By using Recycle Bin you have an option to recover accidentally deleted files from your USB device.
- Possibility of essential file recovery The Recycle Bin offers a backup in case you later realize that you need a file that was removed from the external hard drive.
- Refrain from using data recovery software: When the Recycle Bin is enabled, there is no longer any immediate need to recover mistakenly lost files from external hard drive using data recovery software.
When you enable Windows 11 Recycle Bin for USB drives, you have an extra measure of protection against data loss, which gives you peace of mind and makes data management simpler.
Procedure of Enabling Recycle Bin for USB Drives Windows 11 10
To enable a Recycle Bin on USB drives, it is necessary to modify the Windows Registry using the Windows Registry Editor.
Step:1 Opening the Registry Editor feature
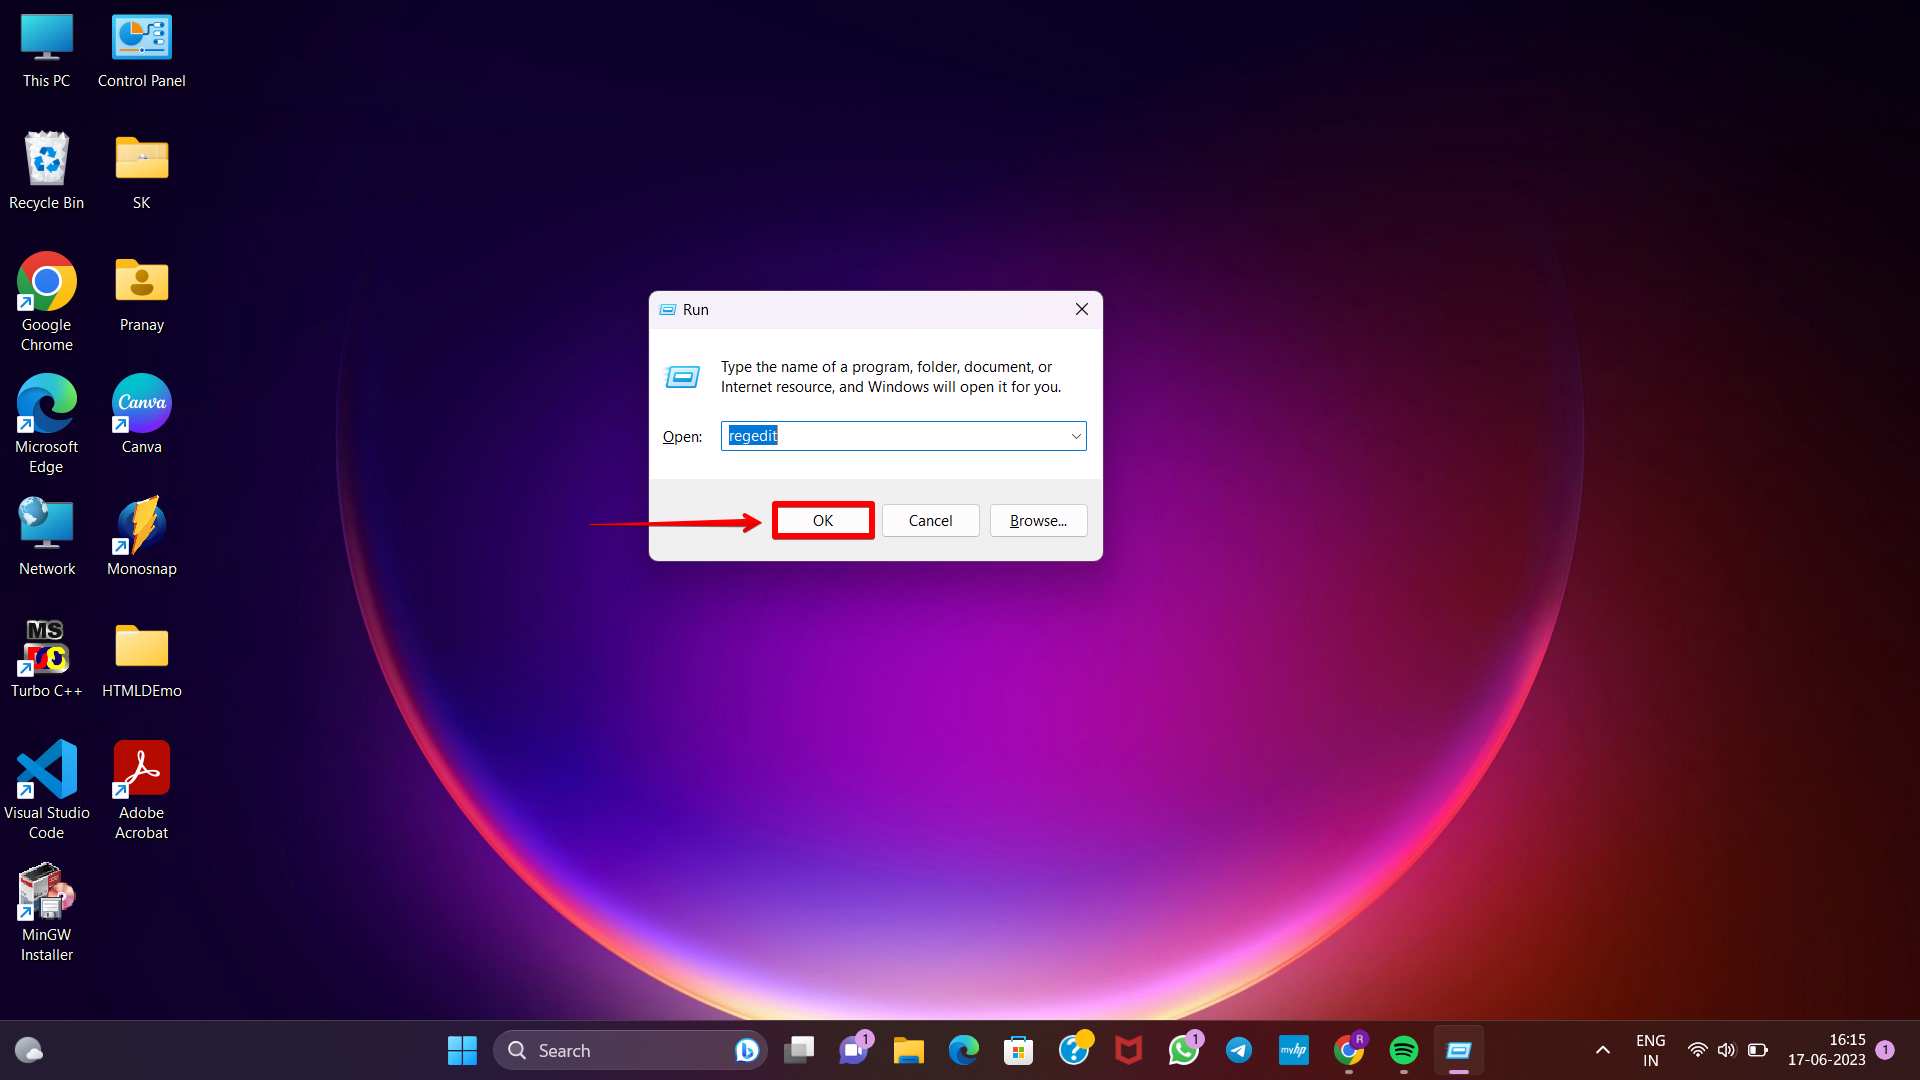
To begin with, open the Run dialogue box to open the Registry Editor first. Use the shortcut key Windows+R to open the Run window.

Type “regedit” into the provided input box and hit the Enter key. Proceed by clicking the Yes button when the User Account Control (UAC) window appears. This will open the Registry Editor.
Step 2: Creating a new key
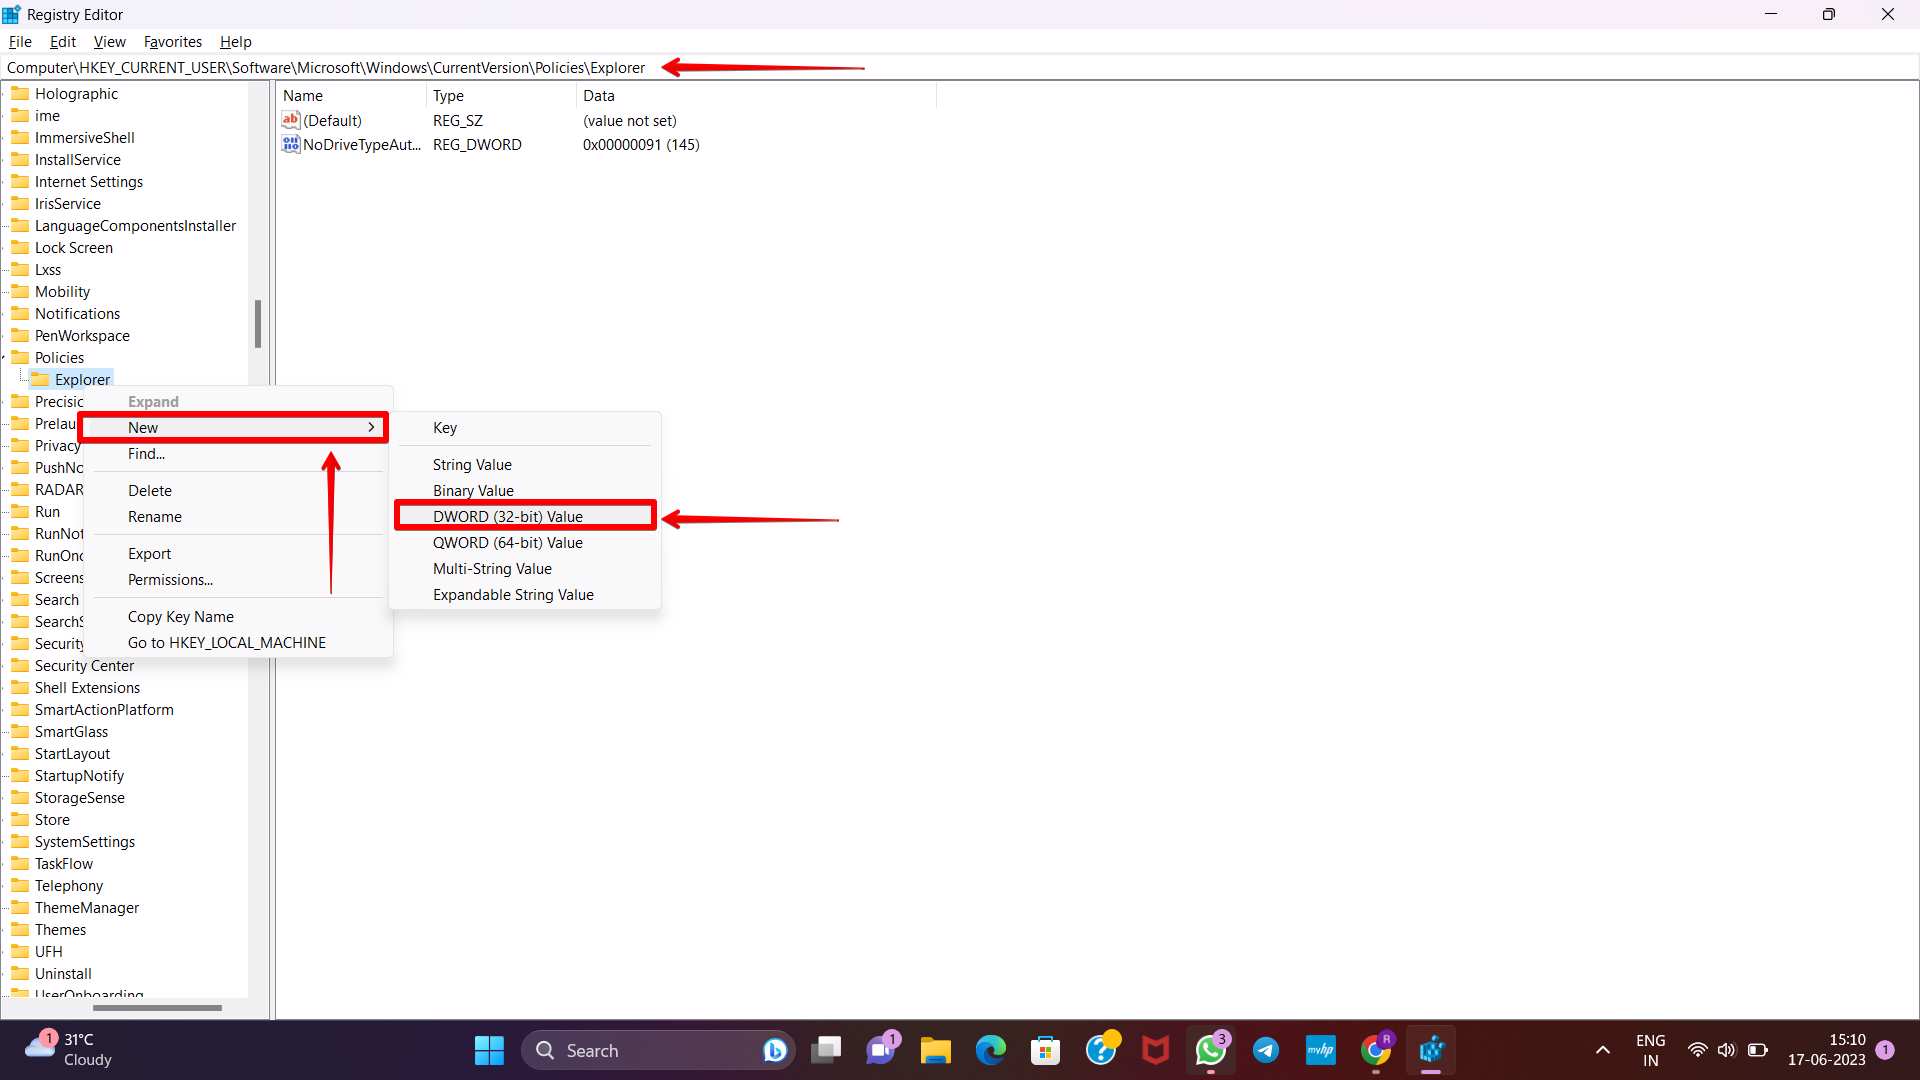
To create a new key, locate to the following path:
Computer\HKEY_CURRENT_USER\Software\Microsoft\Windows\CurrentVersion\Policies\Explorer
If you cannot find the “Explorer” option within the “Policies” folder, you can right-click on the “Policies” folder in the left panel and choose New > Key. Then, provide the new key with the name “Explorer.”

If the “Explore” key is present by default in the menu then right click on it and select the New option. After that select DWORD (32-bit) Value. Next, assign the new DWORD value the name “RecycleBinDrives.”
Step 3: Assigning of the value data

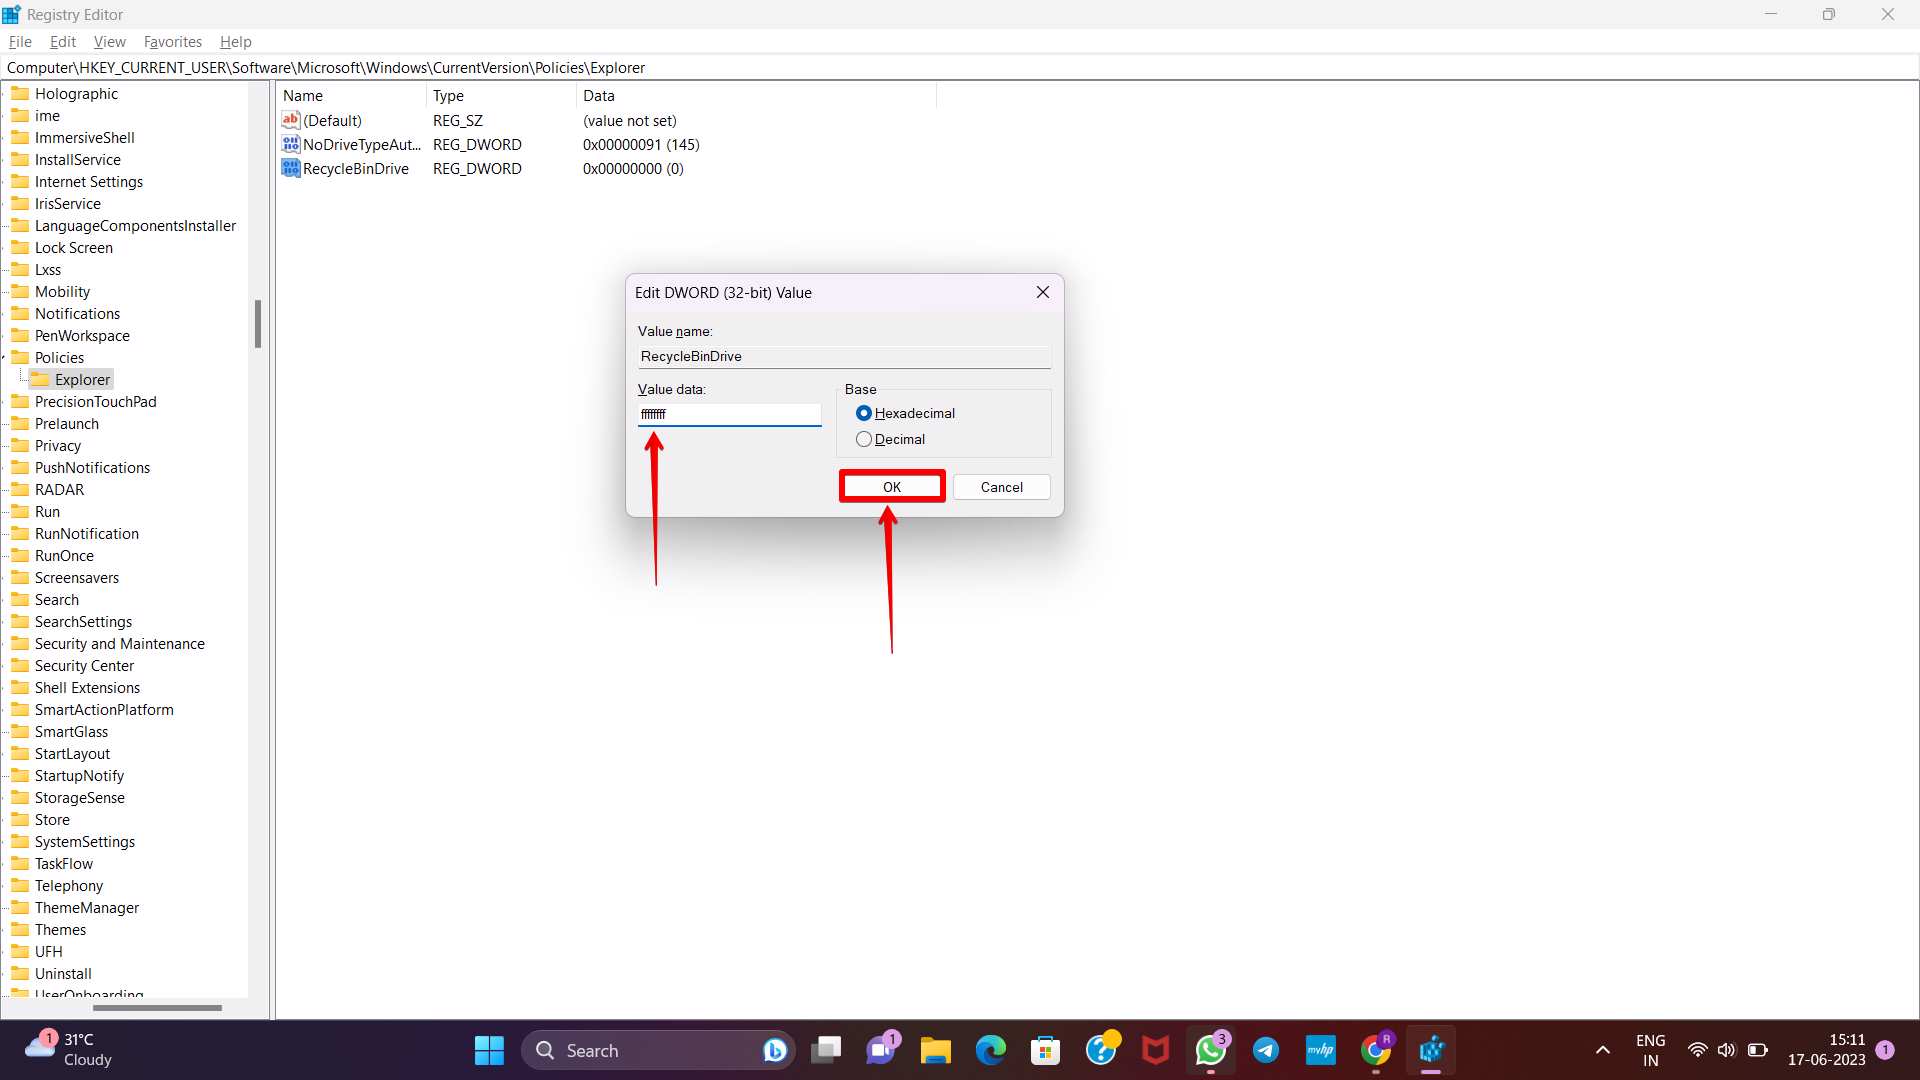
Within the right panel, locate the “RecycleBinDrives” entry and double-click on it. In the ensuing window, modify the value data to “ffffffff” (eight “f” letters). To confirm the change you have made click on the OK button.
Step 4: Test the recycle bin
After making the changes, close the Registry Editor and proceed to delete any unwanted files from your external hard drive . This will allow you to verify if the Recycle Bin functionality is functioning correctly for removable hard drives.
FAQ
- You can use any file recovery software
Enabling Windows 11 Recycle Bin for USB drives gives your priceless files an extra layer of security and makes it simple to restore them if necessary. You may easily enable the Recycle Bin for your USB drives by following the detailed instructions in this article. Accept this useful function and benefit from the assurance that your deleted files won’t be lost forever, which will improve your Windows 11 data management experience.


