Contents
Ultimate Privacy Solutions: Hiding and Locking Photos and Videos on Windows 11 OS
Do you ever feel self-conscious about your Windows 11 OS PC because curious eyes keep showing up on your screen? While you might be unable to escape your unpleasant coworkers, friends, or family, you can certainly switch to a secure method of keeping your private documents and data out of the wrong hands. Let’s be honest; we all have images on our computers or laptops that we’d rather keep to ourselves. Unfortunately, there are times when other individuals use your computers for a short period. There will always be some data on your hard drive that you don’t want to disclose in front of others.
Thanks to the top techniques detailed in this post, you can share photographs, movies, and other essential data on Windows 11. Let’s have a look at these procedures from start to finish.
Hiding and Locking Photos/Videos Using Windows 11 File Explorer
With Windows File Explorer, it just takes a couple of clicks to conceal a single media file or a whole folder’s content.
1. Simply launch File Explorer and go to the desired file or folder location.
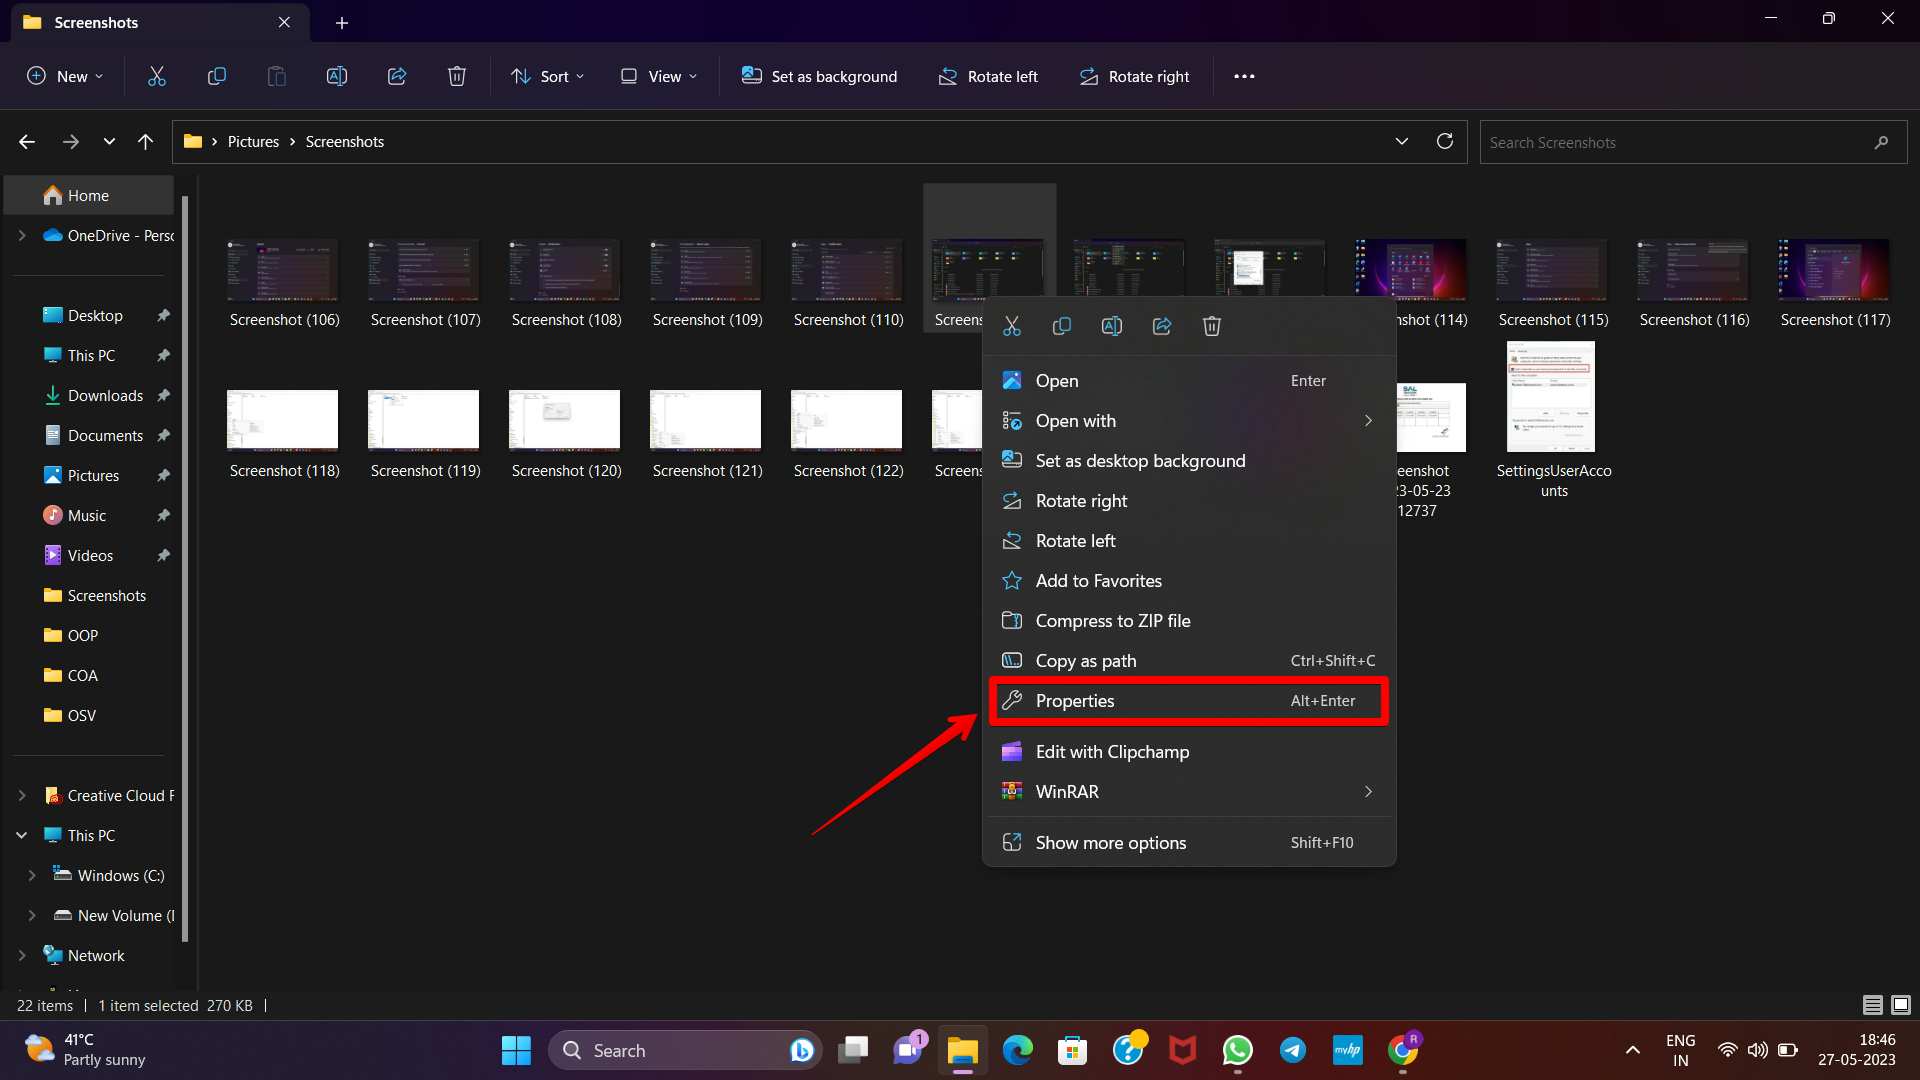
2. Second, choose Properties from the context menu after selecting the photographs and videos you want to work with (file or folder).
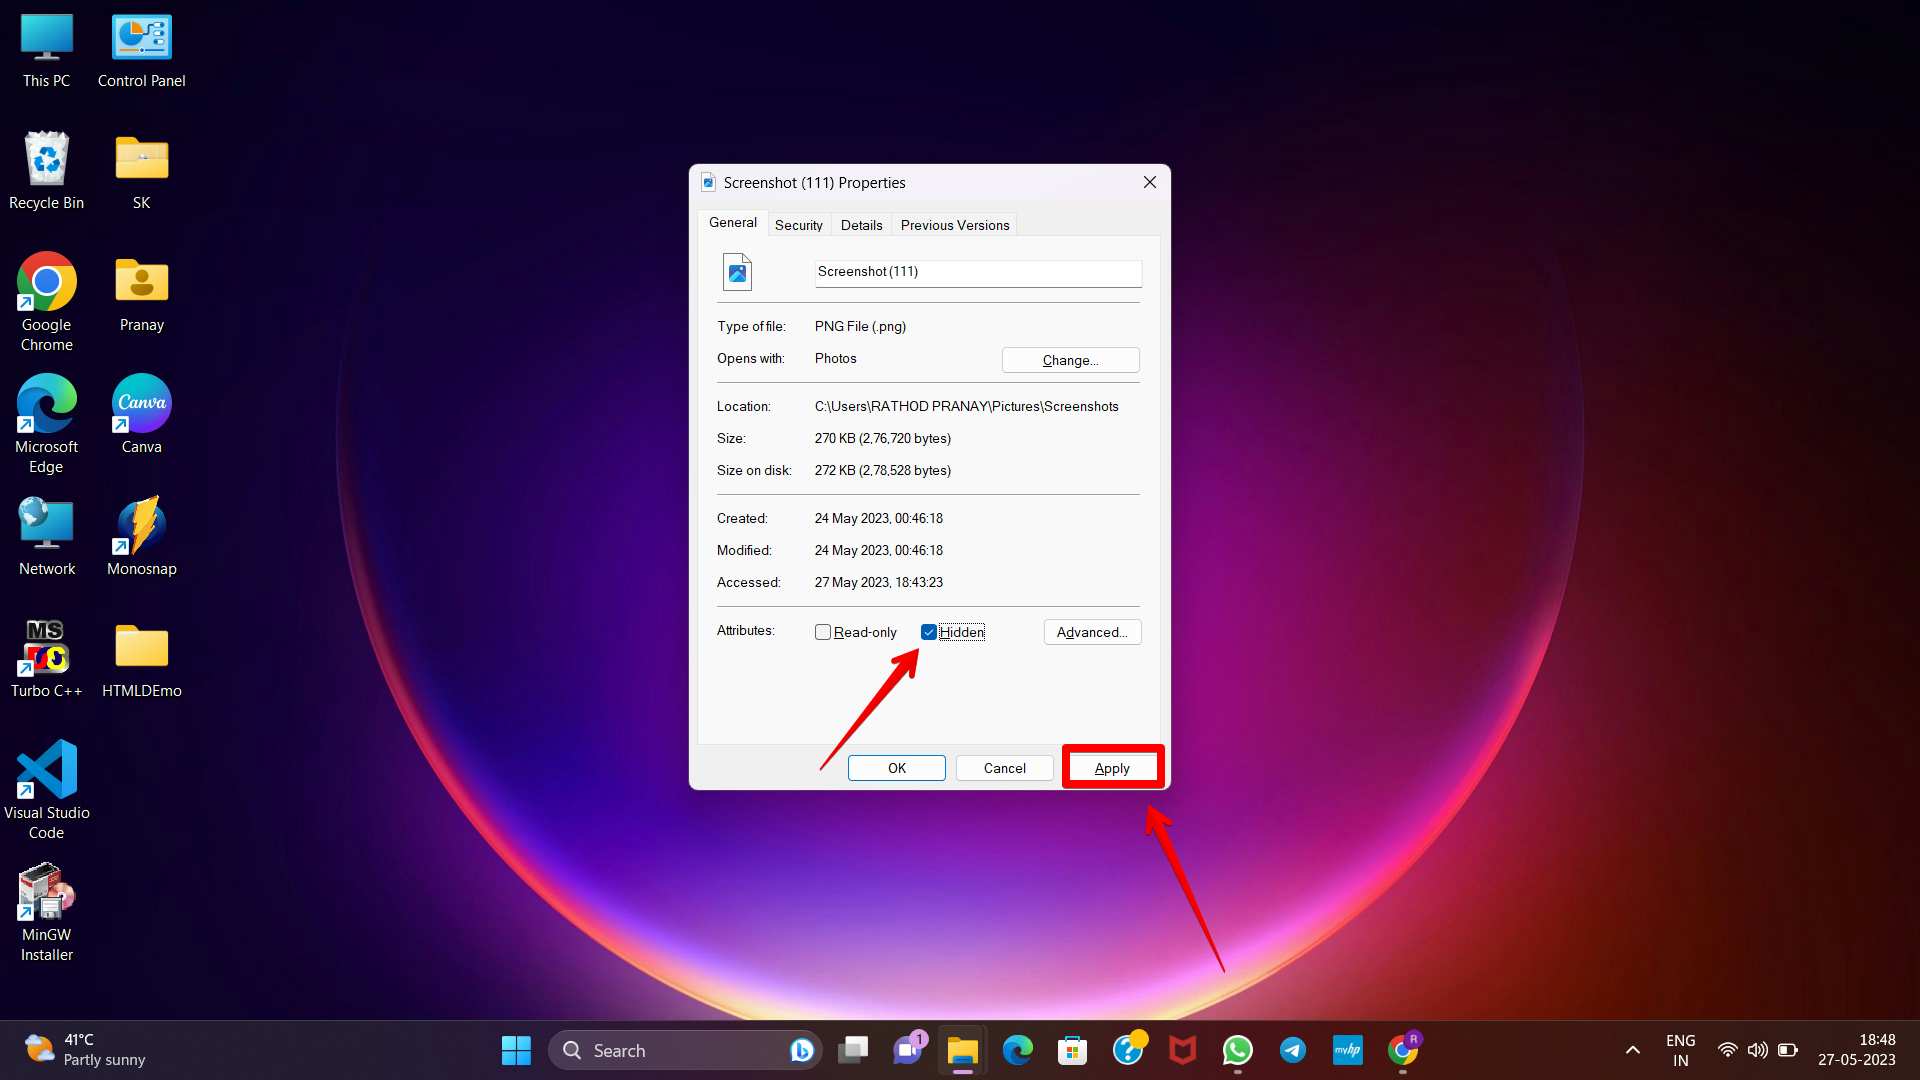
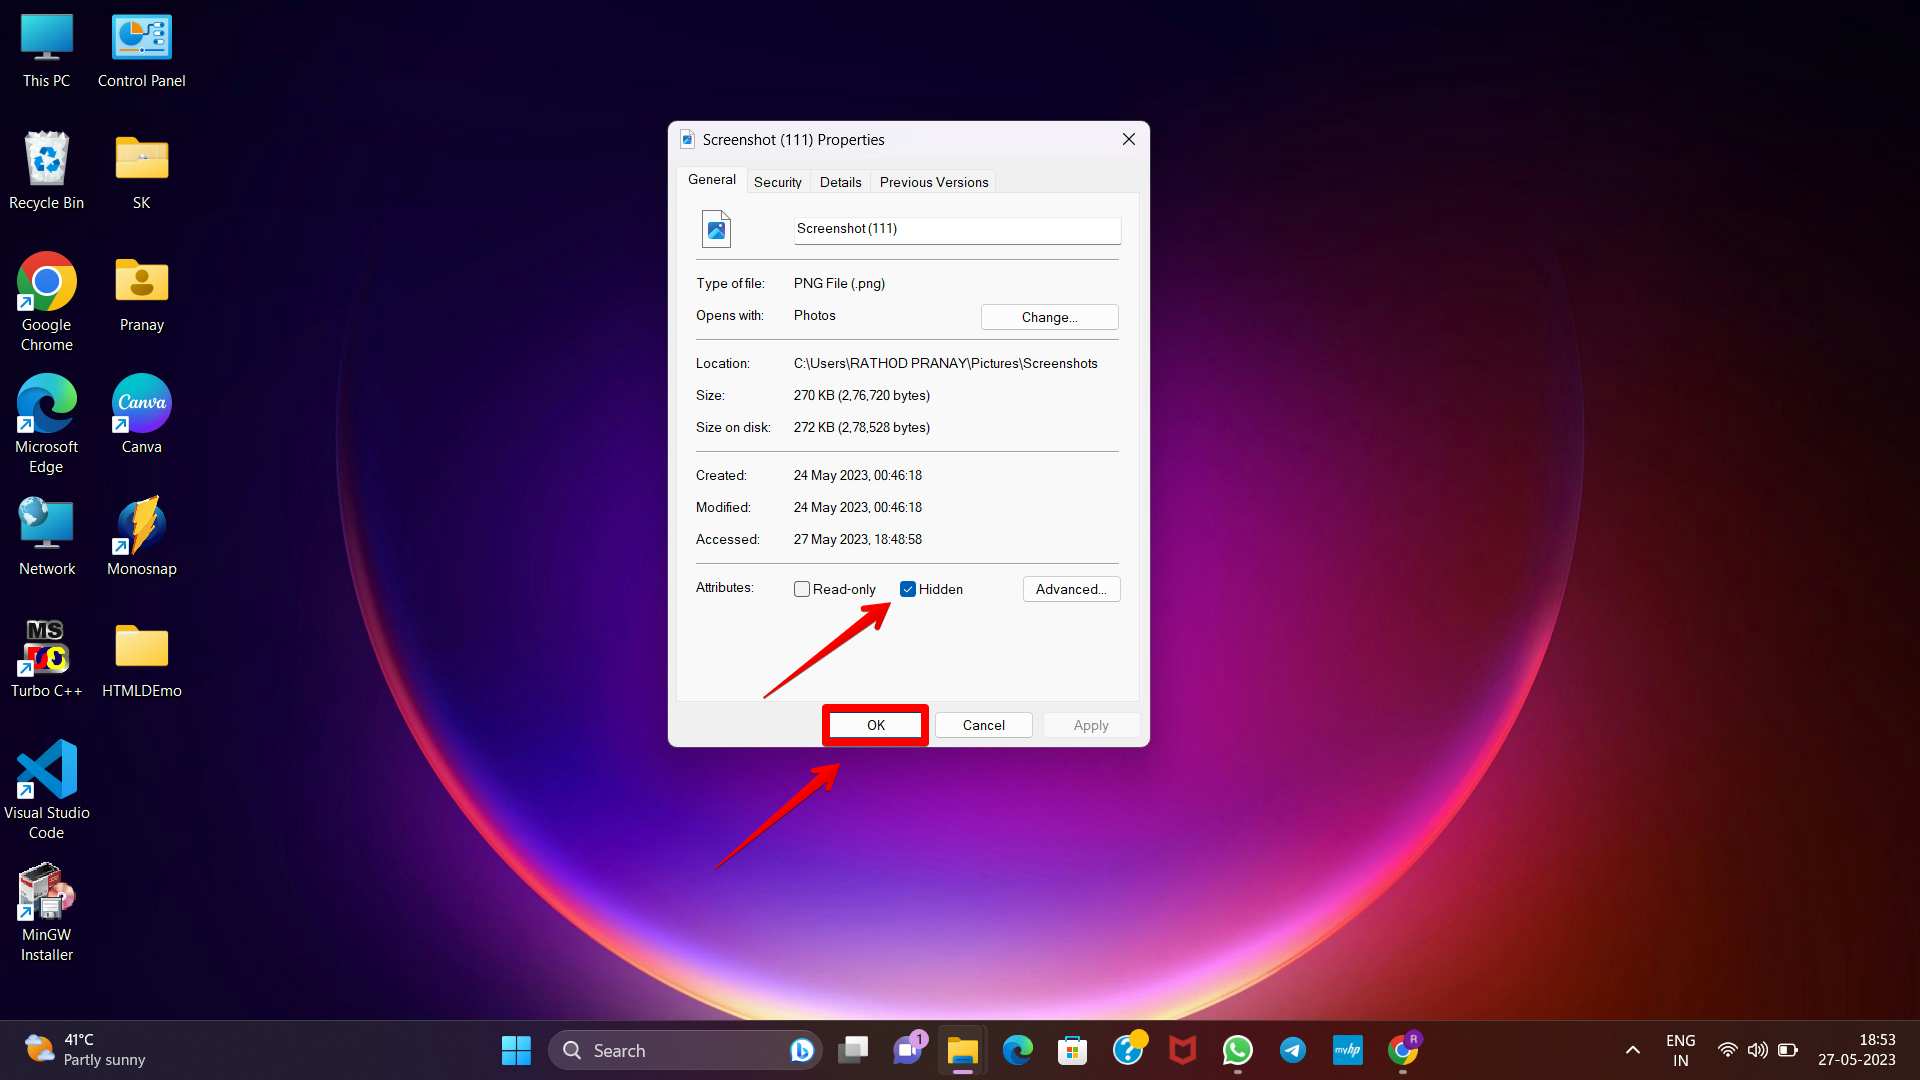
3. Third, open the General tab in the resulting dialogue box, and then select the Hidden checkbox under the Attributes subheading.
4. In the next step, simply click on the “Apply” button.
5. In the confirmation box, select “Apply Changes” for this folder, including its subfolders and files, then click OK once more.
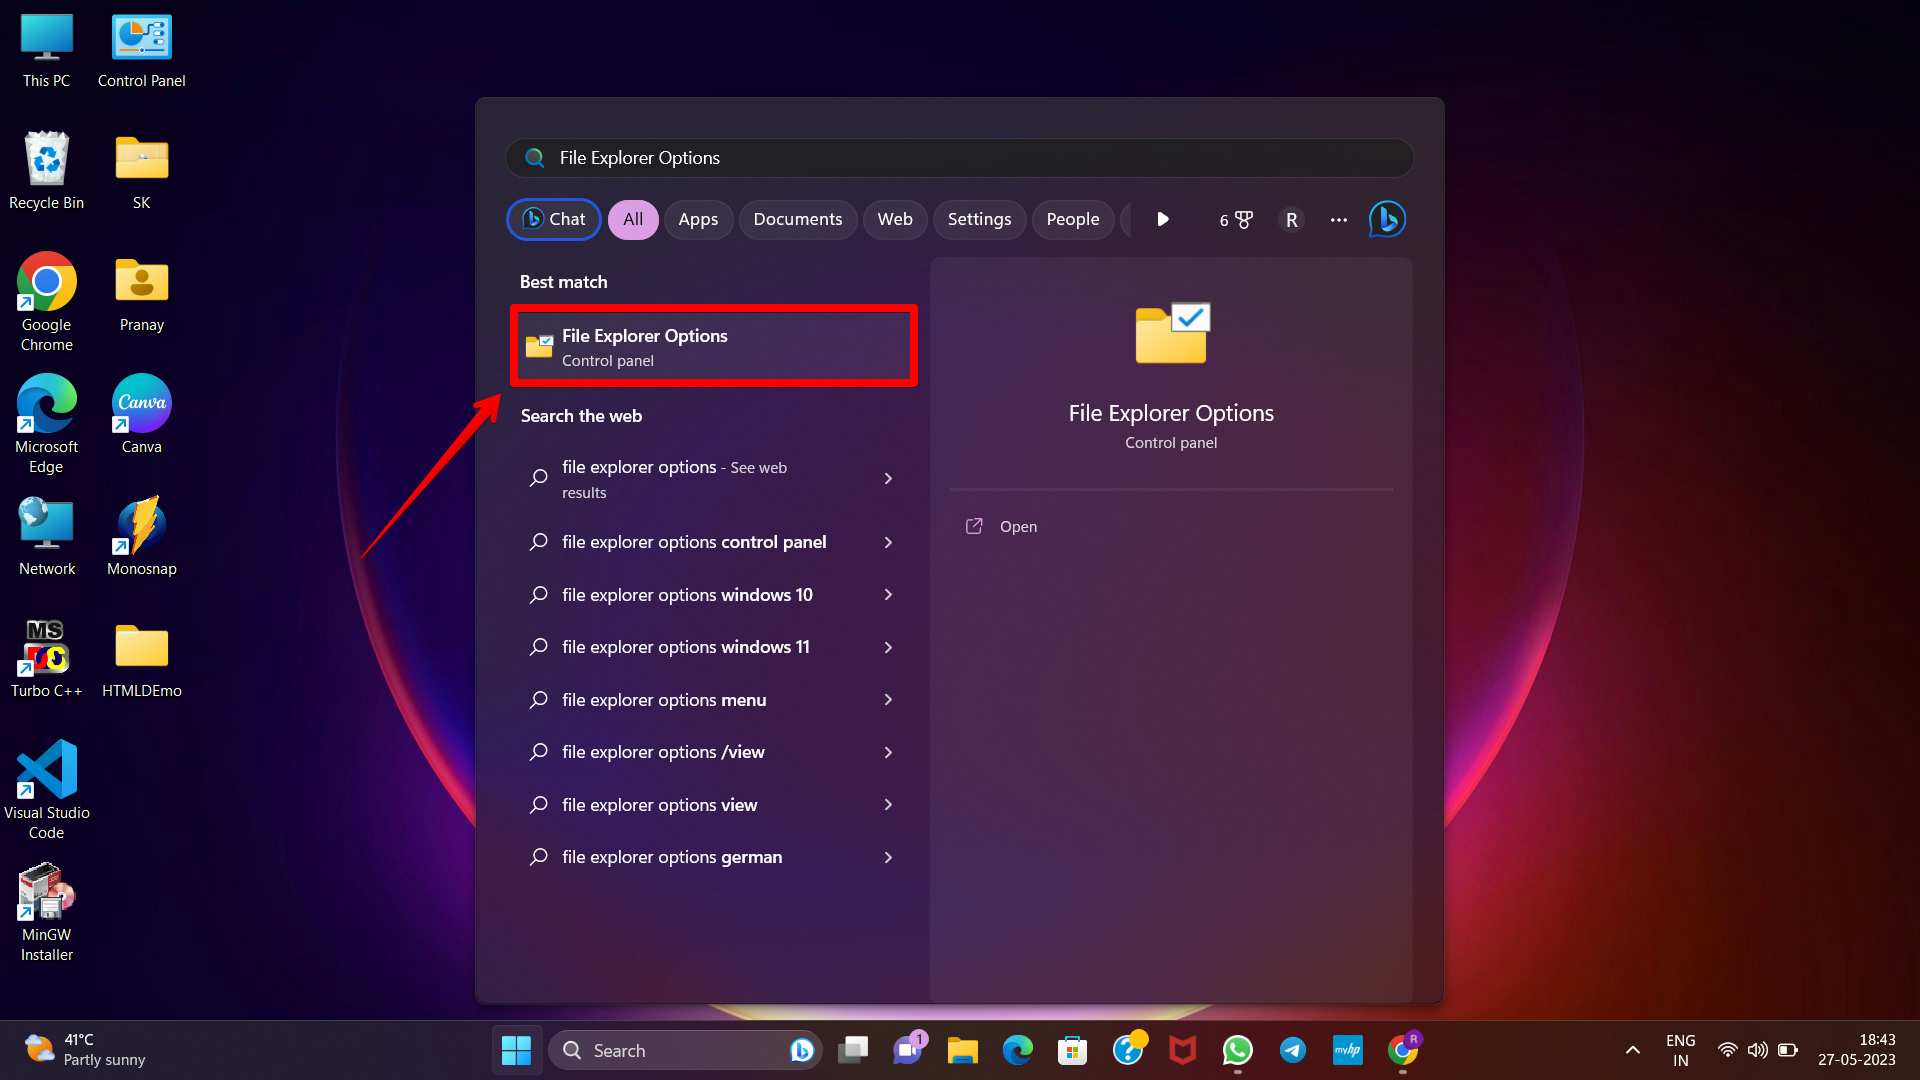
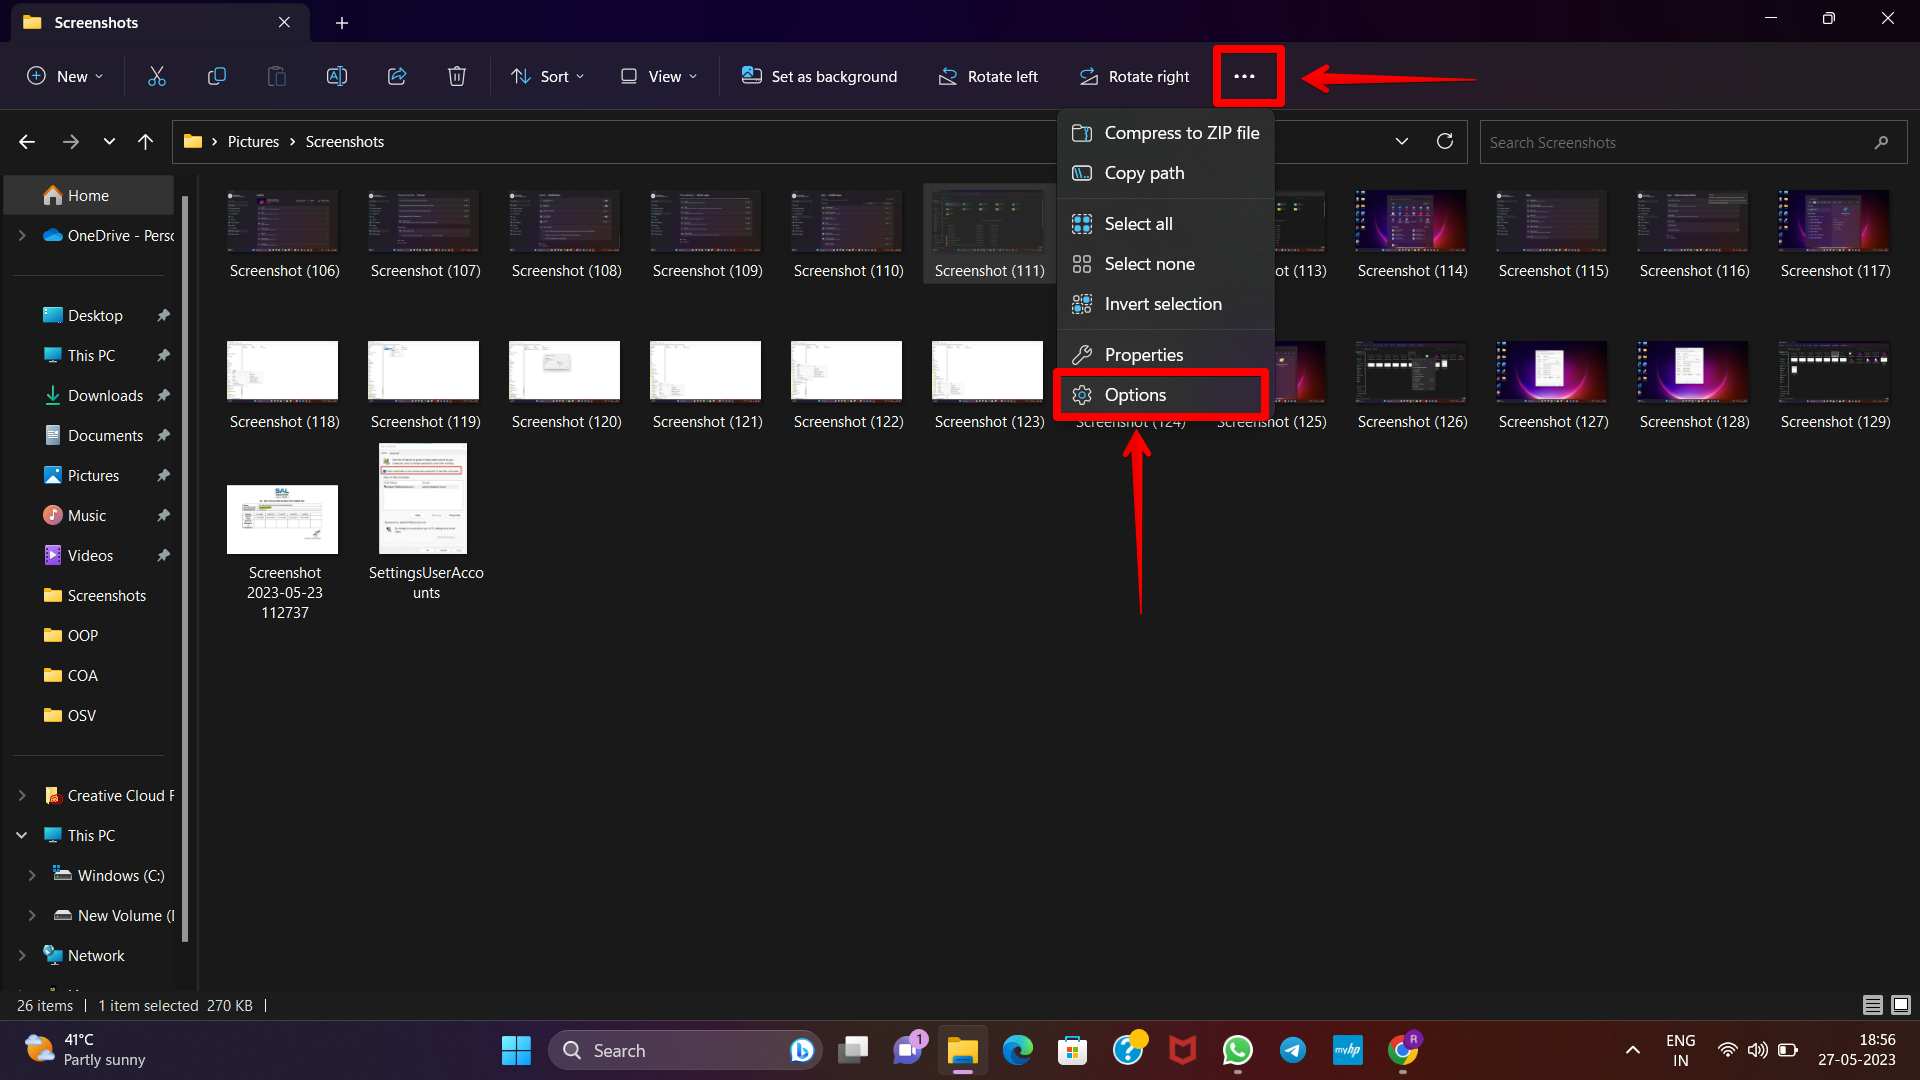
6. Select the More button (the three dots) and then pick Options from the File Explorer context menu after navigating to any folder (Step 6).
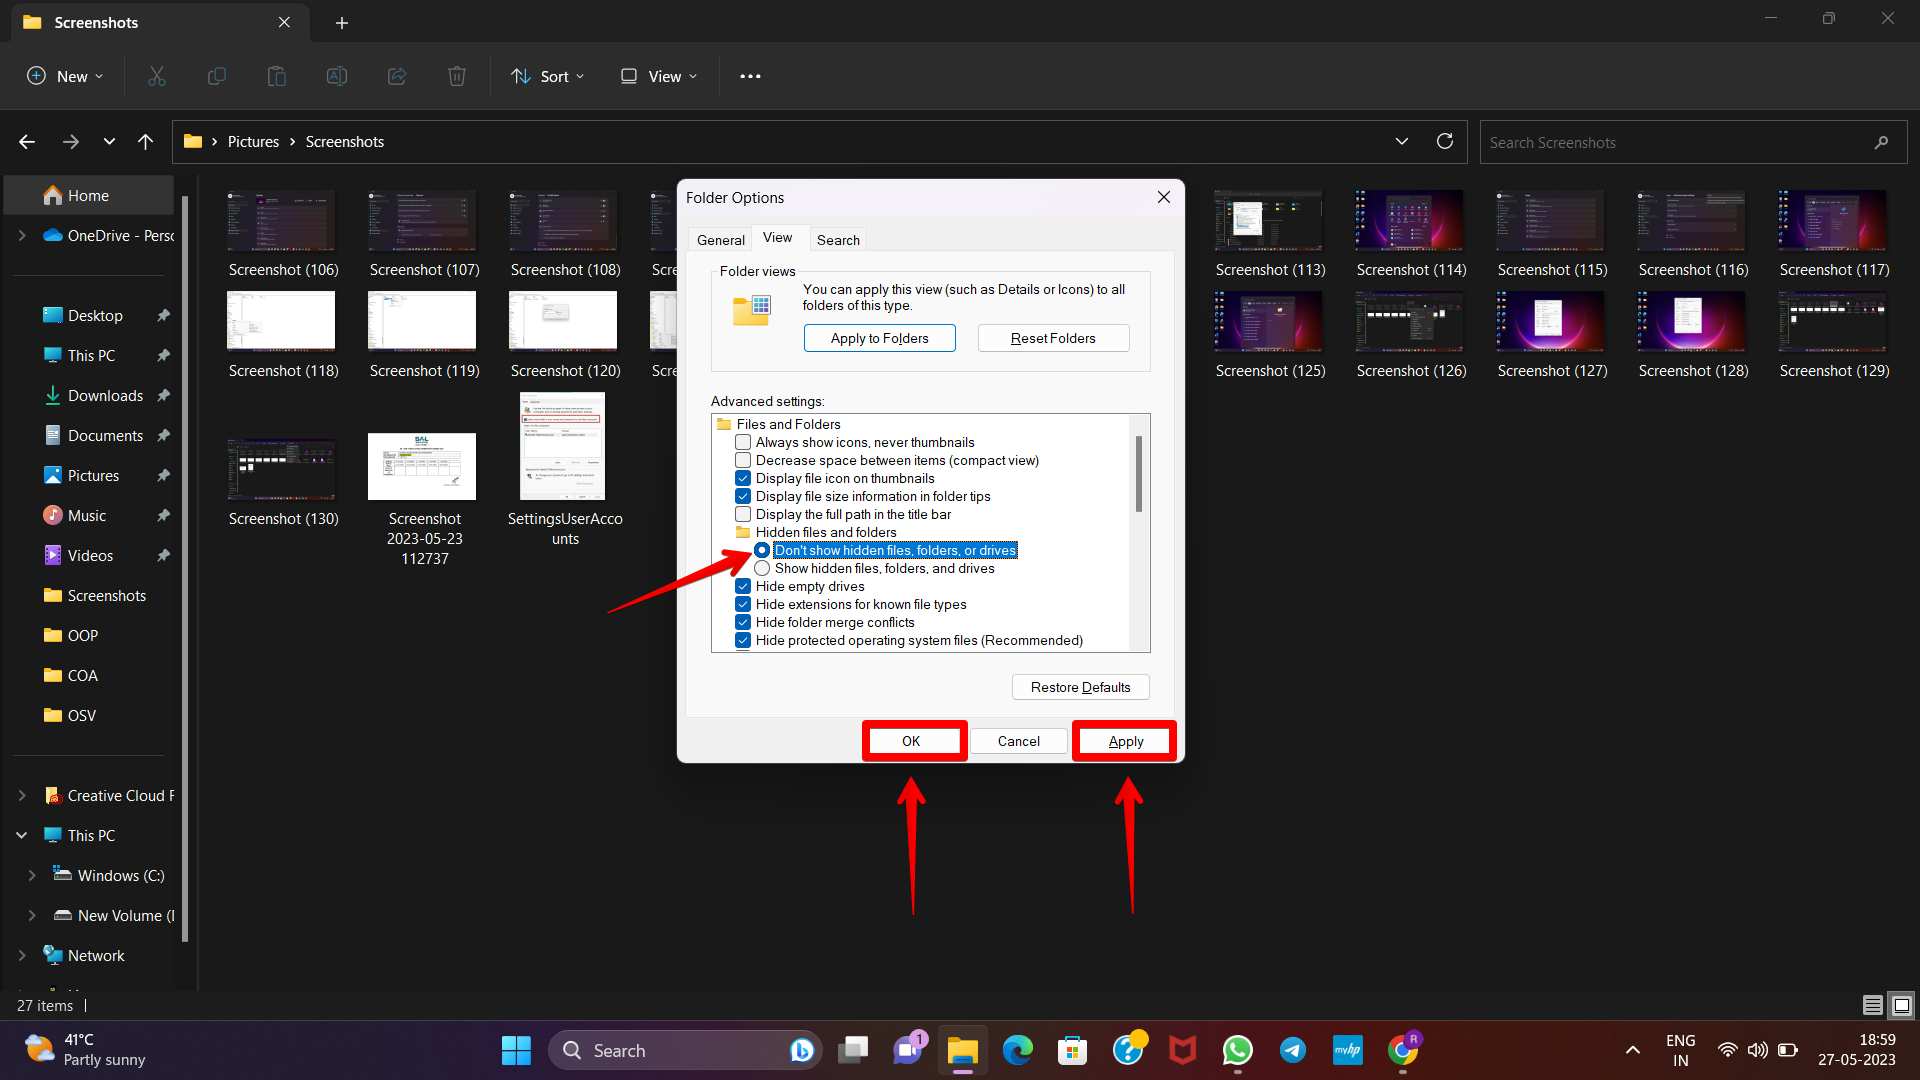
7. Seventh, choose the View tab from the Folder Options window.
8. Select the checkbox labeled “Don’t show hidden files, folders, or drives,” then hit “Apply” and “OK” to preserve your new settings.
Hiding and Locking Photos/Videos Using Windows 11 Search.
You may disguise Windows search outcomes in preferences. You may easily prevent Windows Search from indexing your image and video collections. Verify the speedy procedure.
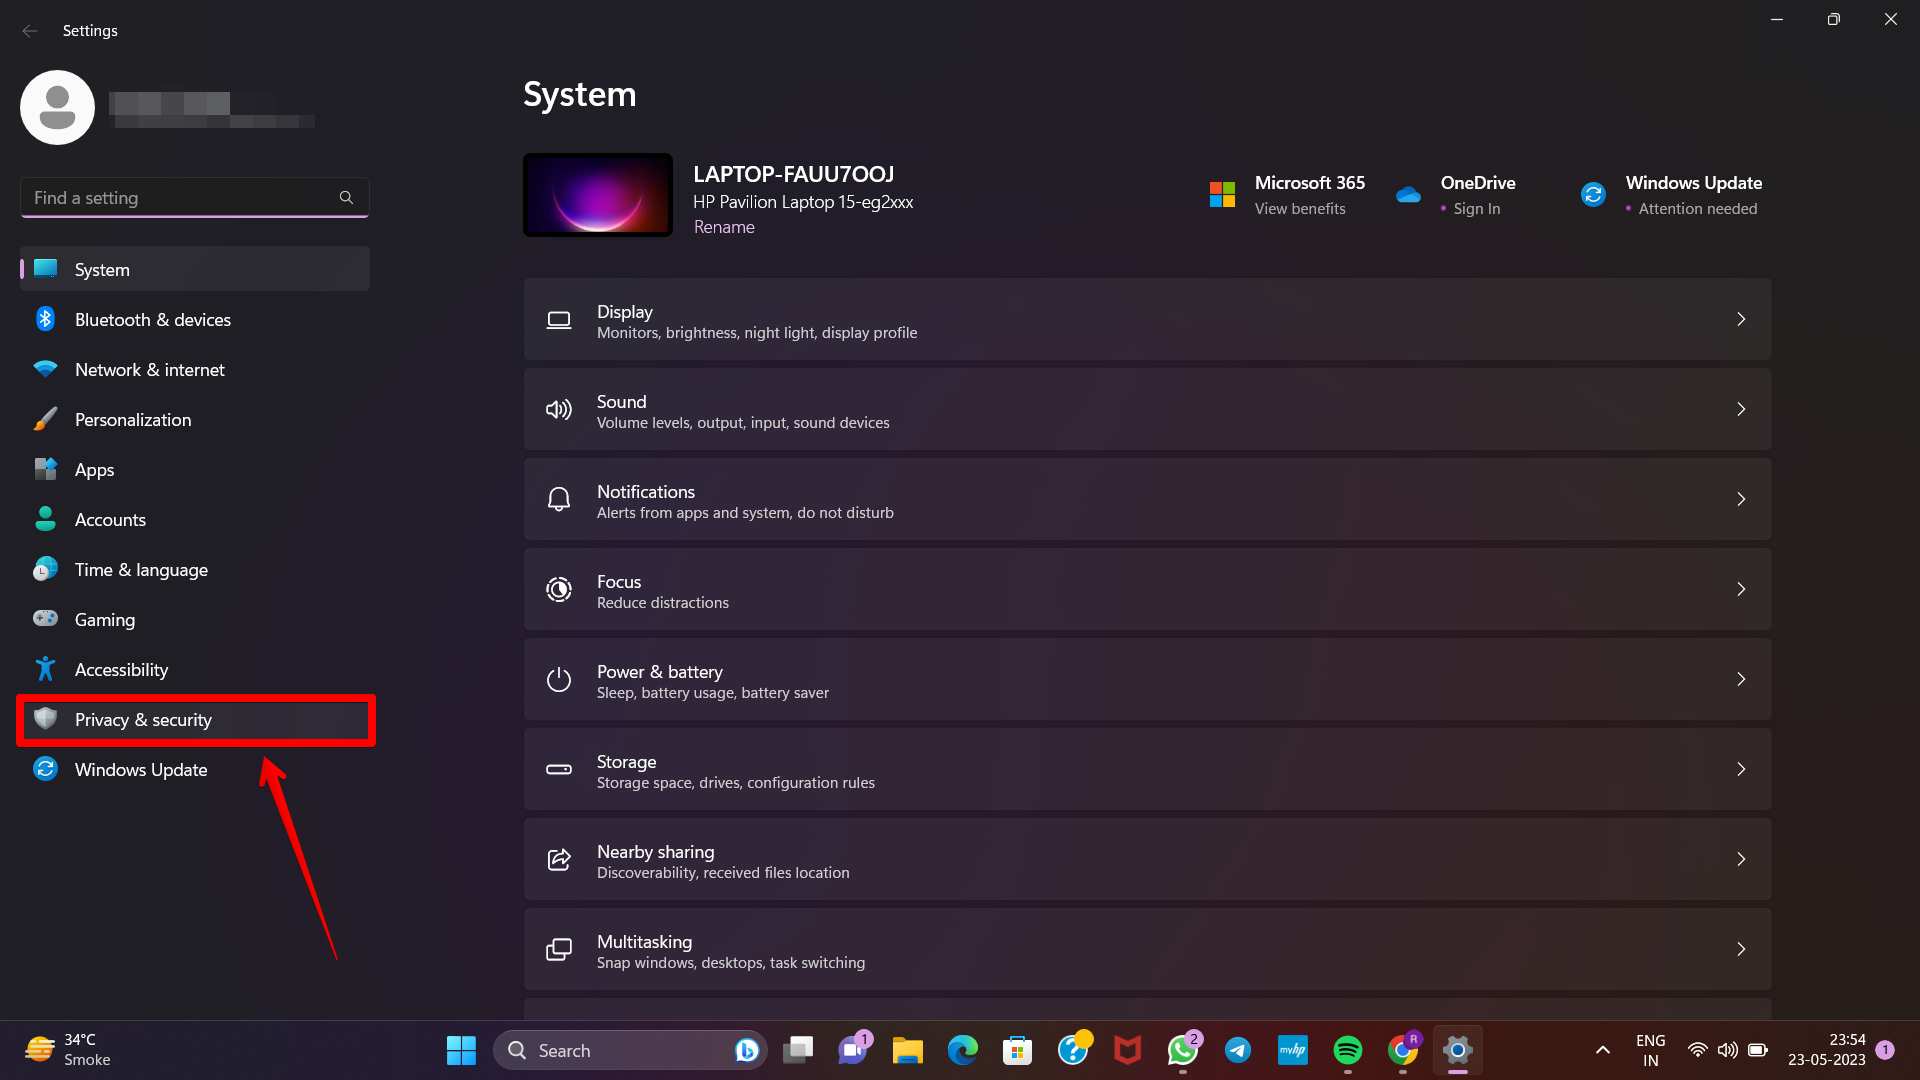
1. Press the Win + I keys simultaneously to get the Windows Settings screen.
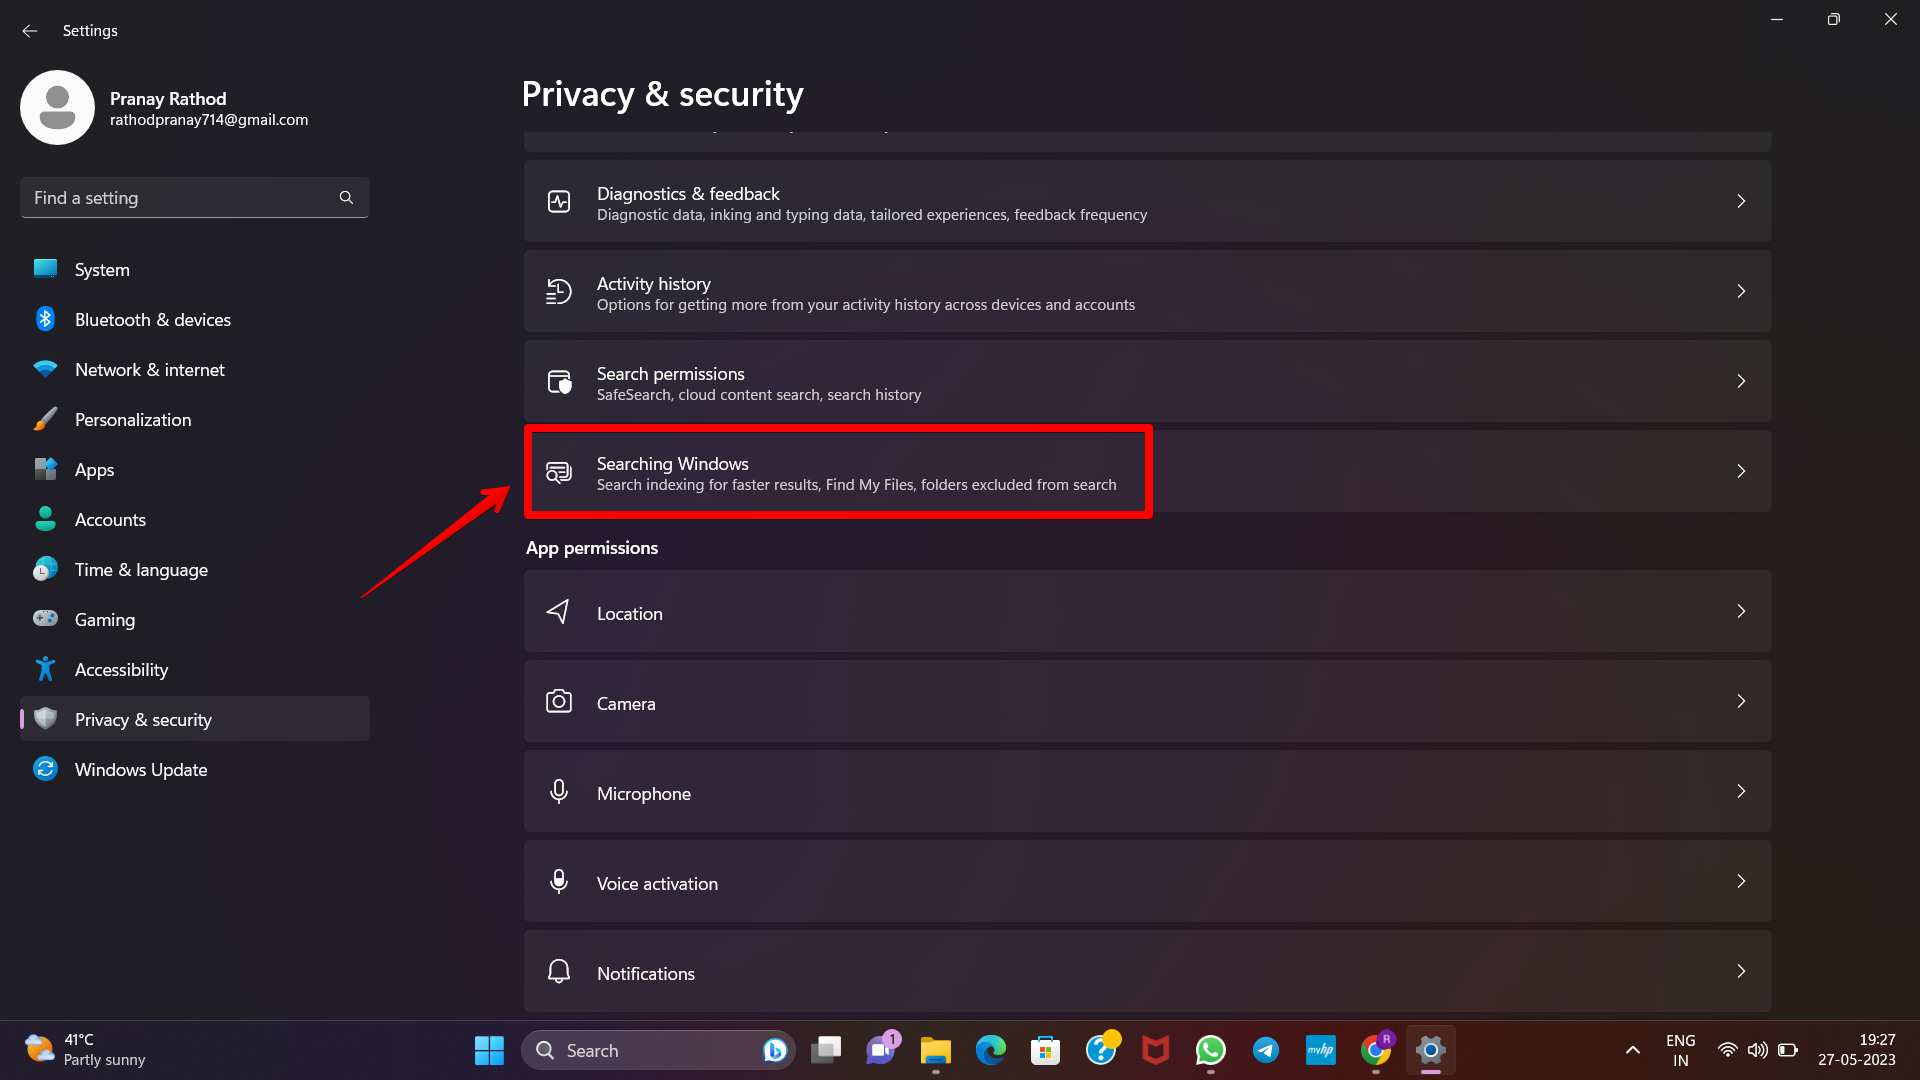
2. Navigate to Privacy & Security on the window’s left side, then click Searching Windows on the right.
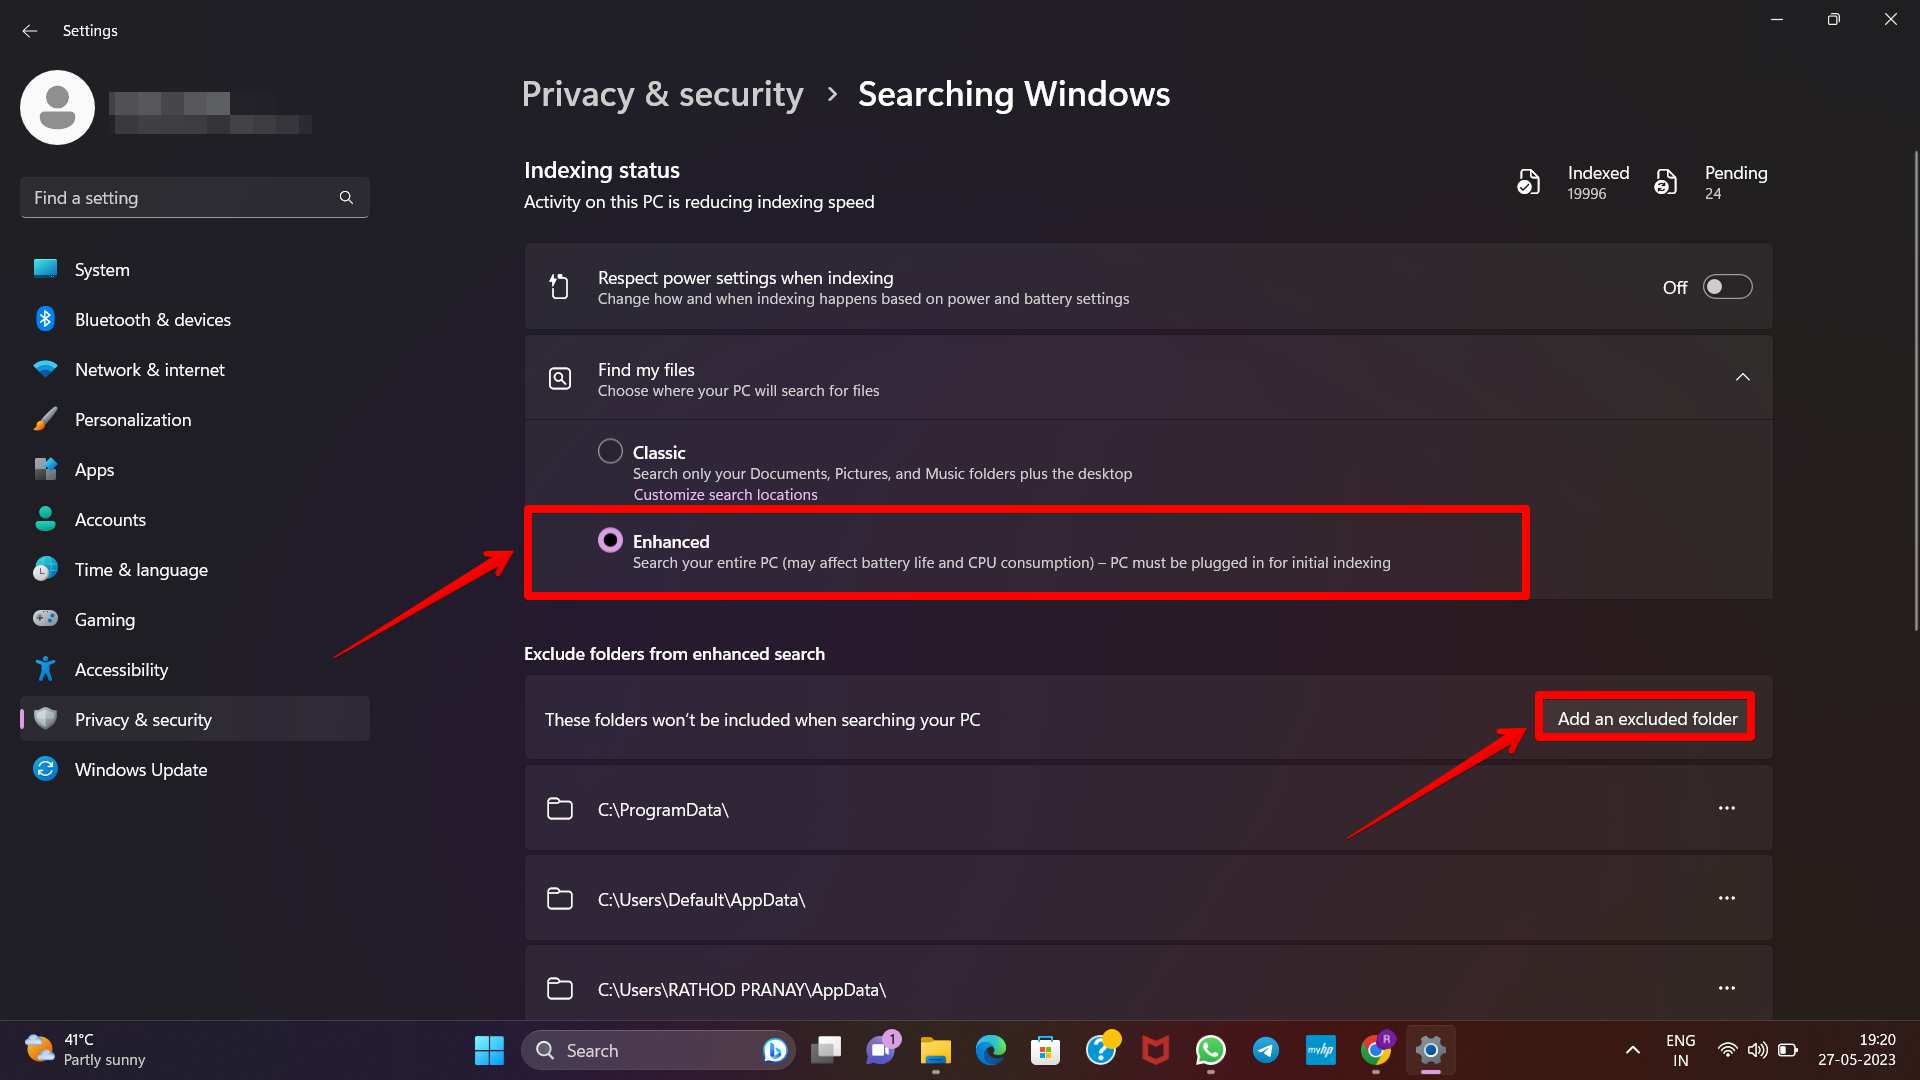
3. Third, go to “Searching Windows,” and under “Enhanced Search,” locate “Exclude folders” and click it.
4. In the fourth step, select “Add a folder to exclude.”
5. Click the Select Folder button in the new window that has shown once you’ve decided which photo or video folder you want to conceal.
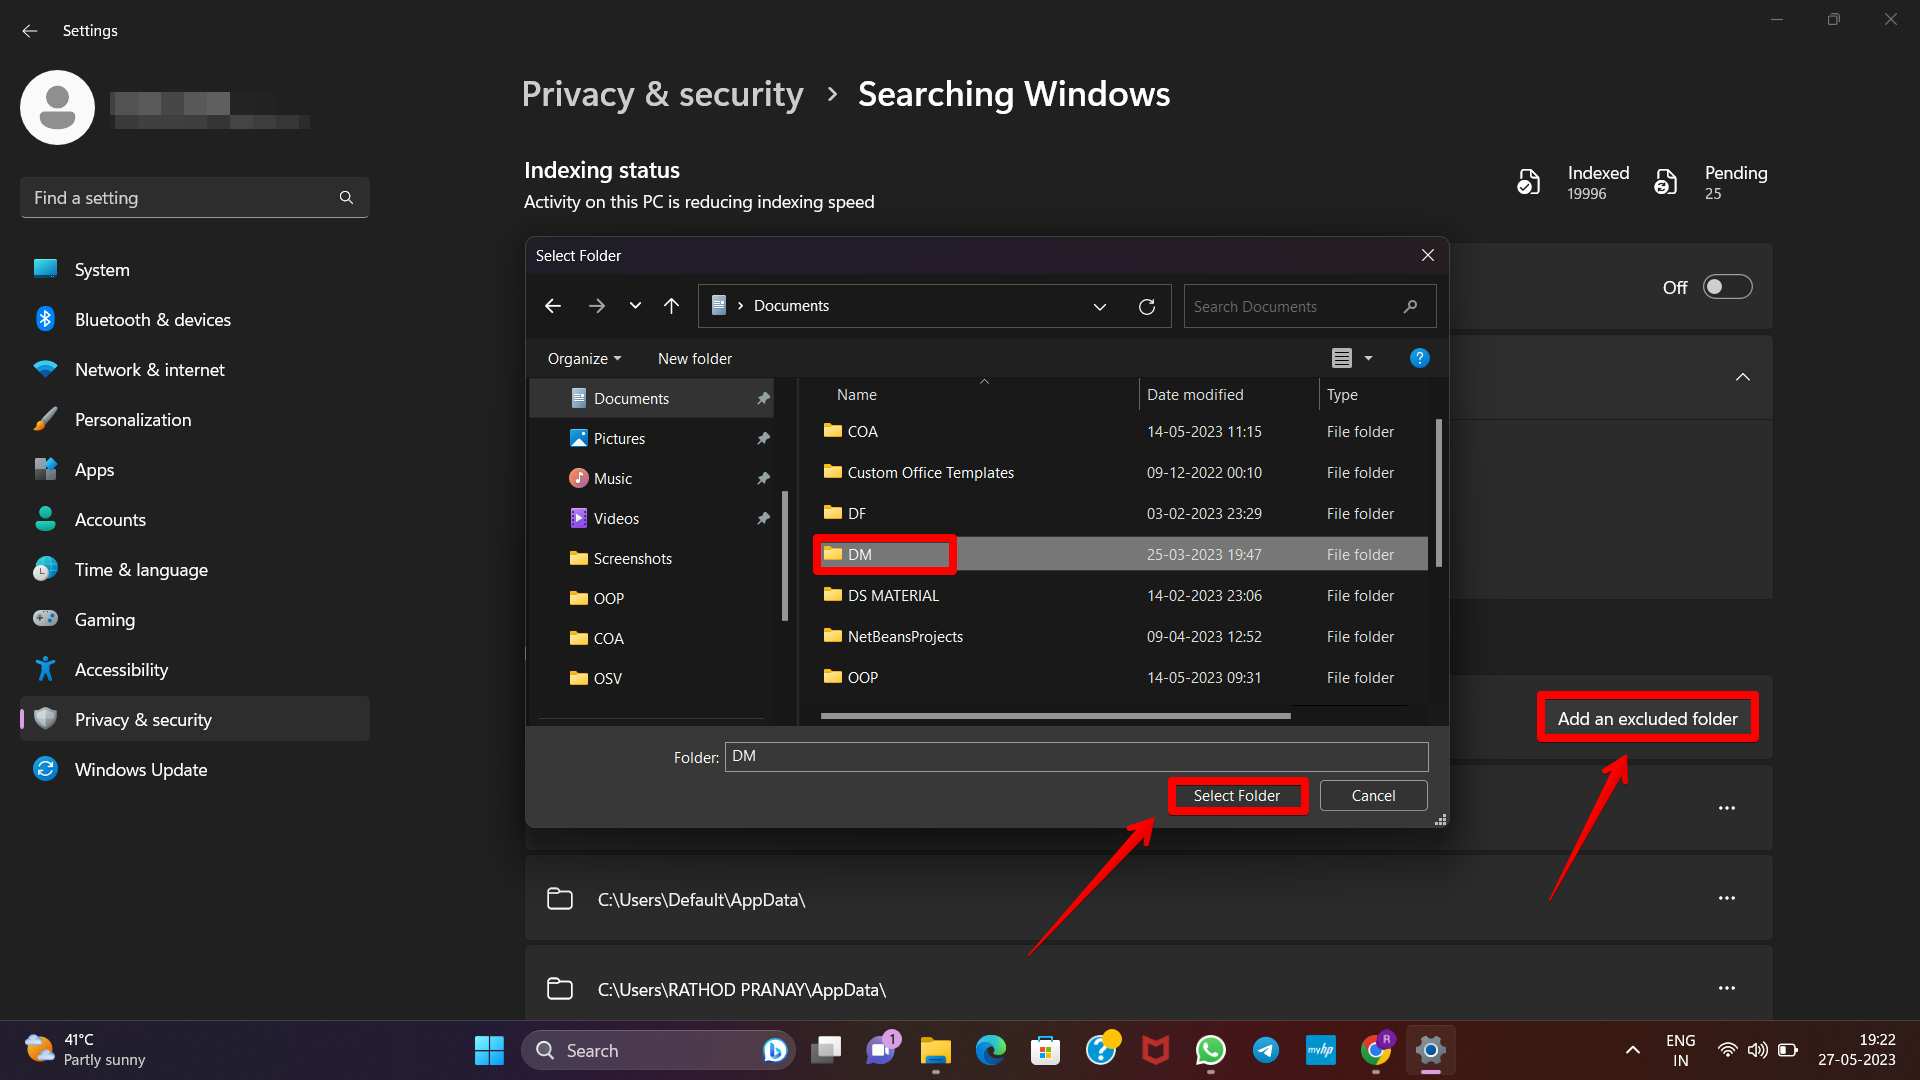
The Windows Settings window can be closed at this time. To remove a file or folder from the banned list, repeat steps 1-3 above, navigate to the folder using the arrows, and then click the three dots to the right of it.
How to Hide and Lock Photos/Videos By Making Folders Invisible In Windows PC or Laptop?
You may also conceal your photographs and movies by making the relevant folders invisible. You can avoid having to unhide it later on by using this strategy. Getting rid of the folder’s label and hiding its icon is easy. However, unauthorized people can stumble into your confidential documents and folders.
1. Press F2 and rename a folder containing your media files.
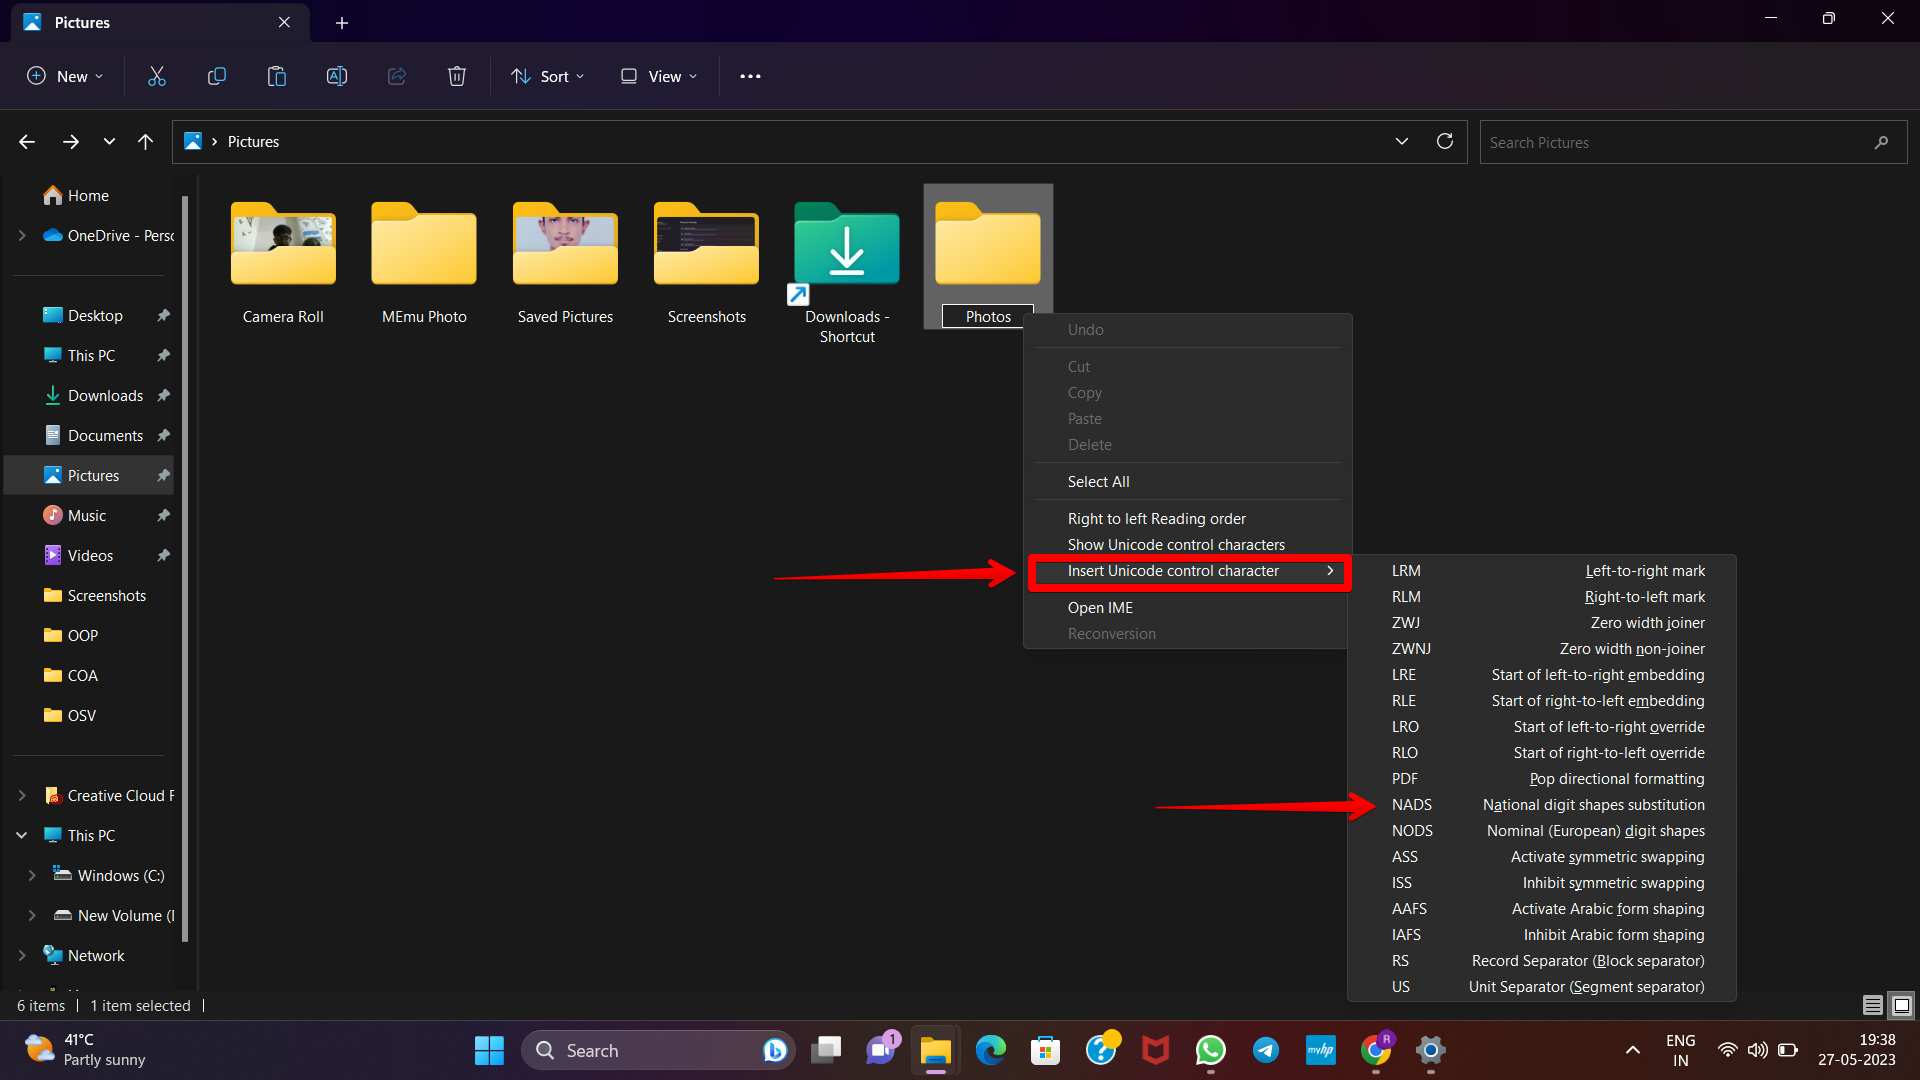
2. Pick the Insert Unicode control character from the context menu when right-clicking the current folder’s name.
3. Third, whenever prompted, choose NADS and click anywhere on the display (desktop).
4. Fourth, choose the folder you want to work in and right-click on it. Look into the Properties menu.
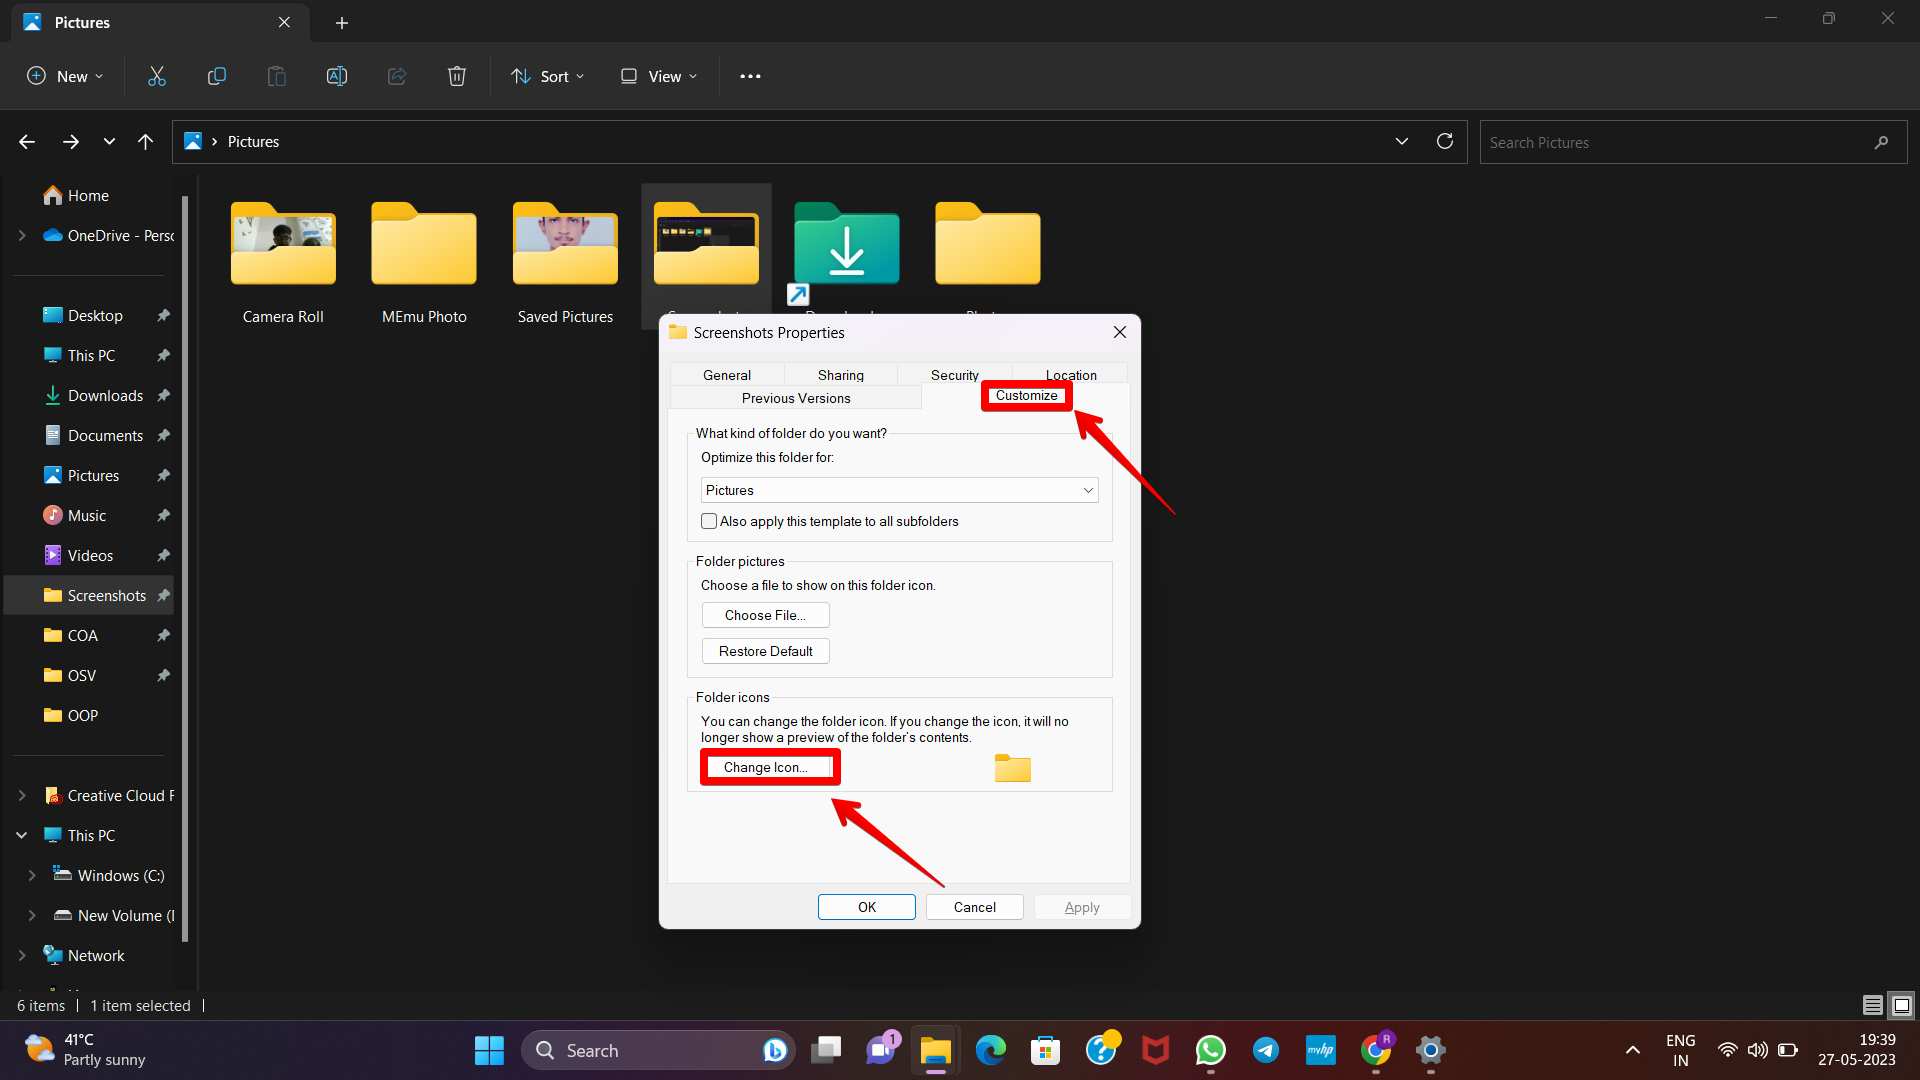
5. Fifth, click the “change Icon for the Folder” button in the “Customise” sub-menu.
6. Sixth, a Windows folder with multiple empty icons will open. Select one, then click OK and Apply in the Properties pane.
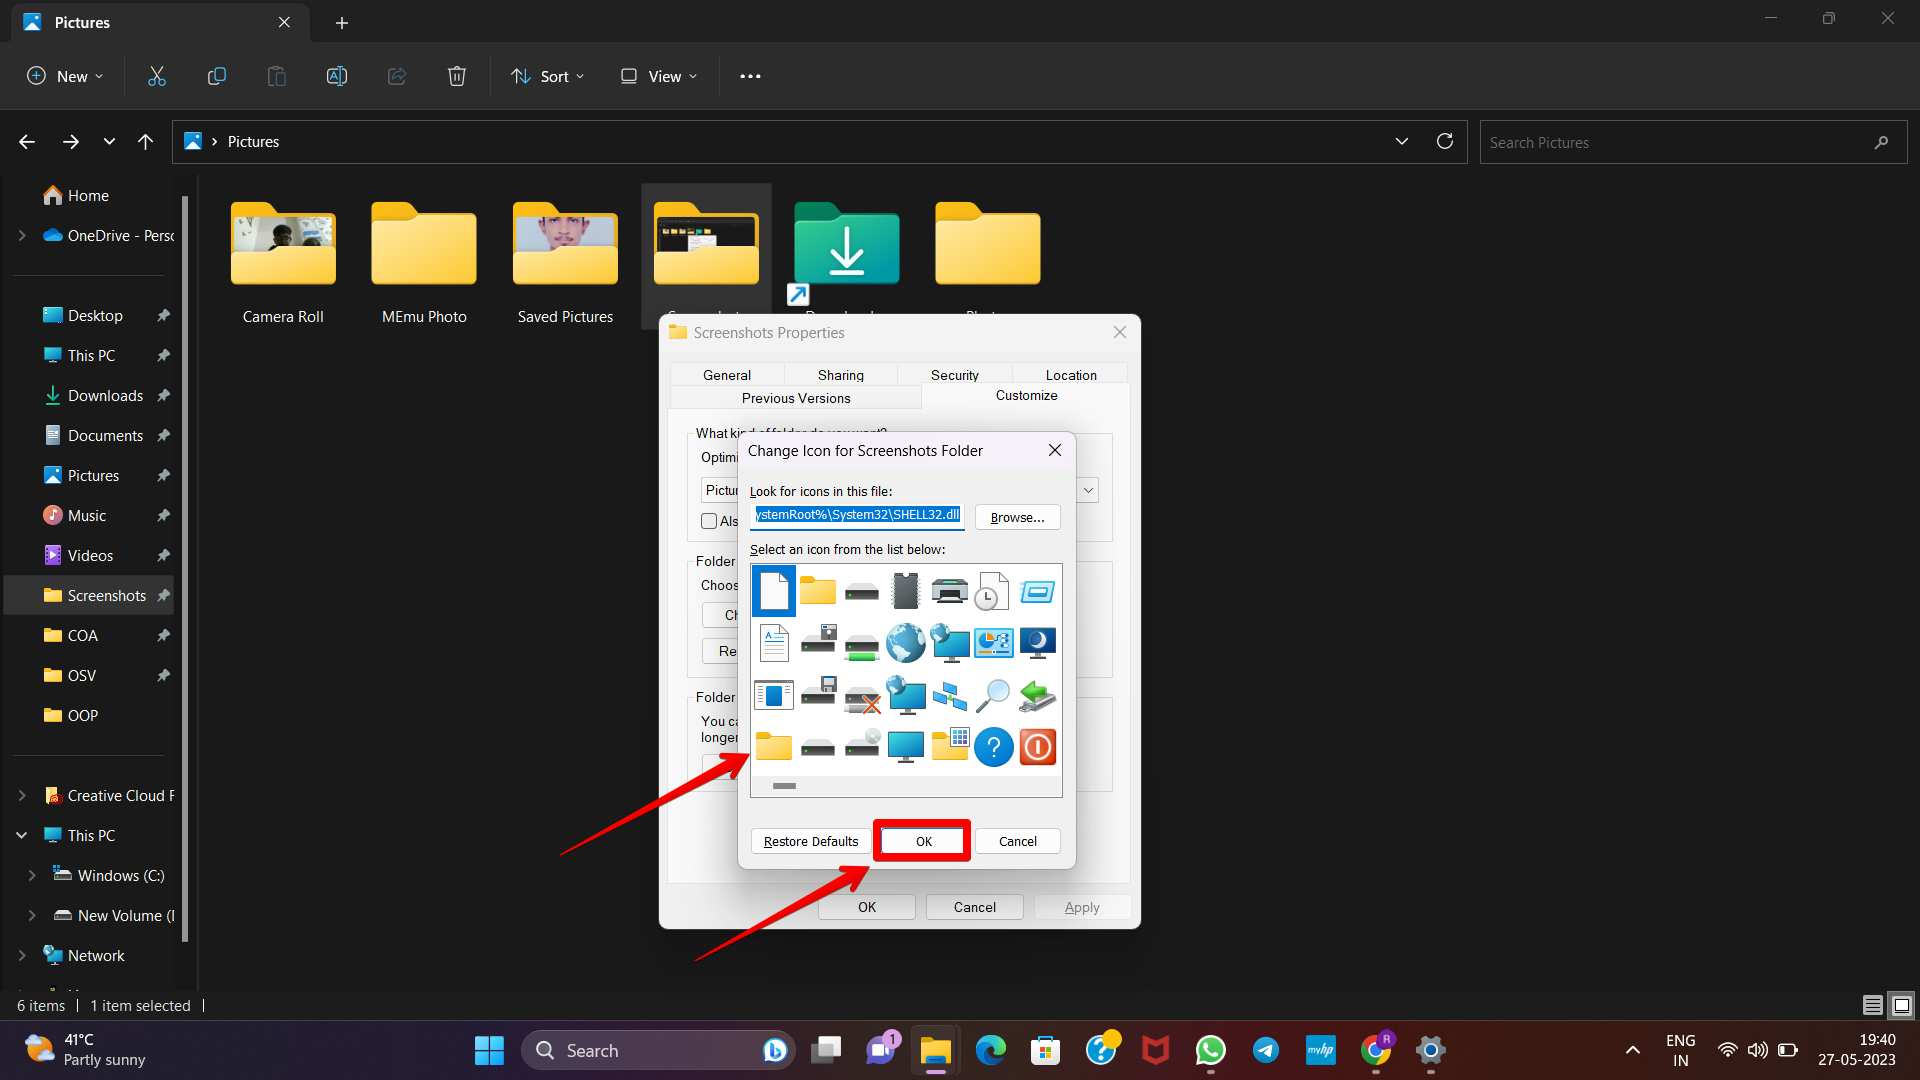
7. The hidden folder may be moved to any spot on your desktop. Please put it at the screen’s edge to lessen the likelihood of being discovered.
Conclusion
Although these techniques can help prevent unauthorized individuals from casually accessing your information, they may need to be more foolproof. Combining these methods with others, such as robust user account passwords and full-disk encryption, can further increase security.
In conclusion, you may safeguard your personal media files with the help of Windows 11‘s in-built tools. Pick a technique and level of protection that works for you, and remember to take extra precautions to keep your data safe.

