Battery Saver options on Windows are a helpful feature that some of us fail to utilize at times. We never knew that we could have gotten an hour or two of extra battery life if we had taken advantage of this fundamental Windows feature. If you are not doing a high GPU or CPU-intensive task then, running our system on low battery mode can give you extra juice to your laptop. The battery saver does this by reducing resource-intensive processes, decreasing screen brightness, and minimizing background activity. To optimize power consumption while not near a charger or to preserve battery life during extended work periods, Battery Saver may be easily enabled or disabled. To help you figure out a way to enable or disable battery savers on Windows 11, this post will show you the methods and more tips that you will need later on.
Contents
- Why You Should Utilize Battery Saver Mode?
- Extended Life of Batteries
- Diminished Power Need
- Better Device Operation When the Battery Is Low
- Adaptable Preferences
- Enhanced Attention to Crucial Tasks
- How To Turn the Battery Saver On & Off
- Method 1: Taskbar method
- Method 2: Turn On & Off Battery Saver from the Settings
- How To Automatically Toggle Battery Saver
- Way 1: Use Settings
- Way 2: PowerShell
- Conclusion
Why You Should Utilize Battery Saver Mode?
One useful function in Windows is called Battery Saver, which lowers power usage and increases battery life. The following are the main advantages of utilizing Windows Battery Saver: 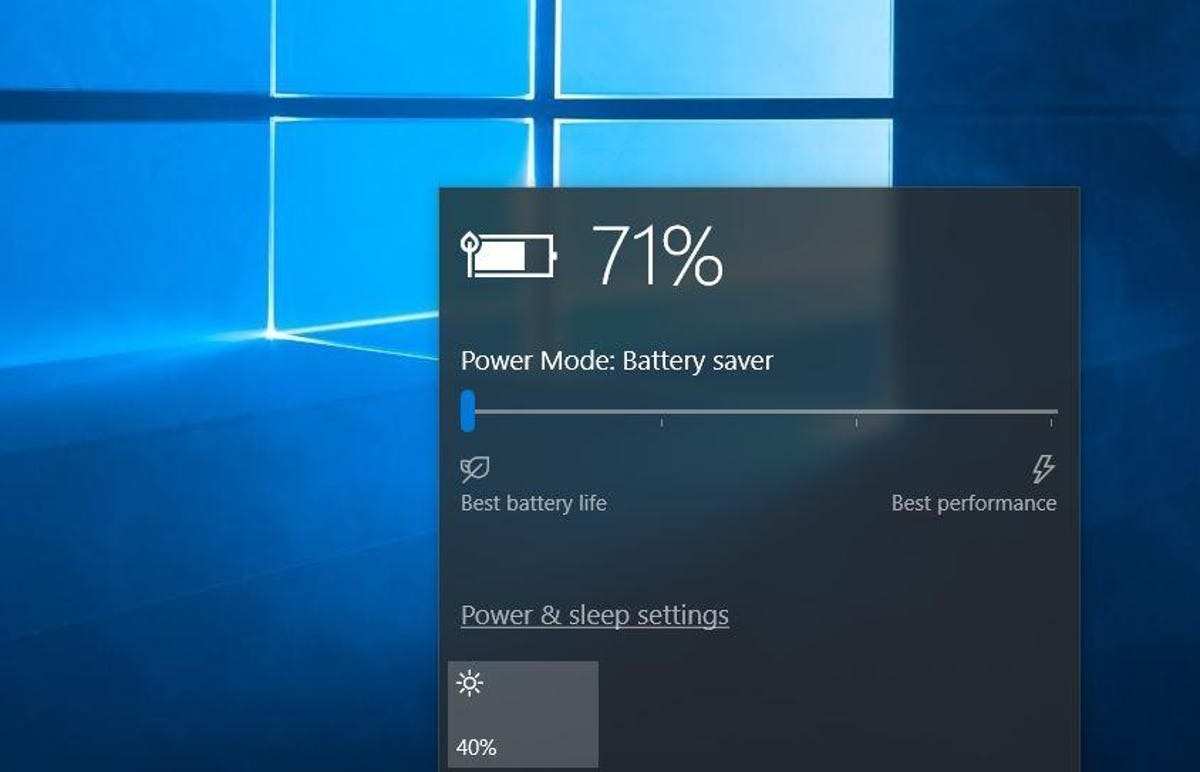
Extended Life of Batteries
Extending the battery life of your smartphone is one of Battery Saver’s most important benefits. Battery Saver makes sure that your smartphone uses less power by minimizing resource-intensive programs, lowering screen brightness, and limiting background activities. This is especially helpful if you need to extend the amount of time your device can run only on battery power while you’re not near a power source.
Diminished Power Need
Battery Saver controls how much energy your gadget consumes, which lowers total power usage. It makes sure that only vital processes are operating by limiting non-essential activities like push notifications and background app activity. By saving energy, this decrease in power consumption not only increases battery life but also lessens its influence on the environment.
Better Device Operation When the Battery Is Low
By keeping vital functions running while reducing non-essential ones, Battery Saver helps stop unexpected shutdowns when your device’s battery is getting low. This is especially helpful when you have essential jobs or appointments to attend since it helps make sure your smartphone stays functional until you can reach a charger.
Adaptable Preferences
You may adjust the Battery Saver settings in Windows to meet your own requirements. You have the option to manually engage the function as needed or to have it activate automatically when your battery reaches a specific level. This adaptability gives you greater control over how your device manages power by enabling you to balance performance and battery life based on your usage habits.
Enhanced Attention to Crucial Tasks
Battery Saver helps reduce background activities and alerts so you can concentrate on important tasks without being distracted. This might be especially helpful in a workplace where focus is essential. Even with your smartphone operating on low power, you may continue to be productive with fewer disruptions from non-essential programs. When To Disable Battery Saver 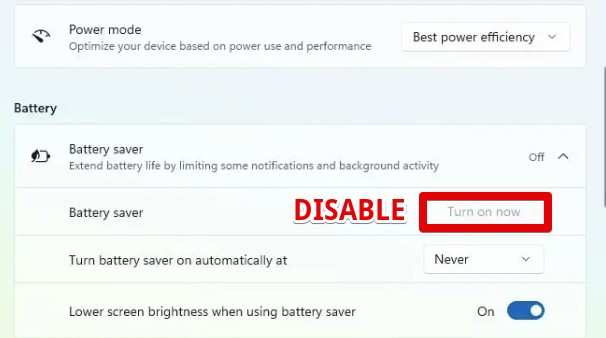
When you want optimal system performance, as while gaming, video editing, or other resource-intensive tasks, it is suggested to disable Battery Saver on Windows 11. Battery Saver can impair performance and visual quality by limiting background tasks and lowering screen brightness. Furthermore, Battery Saver loses some of its benefits when your device is plugged in, so you don’t need to have it turned on. By disabling it, you can make sure that your device is operating at peak efficiency during taxing tasks, making use of all of its processing power and capabilities.
How To Turn the Battery Saver On & Off
The methods are easy to follow and you don’t need a vast knowledge of computer system. You can calmly solve the problem you are facing with just doing some clicks here and there.
Method 1: Taskbar method
The taskbar offers a simple and quick way to turn on or off the energy saver mode, which helps you effectively control the amount of battery life on your device.
- First, look for the battery symbol on the taskbar. It usually appears next to the icons for sound and Wi-Fi. Any of these icons may be clicked to open a pop-up window with several system options, including the battery-saver option.
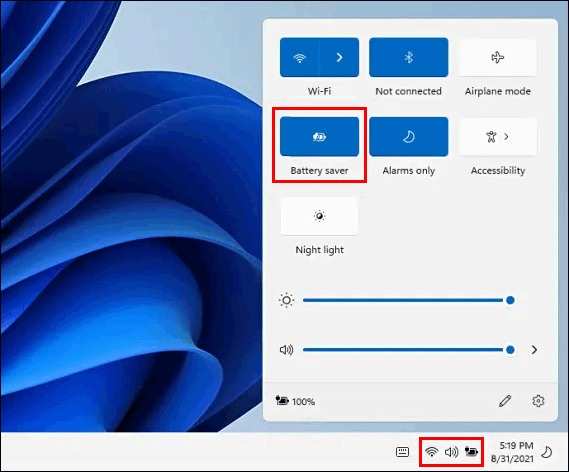
- Just click the battery saver button in this window to turn on the battery saver. The battery conservation mode, which lowers power usage to save battery life, is activated when the button’s backdrop is highlighted. In case you want to deactivate battery saver mode, click on the button once more to turn off the battery saver.
When the spotlight vanishes, the smartphone will restore its default power settings, indicating that the battery-saver mode has been disabled. When you need to maximize battery life without connecting your system to a power supply, turning on the battery saver through the taskbar is the most convenient way.
Method 2: Turn On & Off Battery Saver from the Settings
First, access the Power and Battery Settings.
- To access the Settings menu, press Win + I. In the left pane, click System. In the right column, choose Power & battery.
- Locate Battery Saver under the Battery section, then click to enlarge. In order to activate the battery saver, choose Turn on now.
- To deactivate the battery saver, choose Turn off now.
If you would rather not have to manually control the battery saver, you can set up extra settings to have it automatically switch on or off in response to certain scenarios.
How To Automatically Toggle Battery Saver
Windows devices have an option to automatically turn Off the battery saver without the users having to worry about it. Having to face a sudden battery-low warning on your computer while doing something important is frustrating. With an Automatic battery toggle, you can work for prolonged hours and focus only on your work or other stuff. Your system will take care of your battery life and ensure you get the most juice out of your laptop. So how you can enable this automatic option, there are two ways.
Way 1: Use Settings
- Open up the settings page of Windows by pressing “Win” + “I”. The same can be done by simply searching for it from the search menu.
- When you enter what you searched for, look for “System” and go to it.
- Go to “Power & battery”.
- After entering and expanding the power and battery option, hit on “Battery Saver”.
- Now click on the Automatic battery saver option and it will initiate a drop-down menu. After that, choose your preferred percentage (10%, 20%, 50% etc).
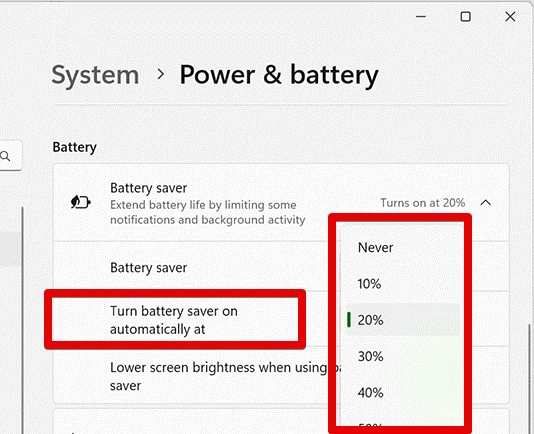 There is also an option for always in battery saver mode but that is not practical in real scenarios. We suggest you choose 20% or 30% and the automatic options will be set. Now whenever your computer runs down on battery and reaches the percent that you have selected, the automatic battery saver option will turn on.
Way 2: PowerShell
Powershell has always been useful in doing administrative tasks such as battery-related tasks. The battery modes and their options can directly be altered with this command-line shell.
- To open Powershell on Windows, press the “Win” key on your keyboard.
- To proceed, search for “Powershell” and your desired outcome will show up, click on it. (make sure to open the shell in admin mode)
- Now simply copy and paste or type out the following code:
powercfg /setdcvalueindex SCHEME_CURRENT SUB_ENERGYSAVER ESBATTTHRESHOLD <percentage>. In “percentage” shown in the command, you need to replace it with a number denoting the percent should the battery savor should be turned on.  After doing this process, your battery saver will enable itself whenever your laptop reaches the battery percentage you have input. FAQs Regarding Windows Battery Saver Enable and Disabling
- Is it advisable to always have the battery saver on?
Depending on how much you use, Battery Saver may or may not always be active. It’s perfect for increasing battery life and preserving power, particularly while performing routine chores like emailing or surfing. But it restricts performance, which has an impact on notifications and functions. It is best to turn off Battery Saver if you are doing CPU-intensive tasks like gaming or video editing in order to keep your computer operating at peak efficiency.
- What proportion of the battery should be saved?
Generally speaking, Battery Saver should be activated at 20% battery life. By lowering system utilization, this threshold ensures that your smartphone can operate longer in situations when a charger isn’t immediately accessible.
Conclusion
To sum up, Battery Saver management in Windows 11 is crucial to maximizing the power and performance of your device. Battery Saver can save battery life by cutting down on background activities and power consumption, but in order to preserve optimal system performance, it must be disabled when carrying out resource-intensive tasks. To make sure your smartphone lasts longer between charges, Battery Saver should be turned on when the battery is around 20% low. Knowing when to turn Battery Saver on or off can help you balance functionality and efficiency based on your use requirements.

