Isn’t it tedious?
You have to update your plugins, themes and WordPress version, check for safety, remove deactivated plugins, prevent hacking and do a lot of tasks as a WP website admin.
Most of the times, we forget to do at least a few of them. Who knows whether it leads to a huge security threat or not the next time!
That’s why you need an automated solution for all these actions to be done without your concern.
Guess what? I have got you the best security plugin for WordPress| Security Ninja.
Contents
- Security Ninja Review
- Features of Security Ninja
- #1. More than 30+ Security Tests on a Single Click
- #2. Takes Preventive Measures
- #3. Makes No Change to Your Site
- #4. Availability of Add-ons to Enhance the Features
- Installation and Initial Configuration
- Add-ons Avaailable
- #1. Malware Scanner
- #2. Core Scanner
- #3. Events Logger
- #4. Scheduled Scanner
Security Ninja Review
As I said earlier, Security Ninja is a WordPress security plugin to scan for a number of vulnerabilities that would adversely affect your website.
First, I want to invite your attention to the features of this plugin. Then, I will explain the process of installation, configuration and working.
Features of Security Ninja
#1. More than 30+ Security Tests on a Single Click
You have already read the headaches in maintaining a WordPress website. This one has simplified the process with their plugin.
Once you install and activate it, you will get an option to analyze you website. Within a short span of time, it provides you the complete report of your site’s security measures.
#2. Takes Preventive Measures
Not only this plugin scans your site, but it also provides you with the preventive measures, using which your site will be protected from brute force attacks, 0-day exploitations and a lot more.
#3. Makes No Change to Your Site
Even when shouldering a huge responsibility of security, it doesn’t make any change to your website. You remain to be the supreme authority no matter what.
#4. Availability of Add-ons to Enhance the Features
If you think you need extra features, you can enhance the plugin with some extra add-ons available for installation.
Now that you have got an overview of the plugin, let’s move on to the installation and initial configuration.
Installation and Initial Configuration
Given that you may be a WP newbie, I am going to explain the whole method of installing the plugin.
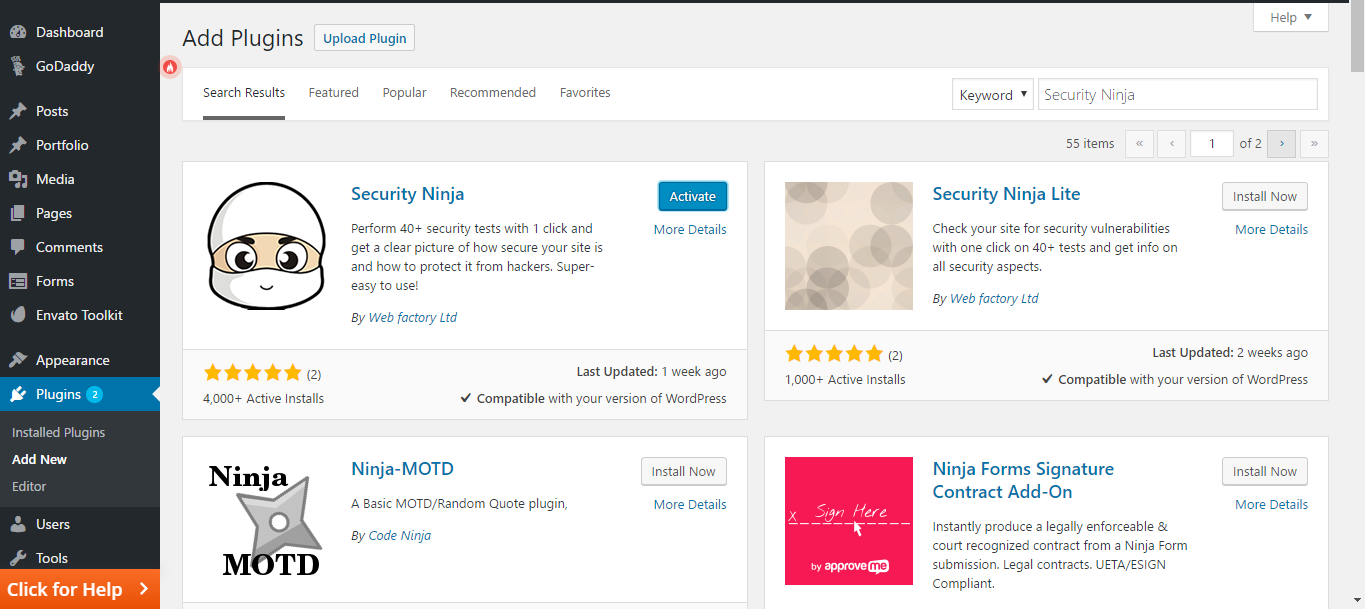
Step 1: First, you have to sign into your WordPress dashboard. Once you get there, follow Plugins>> Add New.
Step 2: You can see a search field there. Enter “security ninja” into the same or you can download from the repository.
There you go. Press install and then activate.
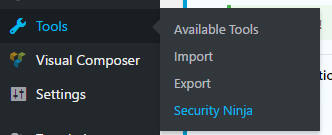
Step 3: On finishing the installation, go to Tools>> Security Ninja.
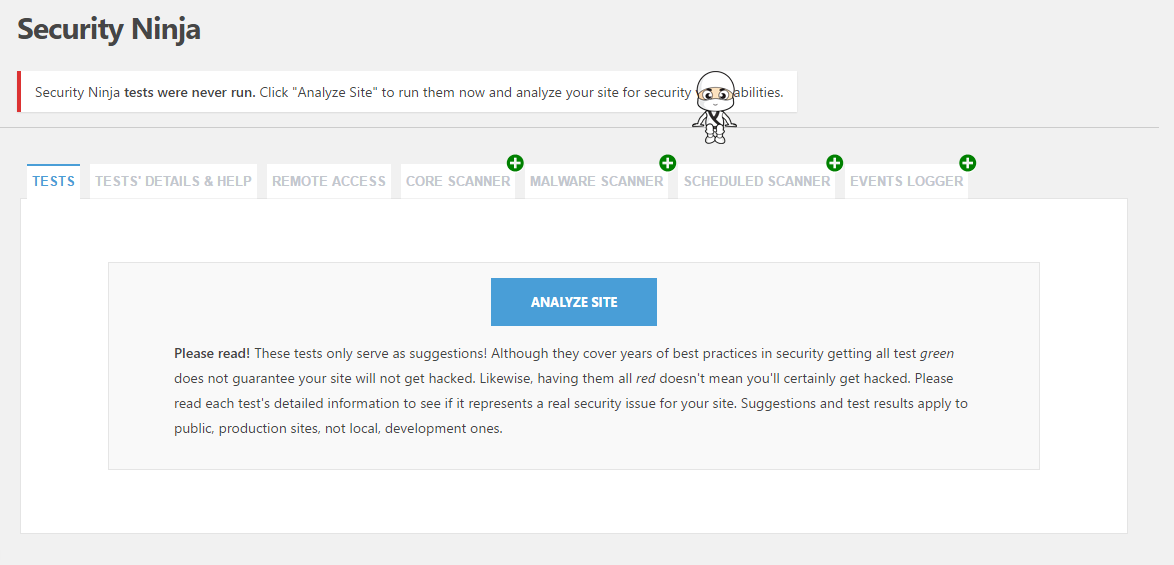
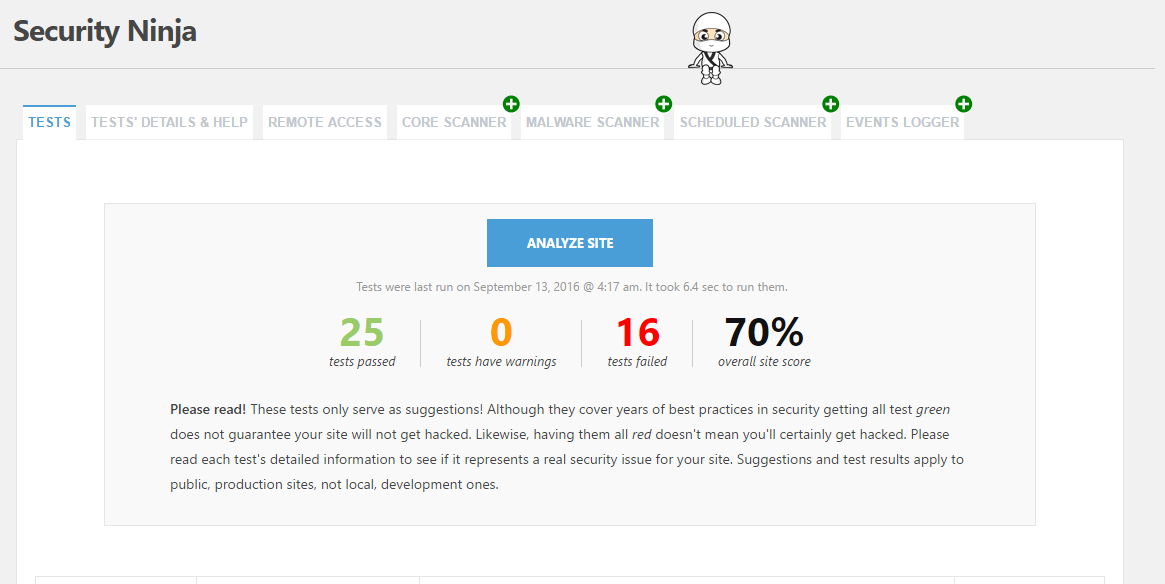
Step 4: As you can see in the image, you will get a blue Analyze Site button. Don’t hesitate to hit on it.
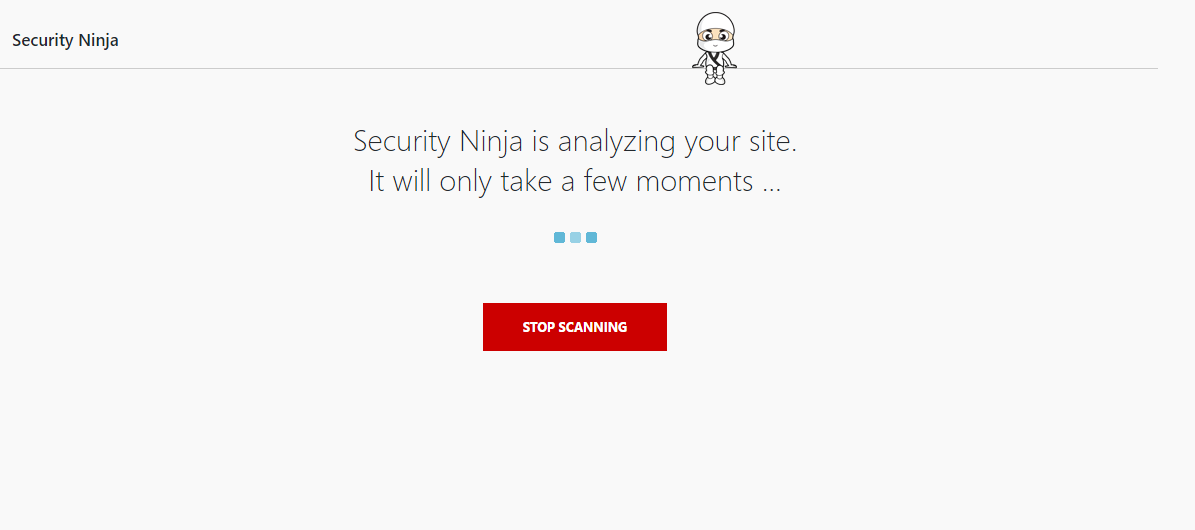
You need to wait a few seconds to get it done.
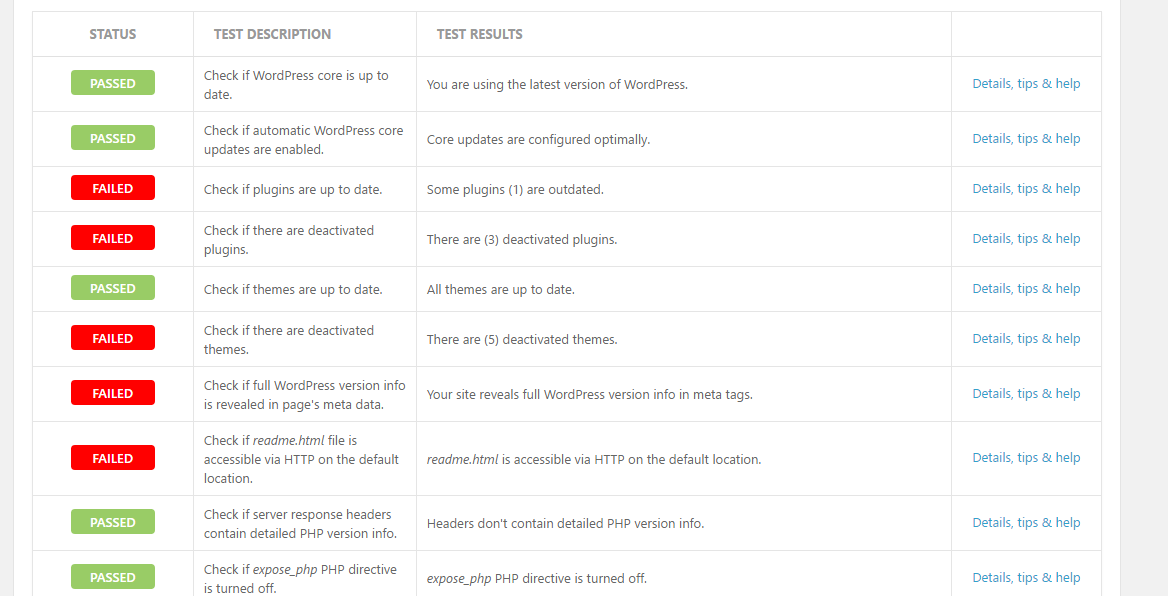
Step 5: Finally, you can see the results on the same page.
And, it’s your time to rectify the vulnerabilities.
Add-ons Avaailable
I have already told you that Security Ninja team has developed a few add-ons to enhance the feature, about which you can read below.
#1. Malware Scanner
Malware is a nightmare to even an ordinary computer user. Then, how come it never bothers web admins? Well, it should!
If you have a habit of installing themes and plugins outside WordPress repository, you must install this add-on. It performs more than 20 security tests and scans your wp-upload folder as well.
#2. Core Scanner
Some malicious plugins inject harmful scripts into the core WordPress files. And, it may not be visible for usual malware scanners. That’s why this one has come up with a WordPress core file scanner to help you with.
Once it finds any problematic file, it allows you to restore the same into the previous state.
#3. Events Logger
If you have a multi-user website, you can’t get to know what all other users do on our sites with default WordPress features.
What Events Logger does is recording every action being done on your site. So, you can trace every modification without any hindrance.
#4. Scheduled Scanner
Even if you are a full-time digital marketer, you can’t always sit in front of computer. Once we do, malware scan may not come in our agenda.
Scheduled Scanner kicks away such problems as it helps you set a specific time for the scan. You need to worry about the solving the issues not the scan.
Wrapping Up
I have given you a complete overview of the plugin now.
Security Ninja, from my experience, is one of the essential plugins every WordPress user should install.
What are you waiting for? Head over to installation page now. Any comments ? Do drop below and we will see to it.

