Microsoft has begun the process of automatically installing the programme known as PC Health Check on devices that are running the Windows 10 operating system by making use of the latest update known as KB5005463.
PC Health Check is a brand new diagnostics tool that was developed by Microsoft and made available in connection with the release of Windows 10. It offers a variety of capabilities that assist with maintenance and troubleshooting.
Contents
- Understanding the PC Health Check feature
- Uninstalling PC Health Check Completely Easily by 5 methods from
- Method 1: Uninstall/Remove PC Health Check by Start Menu
- Method 2: Remove PC Health Check 2.0 using the program’s built-in uninstaller.exe.
- Method 3: From Settings
- Method 4: Uninstall PC Health Check App using programs and features
- Method 5: Uninstall KB5005463 Update using CMD
- Conclusion
Understanding the PC Health Check feature
The PC Health Check app is an official diagnostics tool that was developed by Microsoft to let and assist users of Windows 10 in determining whether or not their machine is compatible with the newest version of the Windows operating system. With the use of this application, a user can determine whether or not the hardware on their Windows 10 computer matches the criteria for Windows 11. This tool will assist customers in determining whether or not they are able to update their Windows 10 devices.
Uninstalling PC Health Check Completely Easily by 5 methods from
- Lenovo
- Dell
- HP
- LG Gram
- Surface
- Studio
- Samsung
- Toshiba
- Sony
- Vaio
- Acer
- Asus
- Fujitsu
- MSI
- IBM
Method 1: Uninstall/Remove PC Health Check by Start Menu
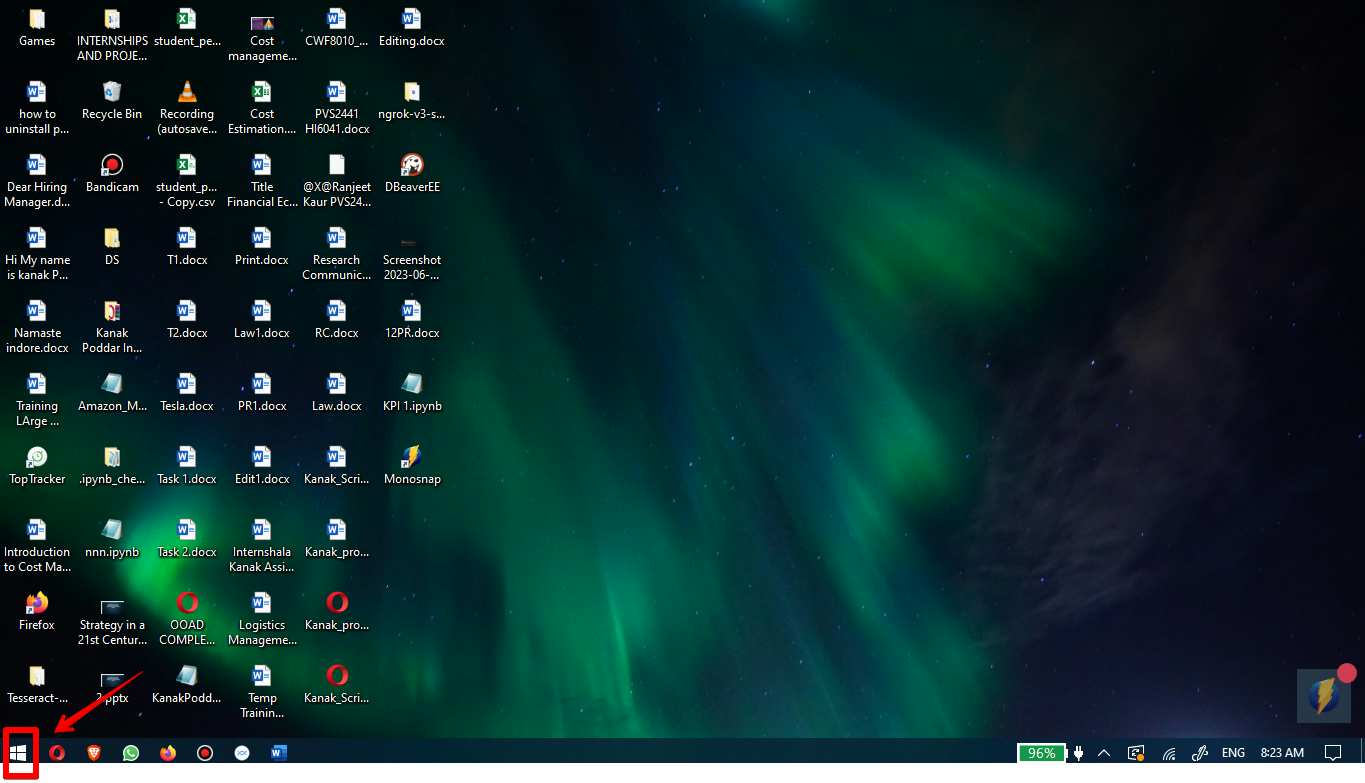
The PC Health Check application may be quickly and simply removed from your computer by using the Start Menu. Same steps can be followed from there to uninstall the PC health check application.
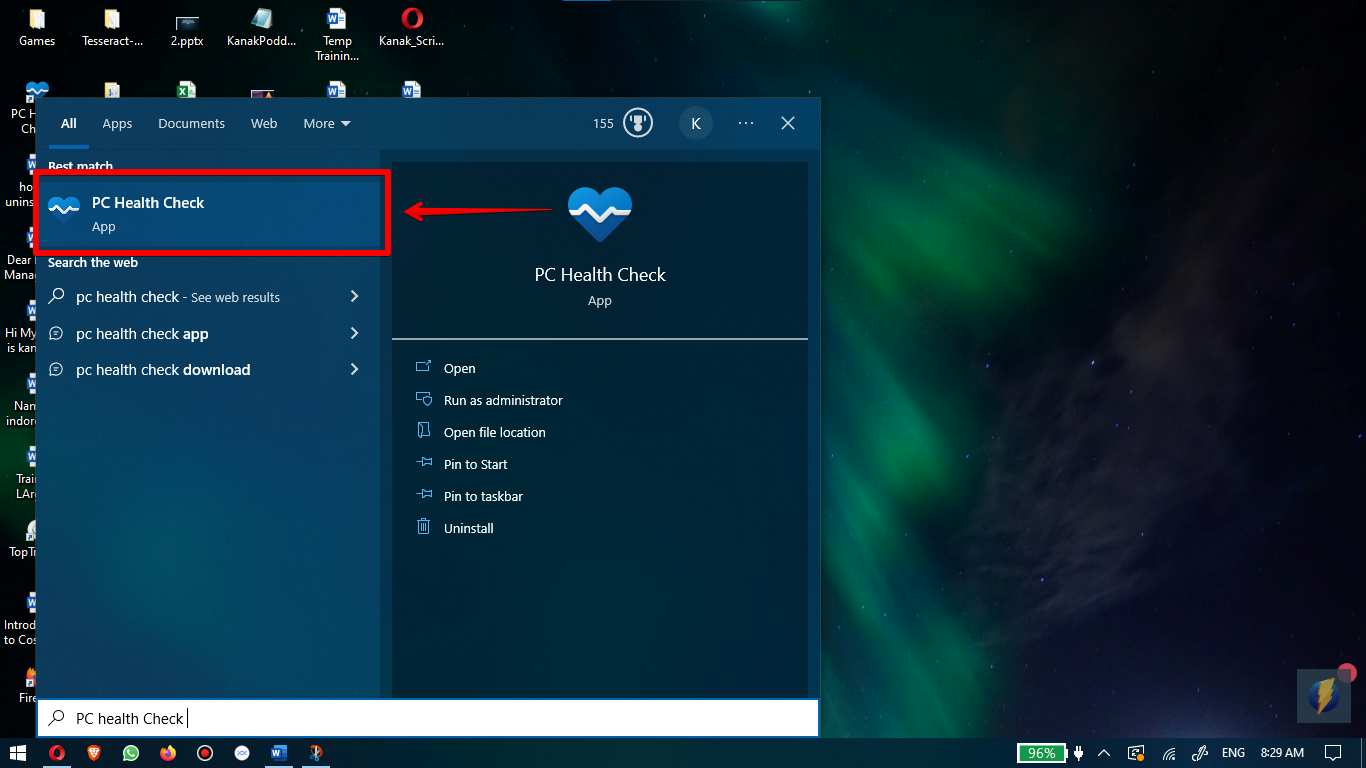
- Launch the PC Health Check application by going to the Start menu.
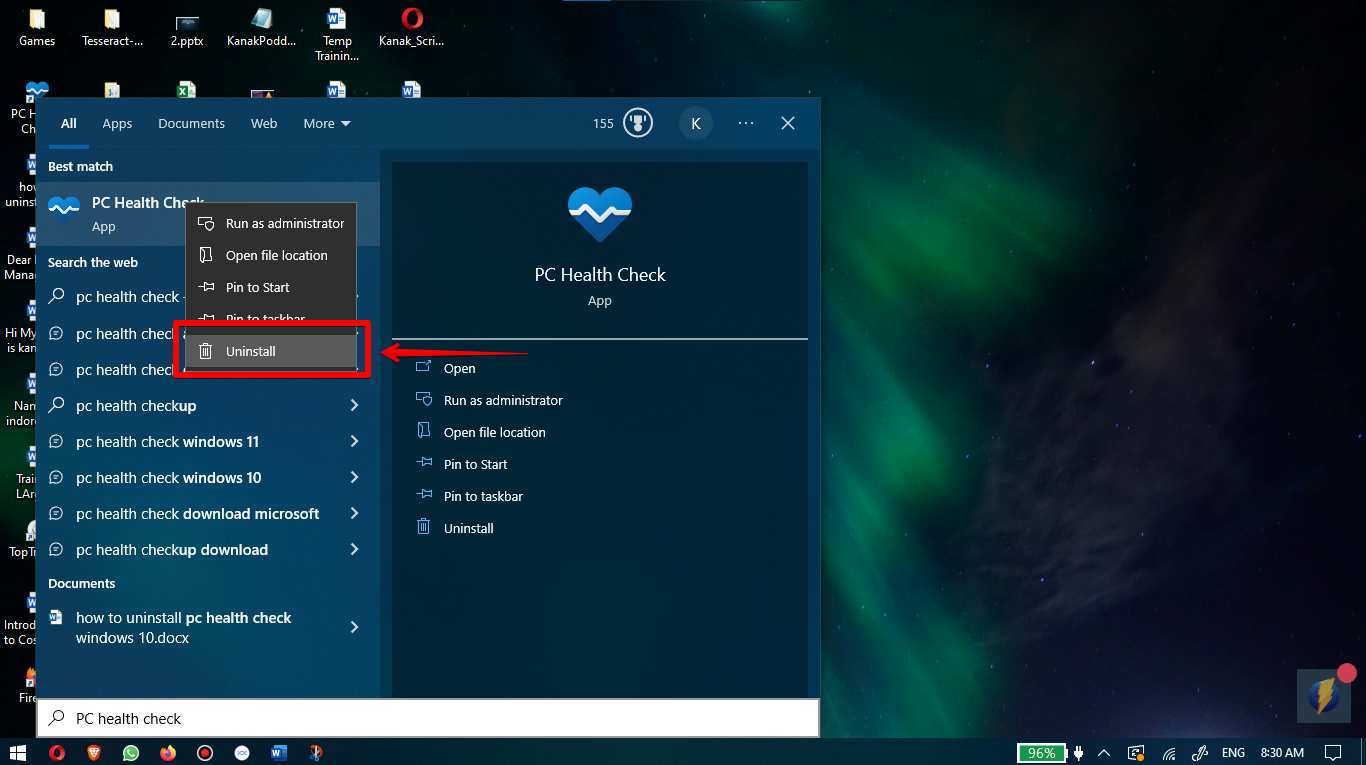
- Using your right mouse button, select the Uninstall option from the PC Health Check app shortcut.
- Select Uninstall from the drop down opened after right click.
Method 2: Remove PC Health Check 2.0 using the program’s built-in uninstaller.exe.
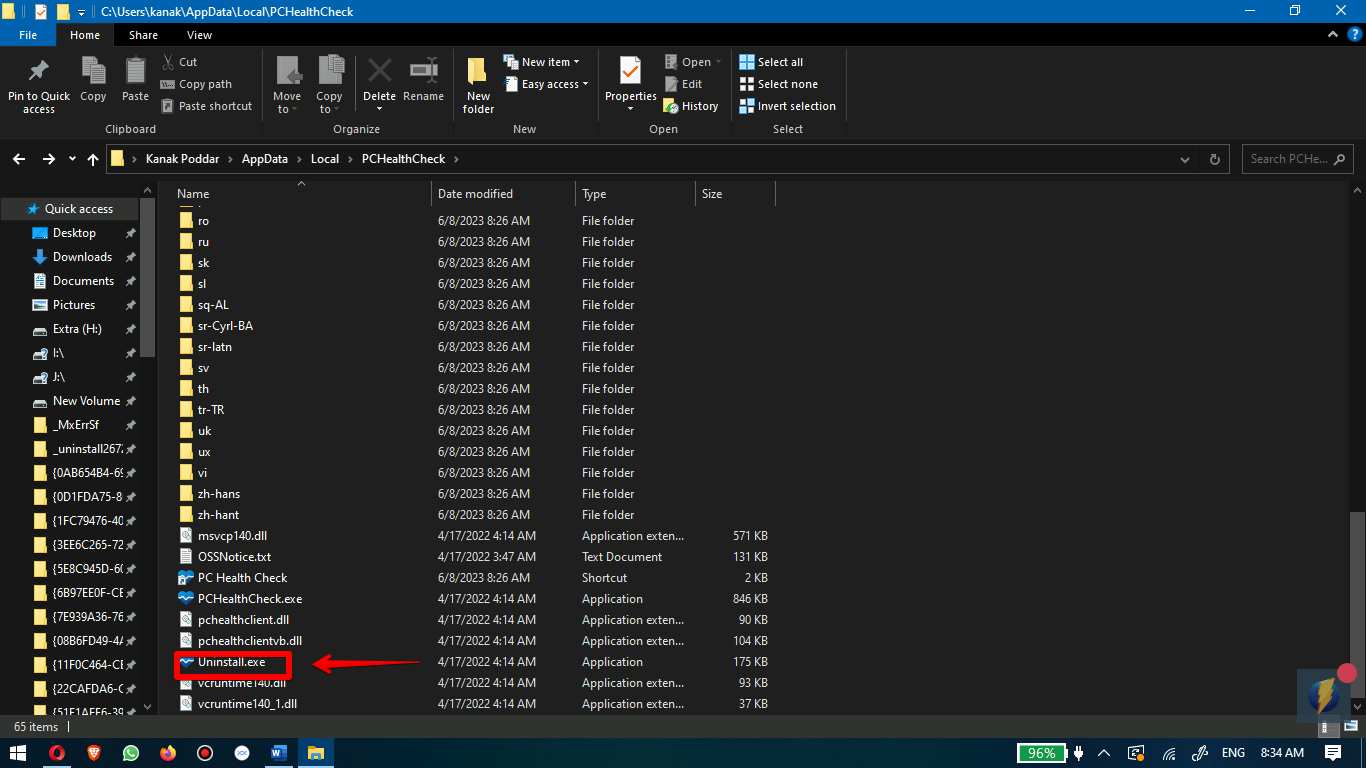
The majority of software applications come with an executable file that can be removed from the computer with a name like its uninstaller file. These files may be found in the folder that was generated when PC Health Check 2.0 was being installed on your computer.
Steps:
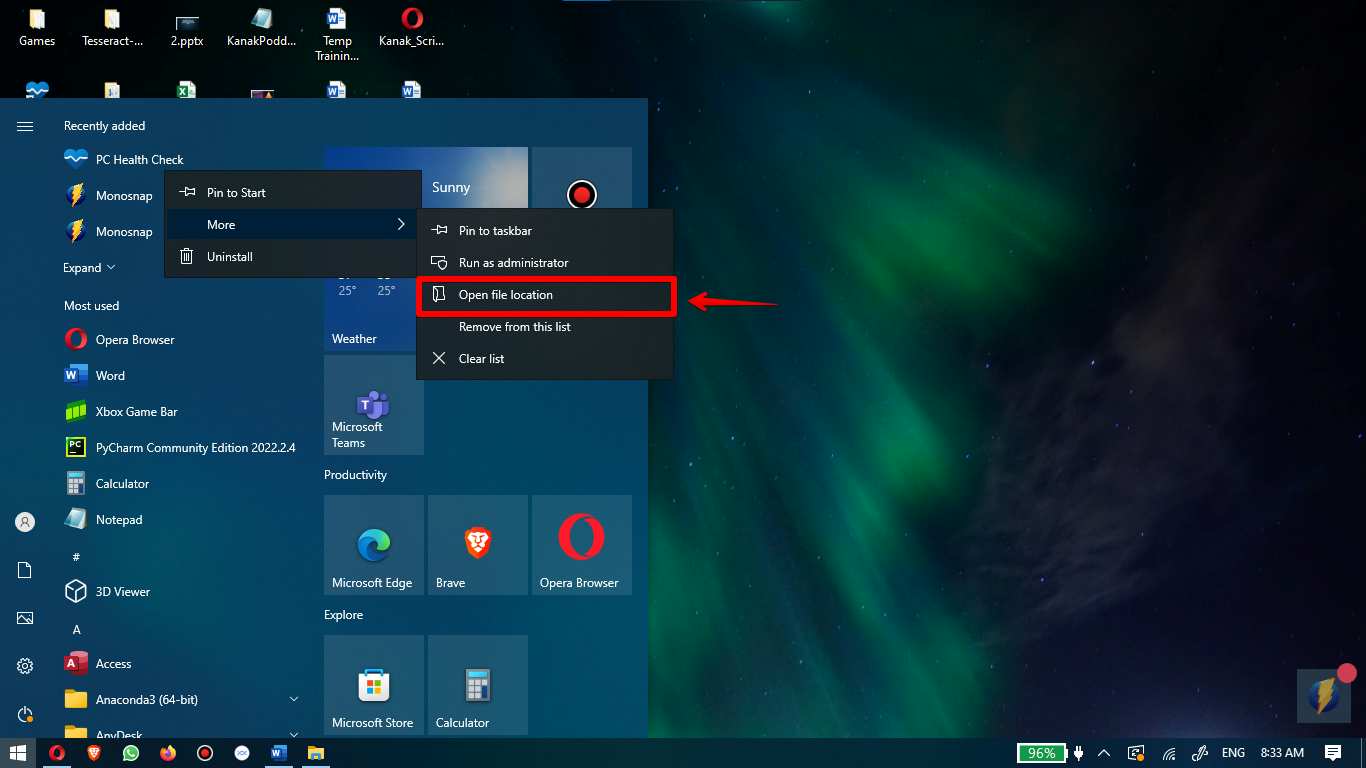
- Open start menu
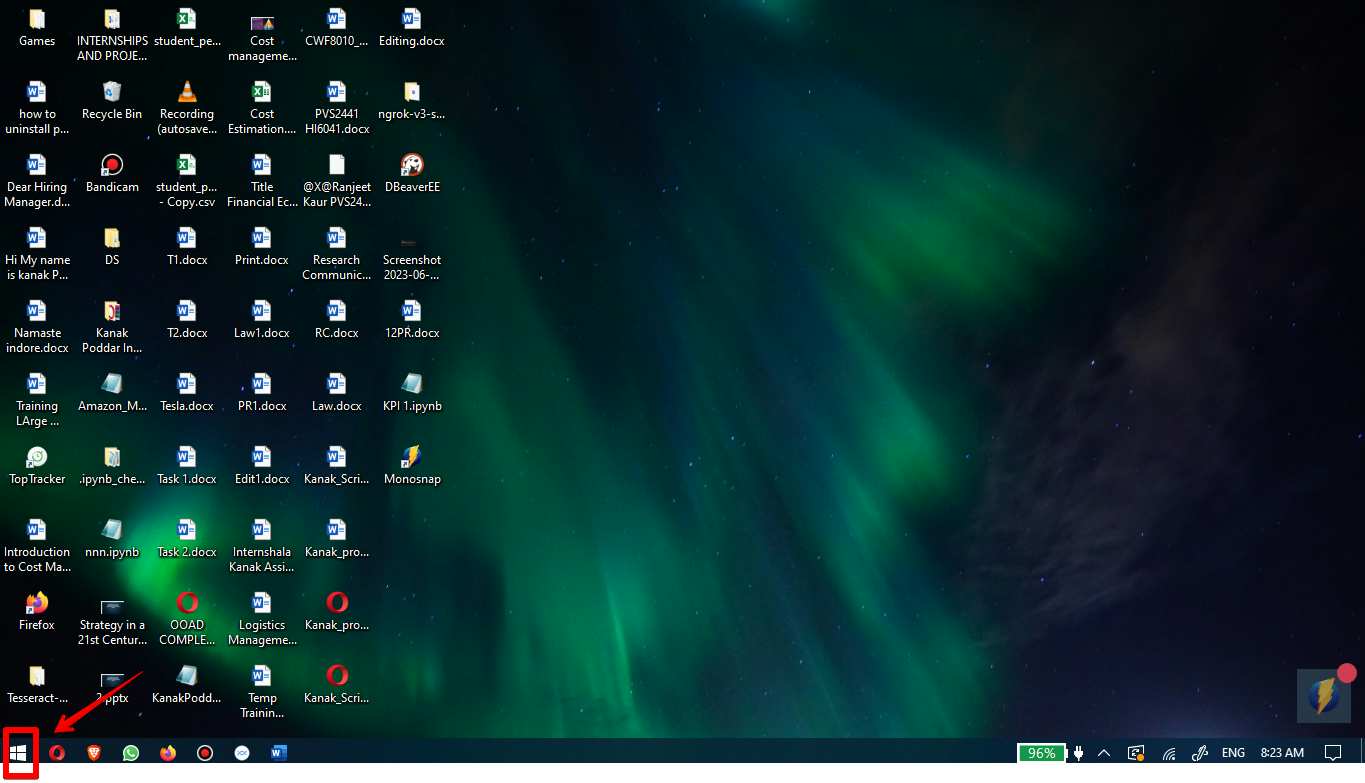
- Right click on PC health Check and click on open file location
- Find the location on your computer where PC Health Check 2.0 was installed, and then look for an executable file with the name uninstall.exe or unins000.exe.
Method 3: From Settings
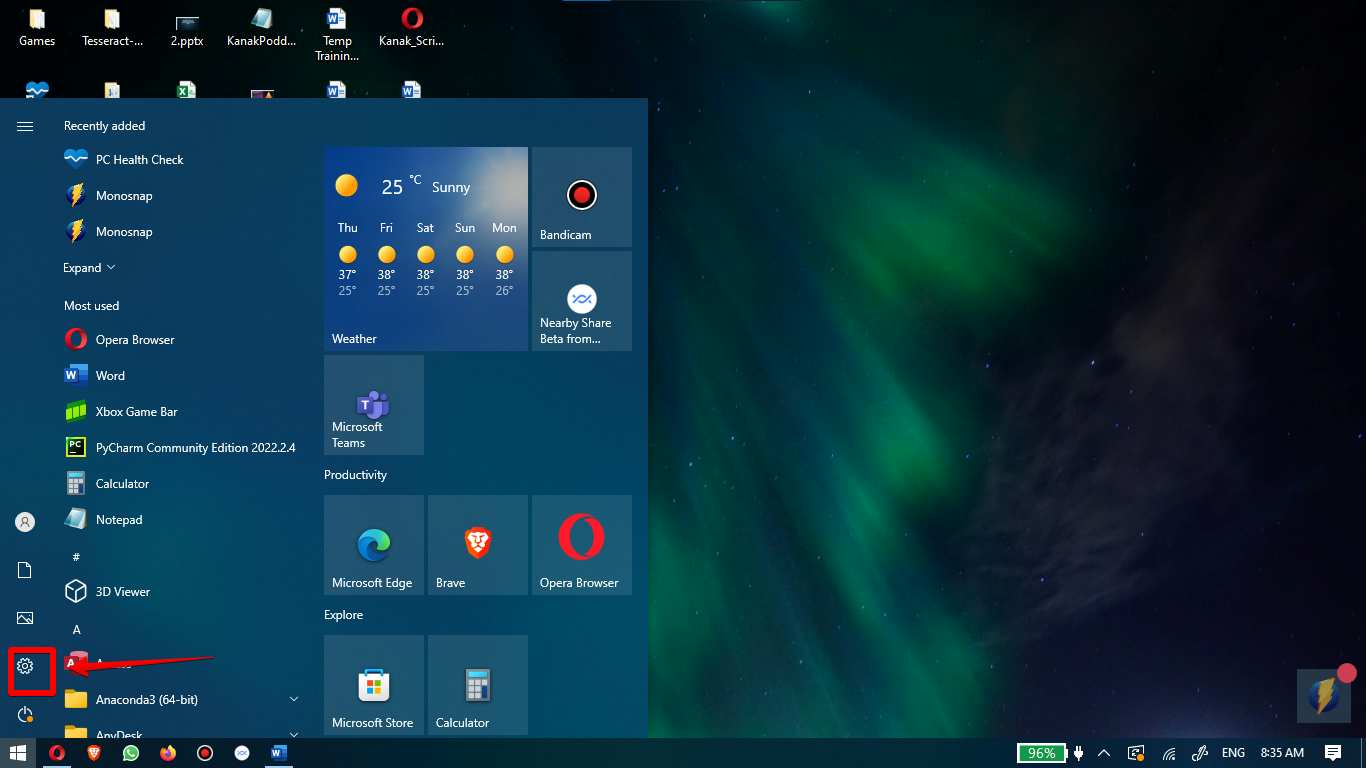
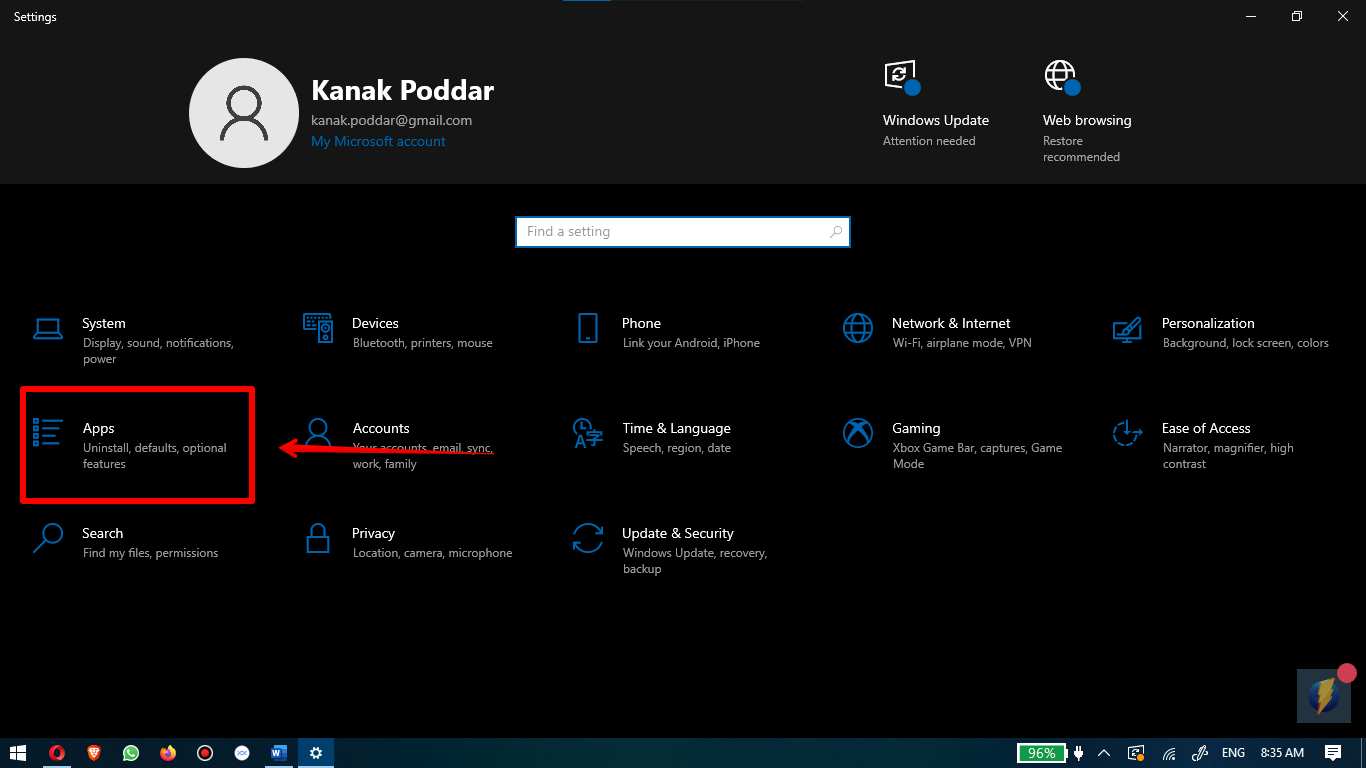
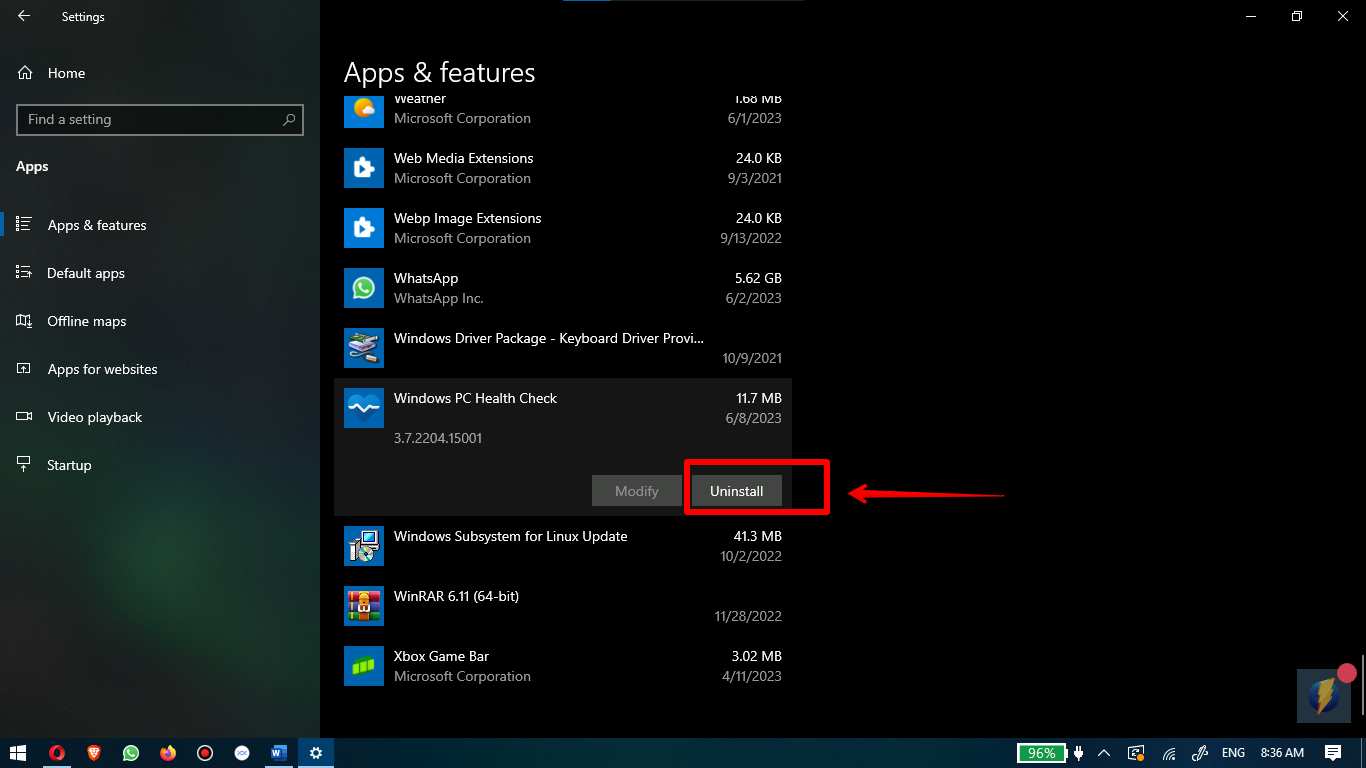
Start > Settings > Apps is where you’ll find it if you’re using Windows 10. Click on the Windows PC Health Check link after you’ve located it by scrolling down until you see it. After that, on the screen that follows, choose the Uninstall option to begin removing the application from your personal computer. Alternatively, you can delete it by pressing the Windows key plus S, then typing “pc health check,” and then selecting “Uninstall.”
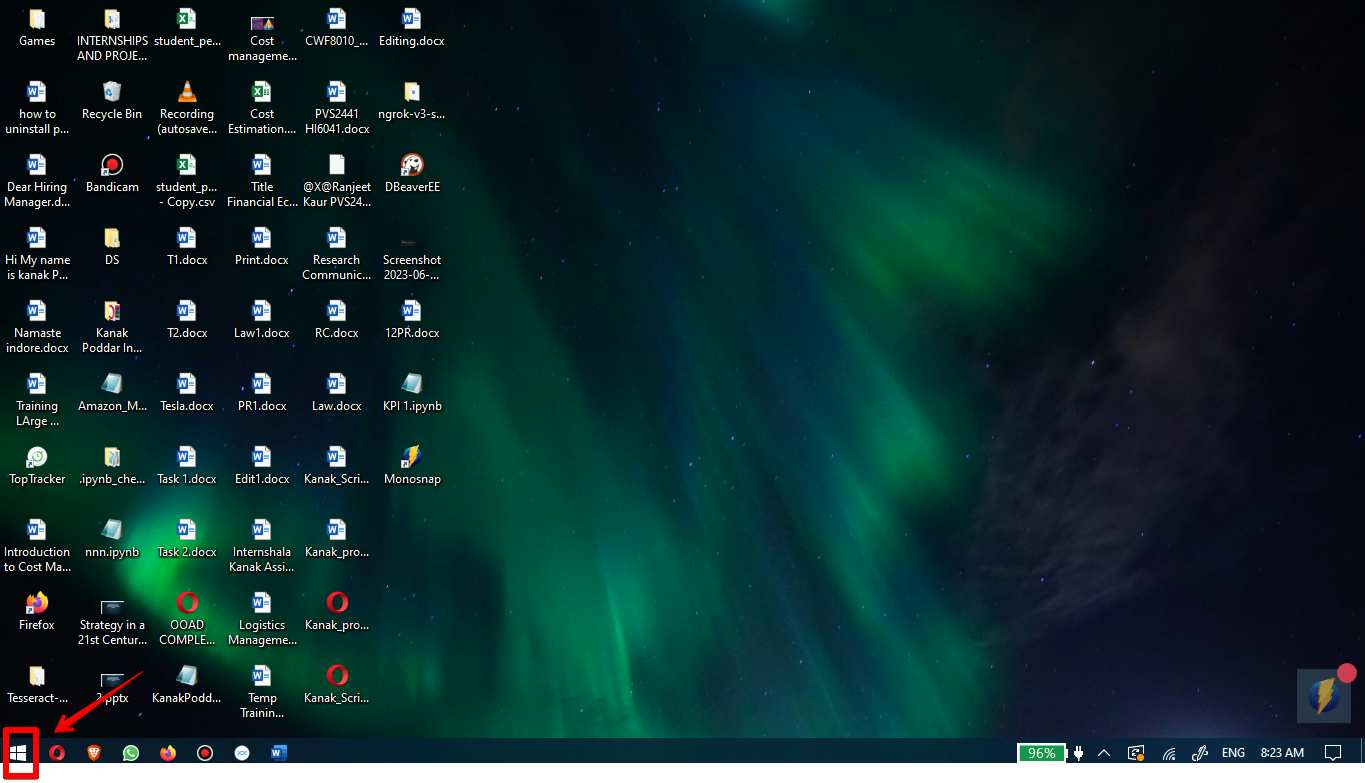
- Click on the start button presented in the taskbar of your device.
- Then enter into the “Settings” option in the search bar and click on the settings button from the right panel of your device.
- Click on Apps.
- Find PC health Check then click on uninstall.
Method 4: Uninstall PC Health Check App using programs and features
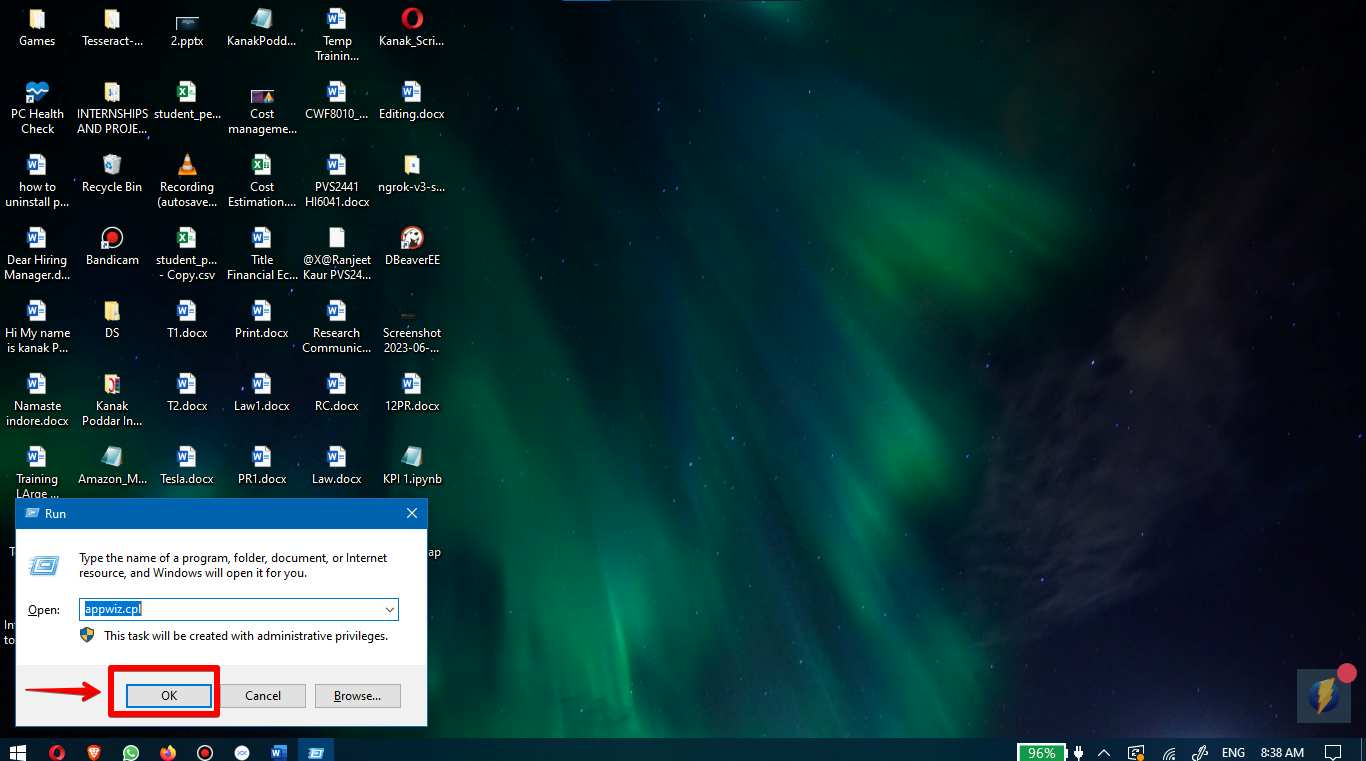
You have the option to delete the PC Health Check programme by using the Programs and features. Follow the steps given below:
- Click the win + R on your keyboard at the same time to open the Run box, then type appwiz.cpl and hit the Enter key on your keyboard.
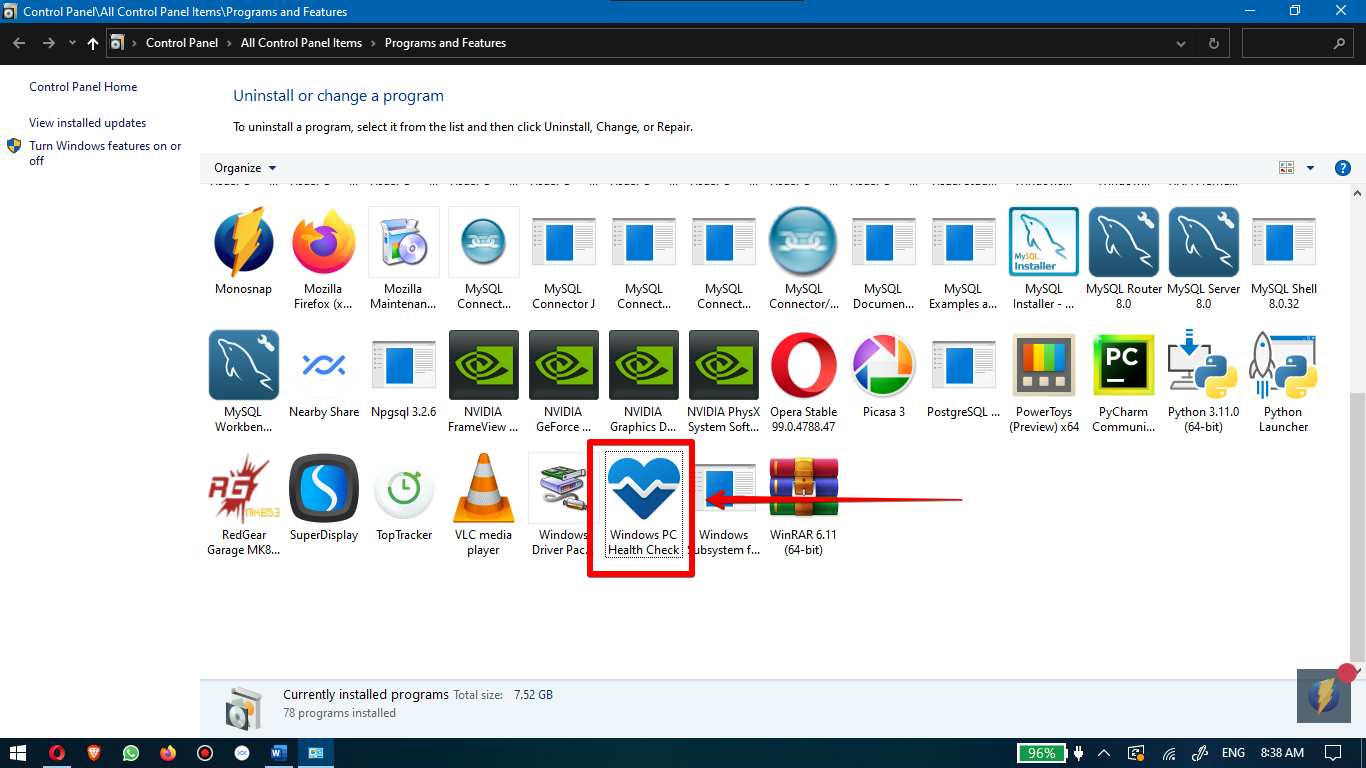
- Search for the Windows PC Health Check application from the detailed list. Simply select Uninstall from the context menu that appears after you right-click the Windows PC Health Check icon on your machine. You also have the option to repair the PC Health Check application by selecting the Repair option.
Method 5: Uninstall KB5005463 Update using CMD
You may also choose to remove the KB5005463 update, which is responsible for the automated installation of the PC Health Check app.
- Open CMD Using Run by typing CMD in the run box.
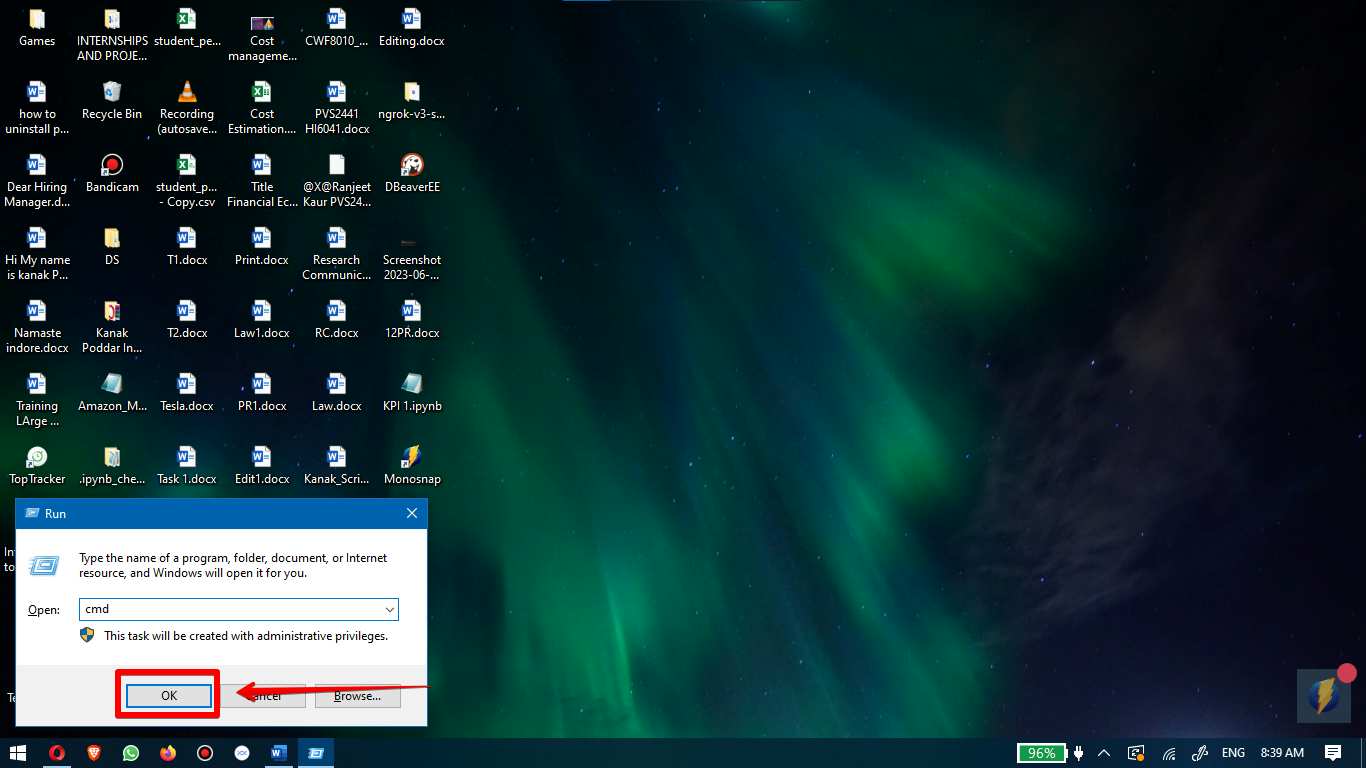
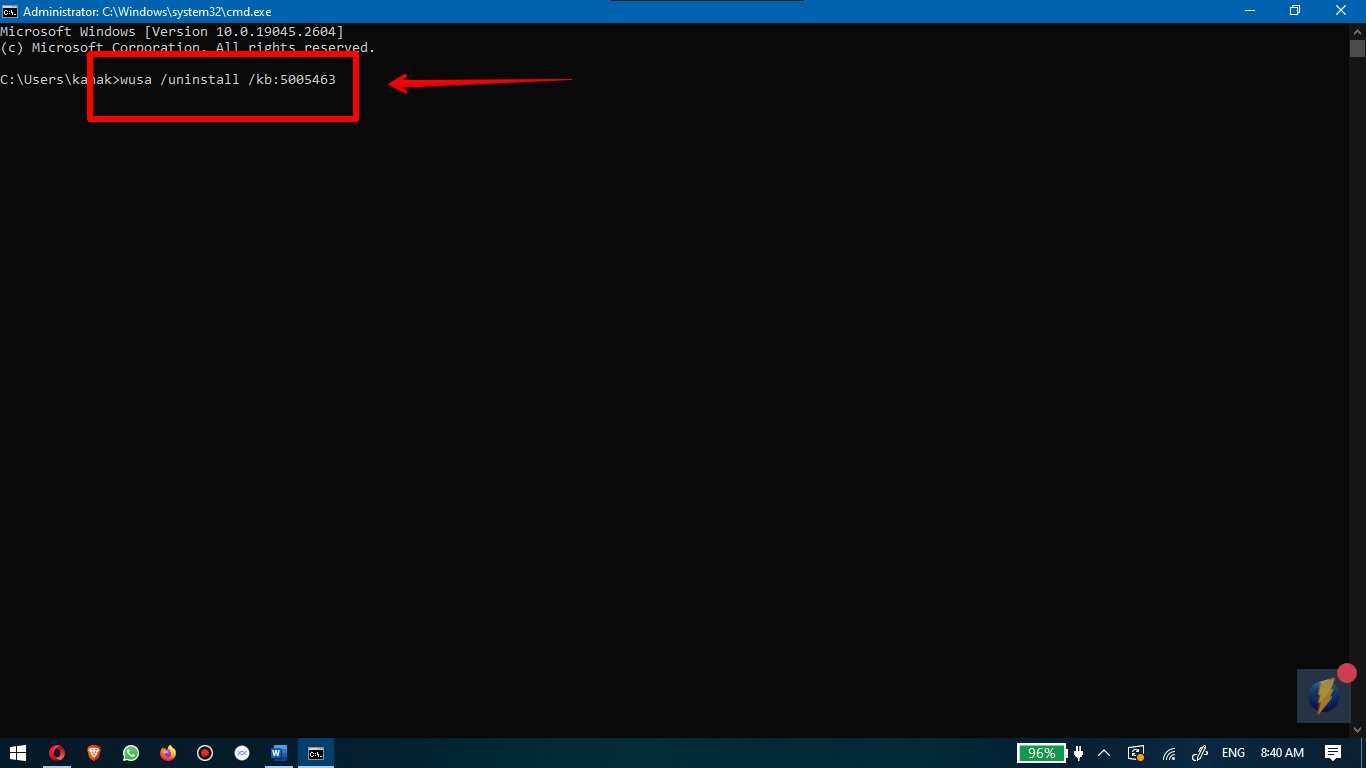
- Now, within the Command Prompt window, perform the following command:
wusa /uninstall /kb:5005463
Conclusion
PC Health Check is intended to give users information regarding compatibility with their devices. The application determines whether or not the user’s Windows computer fulfills the prerequisites for installing Microsoft’s Windows 11 operating system. Other vital pieces of information, such as a device’s battery life and storage capacity, as well as its startup time, Windows Update status, and backup and sync settings, are made available by the application.

