A good webpage for checkout can improve the conversion rate, thereby increasing the revenue. When you run an eCommerce site, having your customers finalize the purchase is the major goal. The default checkout pages that are available with few of the WordPress plugins might not be the right option. You may require customizing the checkout page a bit more. Thankfully, there are a number of plugins available in the WP repository. WooCommerce Checkout Manager is one of them. Let’s have a quick review.
About the Plugin
In some of the cases, you will require more information from your customers, about them, about the product ordered, about shopping, or the desired information might not be inserted through already existing fields. That information must be submitted in the database in an organized manner. This can only be done adding the new fields with right labels and field types. WooCommerce Checkout Manager allow you to add custom fields to your checkout webpage and customize the existing fields with ease.
The Setup
You can download and install the plugin on your website from WP repository. Once you have installed it on your site, follow the below mentioned steps to customize the checkout page on your website.
You can click on WooCommerce and find the ‘Checkout’ option in its dashboard.
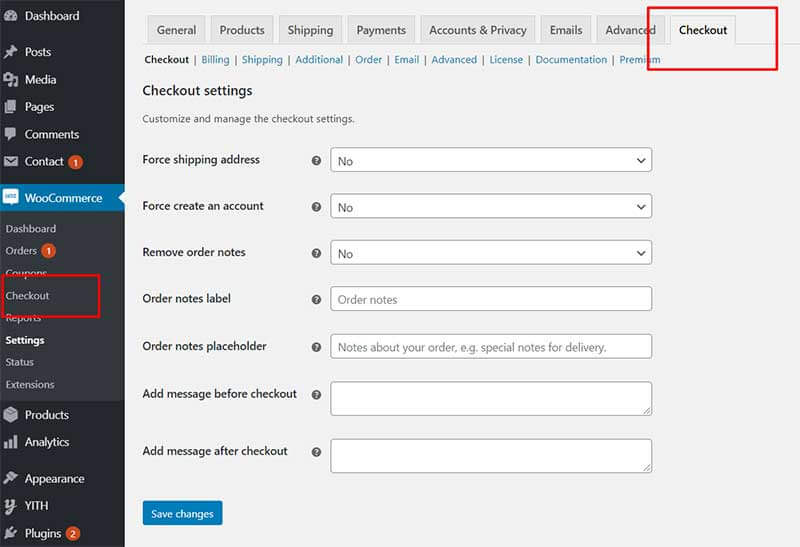
There would be different options inside the plugin dashboard to customize your webpage. The settings like Billing and shipping can also be customized. Once you click on ‘Checkout’ option, you can customize and manage the settings.
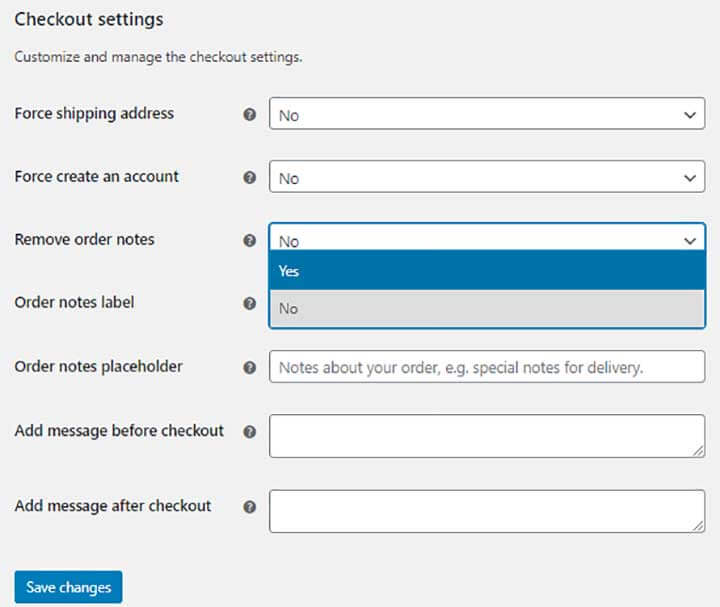
You can enable the email notifications as well. It will send email to the users after they complete purchase process. Custom fields can easily be added to the email. The ‘Force shipping address’ field lets you remove the toggle in order to display the shipping field. In this case, the user must fill in the field. The ‘Force create an account’ option will create user account using the email entered by the user.
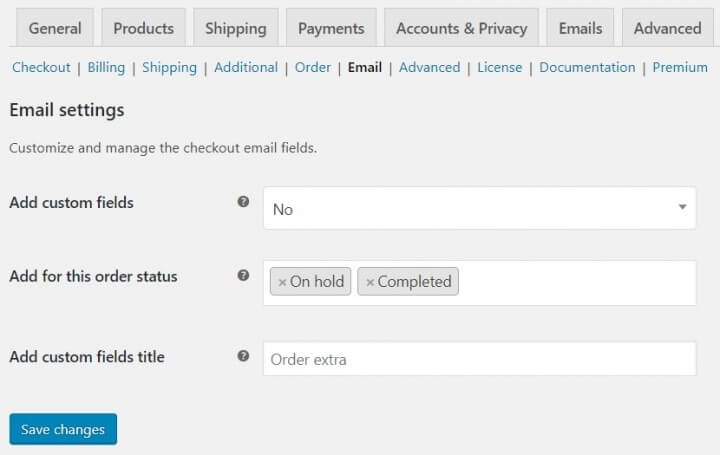
The graphical appearance of every field can be customized to improve the usability of checkout page, making it easy for the users to fill in the information.
Billing section will let you customize the checkout billing fields. Any of the fields can be marked required using a toggle button. You can enable of disable them as well based on your requirements. The position of the field can also be changed, and buttons can be customized.
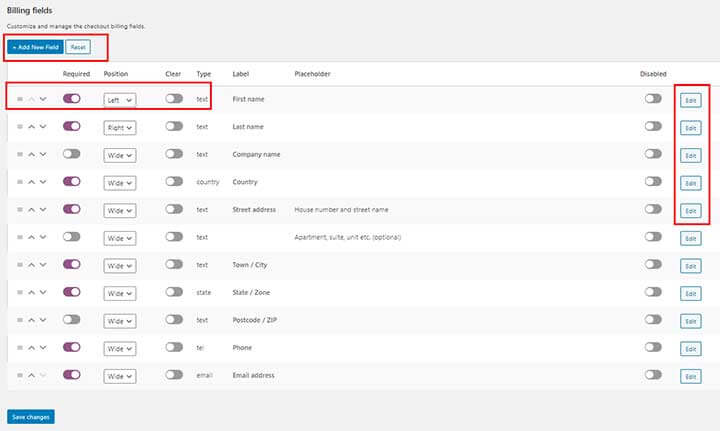
You can also create new fields by clicking on ‘Add New Field’ button and disable them by clicking on disable toggle button.

Add new section allows you to add name, label, type, placeholder and description for a field. You can even add price, change role, modify sorting options, categories etc. just from a single point. The checkout page can also be customized to display the field at time of the payment using ‘Display’ tab. After you have filled all the fields, you can click on the ‘Save’ button to add fields into the billing section.
In the same manner, you can customize the shipping section as well.
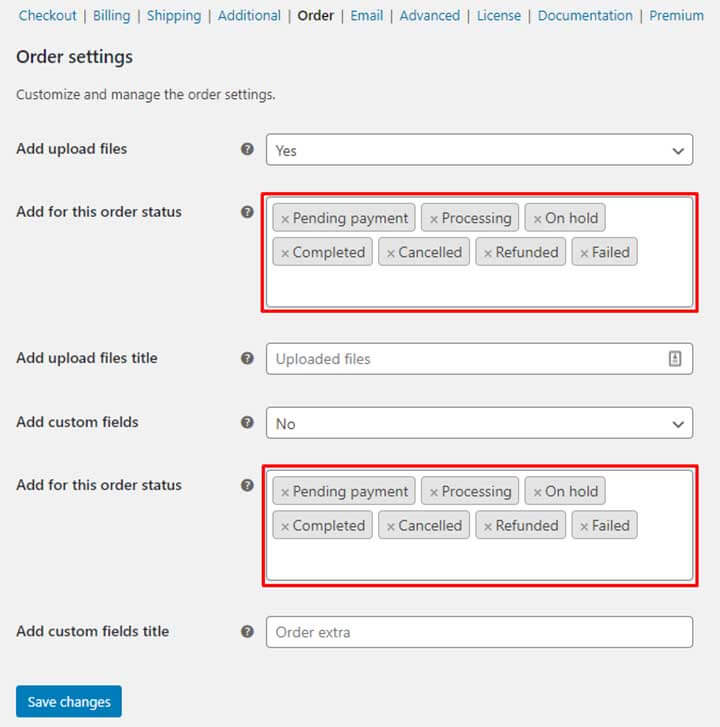
The ‘Order’ section will let you customize and manage the order settings for your WooCommerce store. You can add the upload feature, add additional files, add status and custom fields as well.
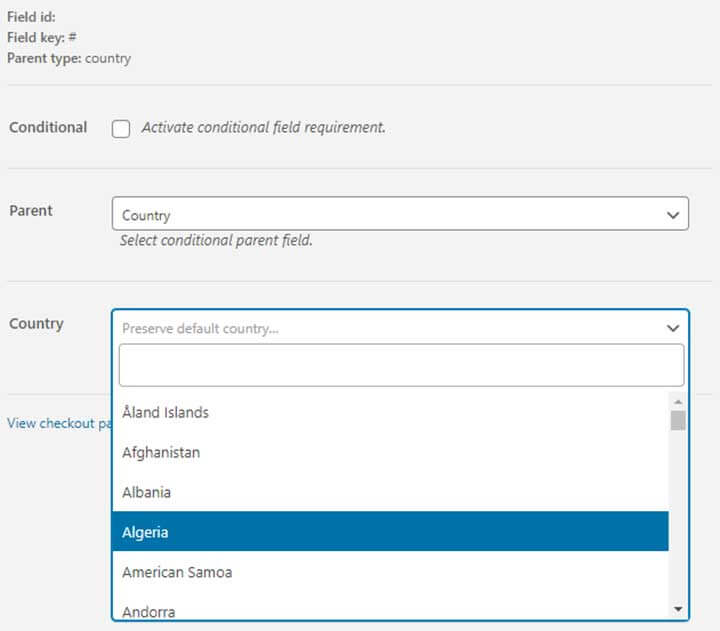
WooCommerce Checkout Manager even comes with conditional fields letting you set the conditions for certain fields.
Pricing
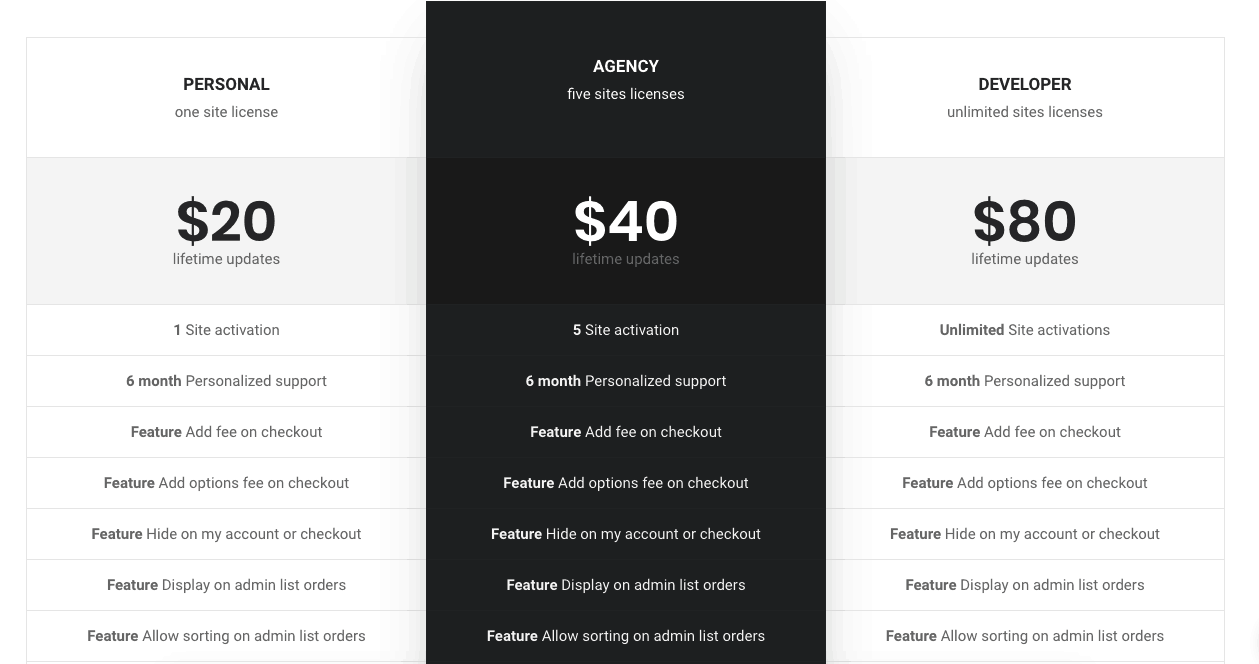
The single site license for the plugin can be purchased at $20 that comes with 6-month personalized support. Licenses for 5 sites can be purchased at $40 while the license for unlimited sites can be purchased at $80. You get lifetime updates for free.
The Bottom Line
WooCommerce Checkout Manager has been designed by Quadlayers. If you are actually looking to customize the checkout page adding custom fields or deleting a few, it is the right choice to make. The plugin gives you multiple capabilities to edit, customize, add or delete the fields that are being displayed on the checkout page. Try it now!

